Introduction
Hosting your first BBQ party can feel like a big task. But with a clear checklist, you can easily organize everything from the grill to the menu. This article helps you plan your BBQ party step-by-step, so your guests enjoy great food and good times.
We will cover the types of grills, tools you might need, simple recipes to try, and tips on managing the party. By following these pointers, you can create a fun and smooth BBQ event, even if it’s your first time hosting.
Choosing Your BBQ Grill Type
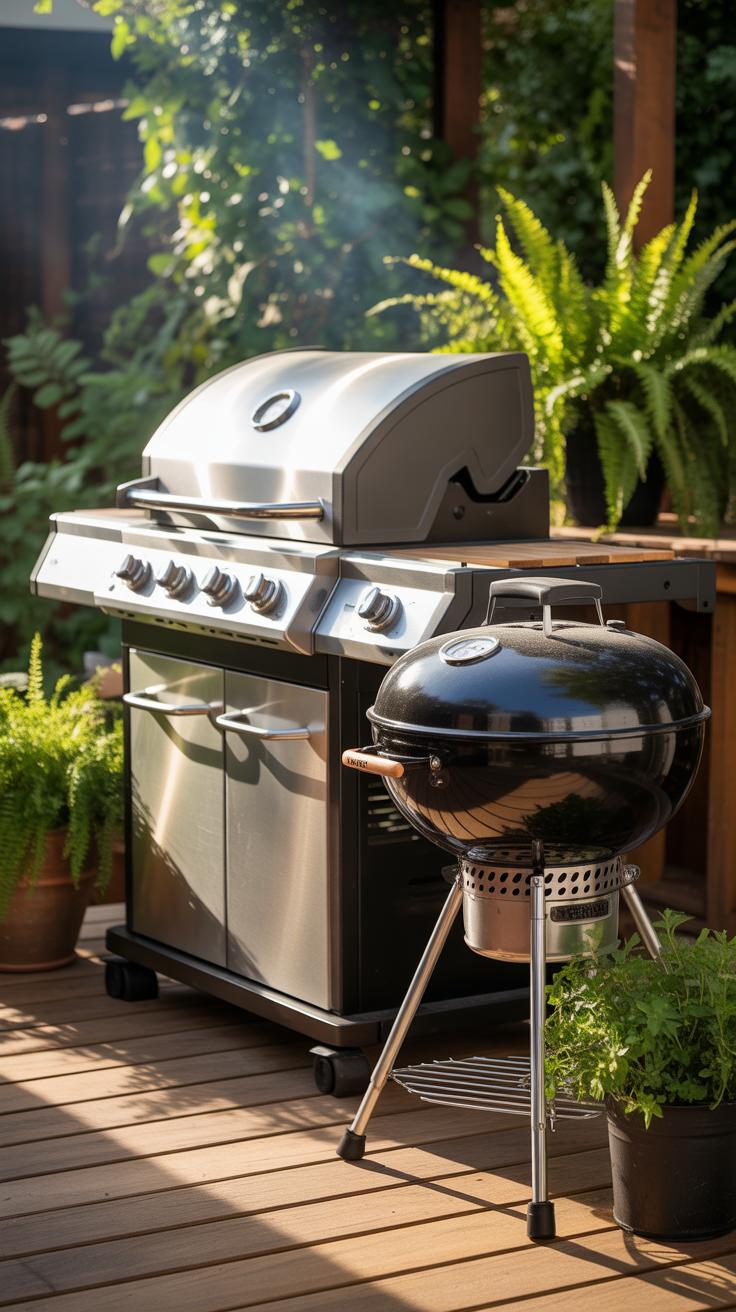
When deciding on a grill for your first BBQ party, the choice often narrows down to charcoal, gas, or electric. Each has its quirks and perks, shaping both the cooking experience and the flavor you’ll end up with.
Charcoal grills work by burning charcoal briquettes or lump charcoal. They take longer to heat but give food a distinct smoky flavor that many people crave. The smoky aroma comes from the charcoal’s smoke mingling with drippings, making those burgers or ribs taste a bit more rustic. On the downside, they require patience to manage the fire and cleanup can be a bit messy. For people who enjoy ritual in cooking and don’t mind a bit of waiting, a charcoal grill might be worth the effort.
Gas grills use propane or natural gas, heating up quickly through burners. They offer more control over temperature with dials, which beginners often appreciate—no guessing when the coals are just right. The flavor is cleaner and less smoky, which might disappoint if you’re chasing that classic BBQ taste, but many still find the result satisfying. Plus, they’re easier to clean, with fewer ashes involved. For small gatherings or fast setups, gas grills tend to work well.
Electric grills heat via an electrical element and are great for people with limited outdoor space, like apartment balconies. They start up quickly and produce less smoke, so you can avoid neighborhood complaints. The flavor tends to be the least “BBQ-like” of the three, since there’s no smoke to infuse the food, but they offer a straightforward way to grill without much fuss. Electric grills might feel a bit like a compromise, but they bring convenience, which matters—especially if you’re balancing space and timing.
Charcoal vs Gas Grills
Charcoal grills give food that smoky, slightly charred flavor many associate with BBQ. The experience is more hands-on—lighting coals, adjusting airflow—and perhaps satisfying for those who enjoy tending a fire. But it’s not the quickest cleanup and charcoal can be costly over time, depending on usage.
Gas grills fire up in moments and offer precise heat control, making them less intimidating for beginners. Cleaning mainly involves scraping grates and occasionally emptying drip trays. They tend to be pricier upfront than charcoal grills, but the ease of use might save time and hassle.
If flavor is your top priority and you have some time, charcoal might be worth it. For a straightforward, quicker setup, gas could suit you better. Think about how much time and effort you want to put into the actual grilling versus socializing during your party.
Electric Grills for Small Spaces
Electric grills really shine when outdoor space is tight—think balconies or small patios where open flames aren’t allowed. They heat quickly and produce less smoke, making them polite neighbors in close quarters. The downside? The flavor won’t have that smoky kick.
Still, if convenience and space are your main concerns, an electric grill lets you join BBQ parties without needing a backyard. It brings grilling indoors or into small spots, often with simple controls and easy cleaning. You might miss the traditional taste, but you gain flexibility, which matters for many first-time hosts.
Essential BBQ Tools and Supplies
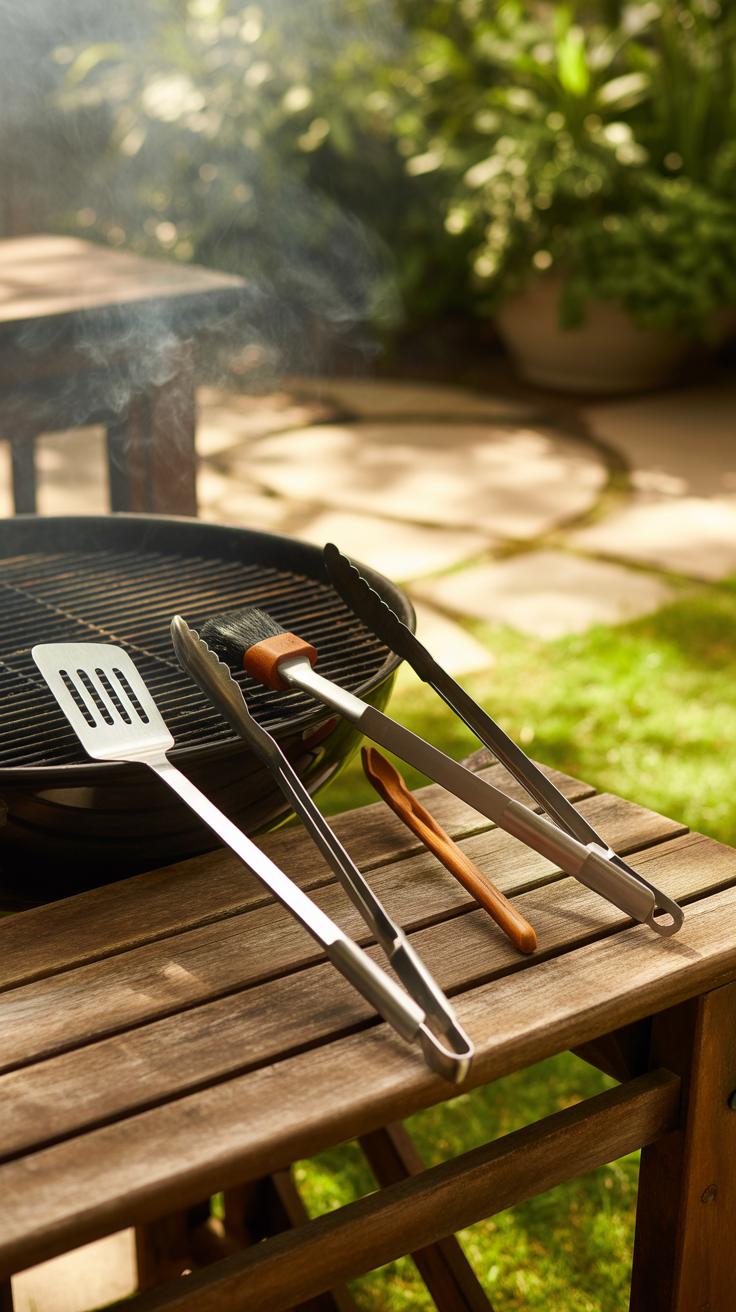
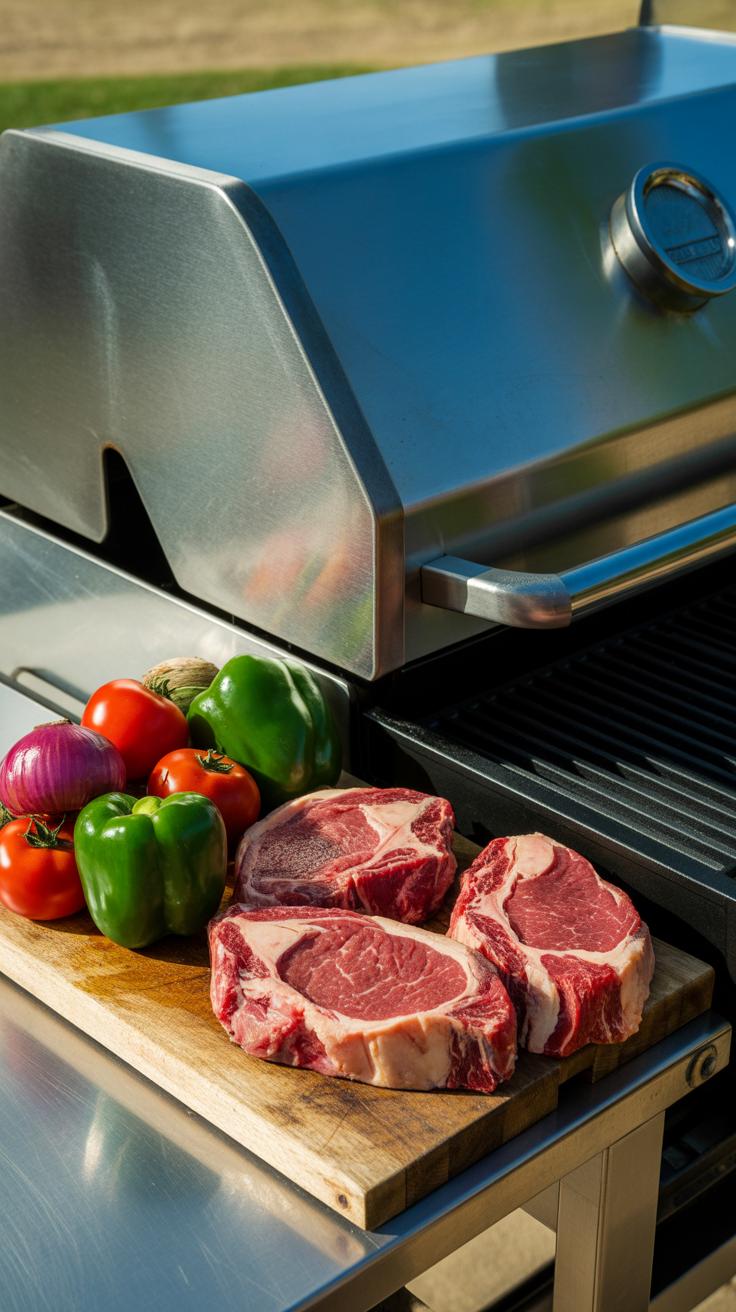
Getting your BBQ tools and supplies ready ahead of time can save a lot of last-minute stress. Think about the basics first: tongs and spatulas for handling food, grill brushes to keep your cooking surface clean, and fuel like charcoal or propane. You might overlook plates and napkins, but you need enough for everyone. Seating also deserves some thought—whether it’s folding chairs, picnic blankets, or a bench—it makes a big difference for how your guests relax.
When it comes to cooking tools, a meat thermometer is often underrated but really handy. It keeps you from guessing whether the meat’s done—nobody loves undercooked food or overcooked steak that’s tough as leather. If you’re on a budget, simple stainless steel tools work fine, and cheap grill brushes from hardware stores do the job without breaking the bank. I once grabbed a grill brush last minute at a dollar store, and it lasted the whole summer.
The way you arrange your space matters as much as having the right gear. Place tables near the grill for easy plating and serving. Make sure trash bins are accessible but not right in the middle—it’s about balancing convenience and keeping the area tidy. Shade is something people often forget until the sun hits hard. A pop-up canopy or even a couple of umbrellas can be lifesavers for comfort. Guests want to chat comfortably, not roast under the sun or shuffle awkwardly for seats.
Planning Your BBQ Menu
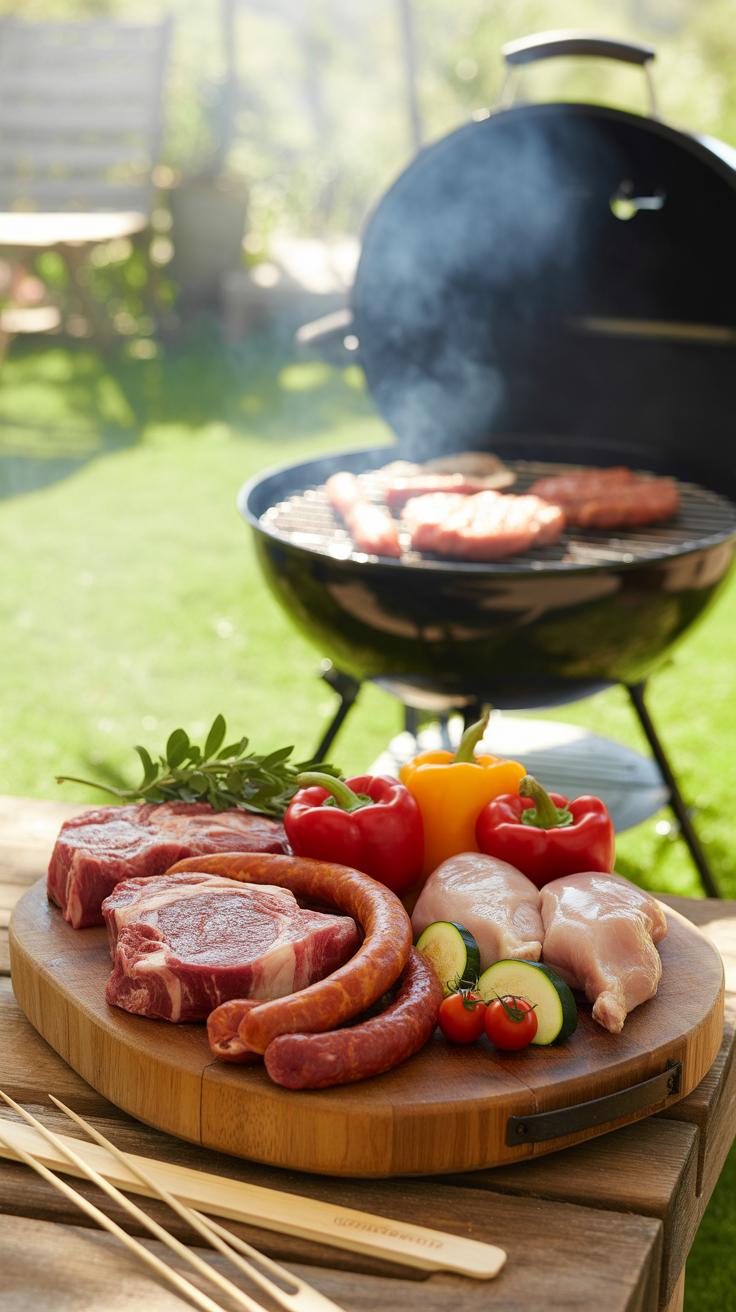
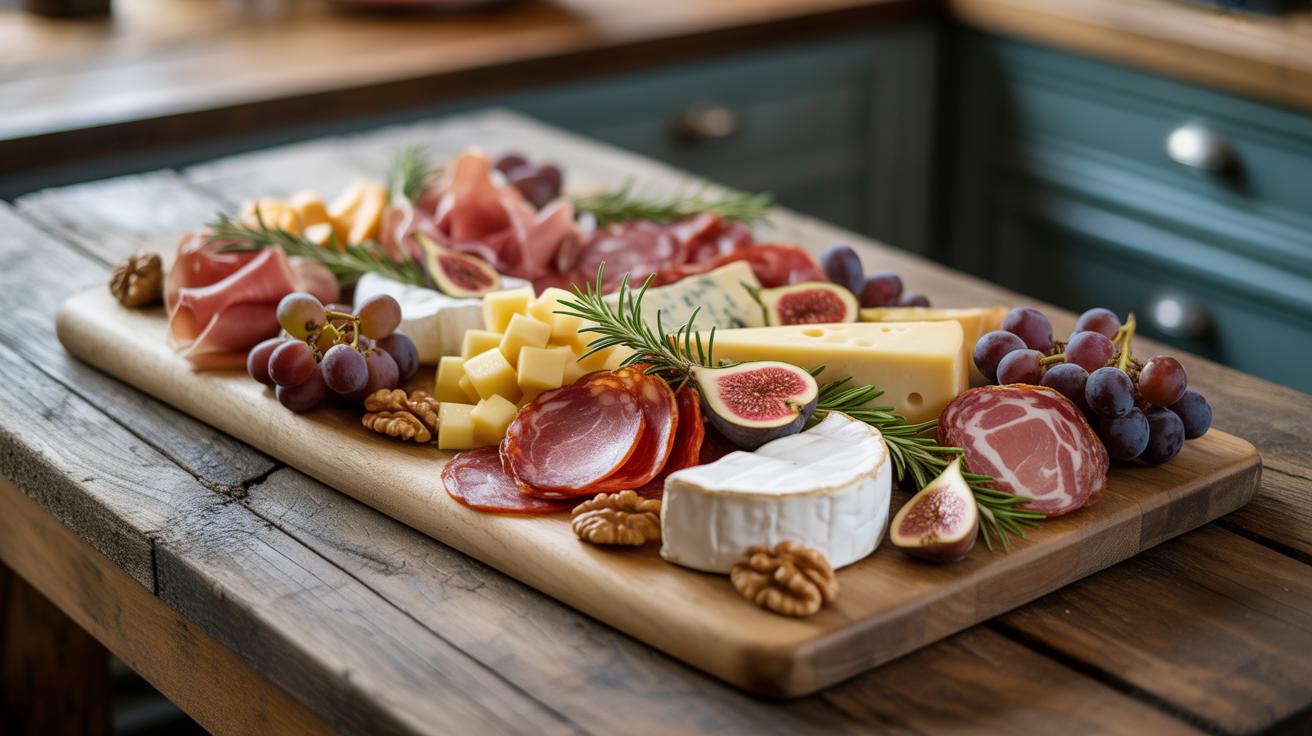
Choosing what to serve at your BBQ can feel overwhelming. You want dishes most people will enjoy, but also enough variety to cover different diets. Keeping it simple is key, especially if it’s your first time hosting. Focus on three main groups: easy grilled meats, vegetarian-friendly veggies, and classic sides.
For meats, burgers and hot dogs are always safe bets. They don’t require fancy skills, and they tend to be crowd-pleasers. Marinated chicken is another option; it’s forgiving on the grill and offers flavor without too much fuss. When shopping, pick fresh cuts and look for pre-made marinades if you’re short on time. Preparing the meat a day ahead often helps with flavor and stress.
Vegetables can round out your menu nicely. Think bell peppers, zucchini, corn on the cob, or mushrooms—these all grill well and add a pop of color. They’re easy to prep quickly with just some olive oil and seasoning. Don’t forget about simple sides like a fresh green salad, coleslaw, or baked beans. These complement the smoky flavors on the grill and cater to guests looking for something lighter or meat-free.

Before you hit the store, make a list. Group ingredients by section or aisle. This saves time and helps avoid impulse buys. If you’re unsure about portions, err on the side of a bit more food—leftovers are easier to handle than hungry guests. And trust me, it’s better to have a little extra than to scramble last minute trying to grill fast things that could’ve been prepared beforehand.
Easy Grilled Main Dishes
Burgers and hot dogs are your go-to options. They grill quickly and everyone knows what to expect. Don’t overthink toppings; simple cheese, lettuce, and tomato often do just fine. For marinated chicken, try a basic mix of olive oil, garlic, and lemon juice. It’s straightforward and forgiving if you forget it a little on the grill. Plus, chicken breasts or thighs are usually easy to find and budget-friendly.
If you feel adventurous, bring in sausages or veggie burgers to mix things up, but no need to overcomplicate. The simpler, the better when starting out. Just watch timing to avoid overcooking. And yes, flipping evenly is easier said than done, but you’ll get the hang of it.
Vegetarian and Side Options
Grilled vegetables can steal the show. Slices of zucchini, eggplant, and thick-cut peppers develop nice char marks and hold up well on the grill. Corn cobs are popular and simple—wrap them in foil with butter or grill directly for a smokier taste. For sides, a potato salad or coleslaw balances the smoky mains with cool, fresh flavors.
Other ideas—grilled pineapple or peaches for a bit of sweetness; these surprise guests in a good way. Beans, especially baked or BBQ style, are not only easy to prepare but good for adding some heartiness without more meat. All these options keep your menu balanced and show you considered everyone’s preferences, even if you didn’t plan a separate dish for all dietary needs.
Managing Food Safety
When planning your BBQ, managing food safety isn’t just about preventing illness—it can also affect how fun and stress-free the event feels. You might think keeping meat cold is enough, but there’s a bit more to it.
First off, storing raw meat separately from other foods helps avoid cross-contamination. Use sealed containers or tightly wrapped packages to keep juices contained.
Cooking temperatures are crucial. For example, ground beef needs to reach 160°F to be safe, while whole cuts like steaks or pork chops should hit at least 145°F, then rest for a few minutes. Do you have a reliable meat thermometer? If not, investing in one might save you some worry.
Leftovers? Don’t let food sit out too long—two hours is the general limit before bacteria multiply. Cool leftovers by dividing large portions into small, shallow containers. That helps speed things up. You can keep them in the fridge safely for about three to four days. After that, it’s probably better to toss or freeze them.
Thinking about how you handle food might sound tedious, but it definitely keeps your BBQ guests safe—and that’s worth the little extra effort.
Inviting and Organizing Guests
How to Send Invitations
When inviting guests for your BBQ, you don’t have to overcomplicate things. A quick message or group chat can work just fine. What really matters is you include the essentials: date, start time, location, and if they should bring anything. Maybe mention a rough end time—that way, guests can plan accordingly.
If you’re unsure about who’s free, ask them directly rather than making assumptions. Sometimes people forget to reply, so a gentle follow-up helps. Also, try to keep the tone friendly and casual—it sets the mood before the party even starts, you know?
Don’t forget to ask about dietary preferences or restrictions upfront. It’s easier to accommodate when you have a clear picture early on, and guests will appreciate it.
Seating and Social Areas

Creating a comfortable space is a bit like setting a stage. You want spots where people can sit and chat but also places for others to stand and mingle. Consider mixing seating types—some chairs, a bench, cushions—whatever you have on hand.
Arrange seats so groups don’t feel boxed in but close enough to encourage conversation. Sometimes, scattered small groups work better than one big circle. And if space is tight, try positioning seating in L-shapes or semi-circles along fences or walls to open the center for movement.
Don’t forget shade or cover options. If the sun’s blazing or there’s a chance of rain, a simple umbrella or canopy can save the atmosphere. Think about where guests will drop their plates or drinks too—little tables or flat surfaces make a difference for comfort and keeping things tidy.
Setting Up and Lighting the Grill

Before your guests arrive, you want your grill ready to handle whatever you’re cooking without any last-minute panics. Setting up clean grates and arranging your fuel right sets the stage. If you’re using charcoal, start by piling your briquettes in a mound or pyramid shape—that helps air circulate and encourages a steady burn. Then comes the lighting.
How to Light Charcoal Safely

Don’t just toss lighter fluid and hope for the best; that’s a quick way to end up with uneven heat or worse, flare-ups. Instead:
- Arrange your briquettes tightly together in a pyramid.
- Soak a fire starter cube or crumpled newspaper under the pile, or use a chimney starter—these tools help light charcoal evenly without excessive chemicals.
- Light the fire starter carefully with a long match or lighter, and let the charcoal catch.
- Wait patiently. The coals need about 15-20 minutes to turn grayish-white and feel hot. That’s your sign the grill is ready.
Trying to speed this up rarely works. It feels slow, but rushing will leave you with unevenly cooked food. And always keep water or sand nearby, just in case things flare up too much. Safety first, especially if it’s your first time.
Using a Gas Grill Properly
Gas grills are usually easier, but they come with their own quirks. Here’s how I usually do it:
- Open the lid before turning on the gas. It’s easy to forget, but closing it can cause a gas buildup, which is dangerous.
- Turn the gas valve on, then ignite the burners—either with the built-in igniter button or a long lighter if it’s a manual model.
- Start with high heat to preheat the grill; it usually takes about 10-15 minutes.
- Adjust the burners depending on what you’re cooking—lower heat for slow cooking or higher for searing.
One tricky bit is knowing when it’s hot enough. A quick test: hold your hand about five inches above the grill grates. If you can hold it there for two seconds before pulling away, the heat’s high. Three to four seconds signals medium heat. It’s not perfectly scientific but works well enough in practice.
And just a side note—never leave the grill unattended while it’s on. It’s easy to forget you’re grilling when chatting with guests, but those few minutes make a difference in preventing accidents.
Cooking and Serving Tips

Grilling Basics for Even Cooking
When you put food on the grill, try to leave some space between each piece. Crowding makes it harder to cook evenly, and you might end up with some spots burnt and others underdone. If you’re grilling thicker cuts, like burgers or chicken breasts, start them over medium heat, not too hot, and flip them only once or twice. Flipping too often tends to dry them out or leaves you guessing about doneness.
Checking if something’s cooked can seem tricky, but a simple trick is pressing the meat lightly with your finger or tongs. For example, a rare steak feels soft, while a well-done one feels firm. If you’re unsure, a basic meat thermometer can save you from guesswork—aim for about 165°F for poultry and 145°F for pork. Sometimes you might find yourself unsure whether to trust timing or feel; maybe both, actually.
Serving Food to Guests
Setting up a serving area where guests can easily grab food keeps things moving smoothly. Try arranging a station with plates, utensils, napkins, and condiments all nearby. It stops bottlenecks and lets people help themselves without waiting around. You could also consider plating some main items ahead—say, burgers or skewers—so they’re ready to hand out, while sides stay in bowls for self-serve.
Think about flow. Guests usually start with drinks, so place snacks or appetizers close. Then, lay out main dishes in a logical order, ending with sides and condiments. It might feel like overthinking, but it prevents awkward pauses when people start piling up for food. Serving at the right tempo keeps hunger at bay—no one really wants to wait too long between bites.
Cleaning Up After Your BBQ
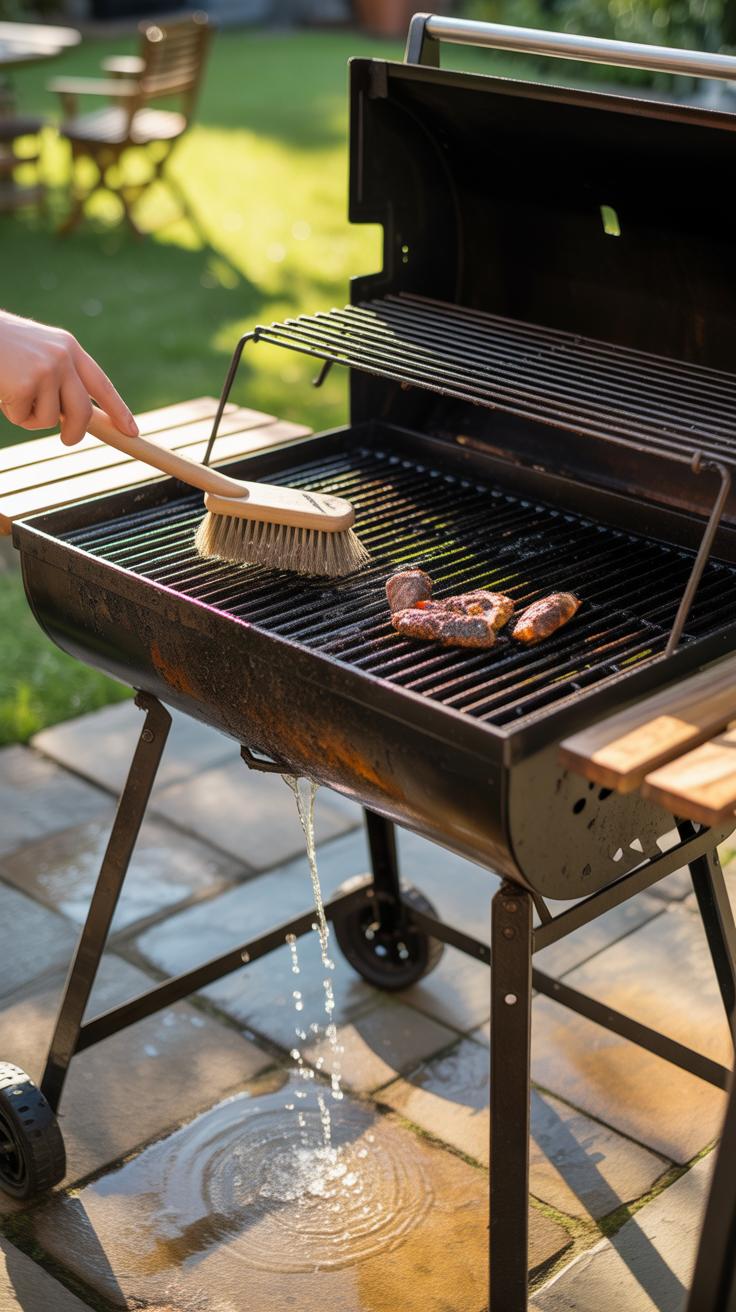
After the party winds down, the cleanup can feel like a chore, but it doesn’t have to drag on. Start by tackling the grill grates while they’re still warm—scrape off leftover food bits with a stiff brush or a ball of foil. That’s often quicker and easier than waiting until everything cools. If you skip this step, next time’s grilling might be more frustrating than fun.
When it comes to charcoal, let the ashes cool completely before discarding them. I usually keep a metal container nearby, so I don’t have to worry about any stray sparks. It’s a small detail, but it saves headaches later.
Sorting through trash after the party requires a bit of attention. Set up bins for recyclables, compost, and regular waste. You can even prepare labeled bags beforehand. Watching guests toss things into the right bin feels rewarding—well, sometimes it does. Leftover food deserves care, too. Store perishables in airtight containers and refrigerate promptly to avoid spoilage. It’s tempting to rush this step, but I’ve learned that paying attention here saves a lot of wasted food—and money.
Quick tip: grab a garbage bag early to collect scraps during the party itself. It keeps the mess from piling up and cuts overall cleanup time. And don’t hesitate to ask for a hand; sometimes the simplest way to speed things up is to share the load.
Conclusions
Getting your BBQ party ready involves picking the right equipment, planning your menu, and setting up the space well. Each choice you make will shape your guests’ experience. Simple preparation helps avoid last-minute stress and makes the hosting fun.
Use this checklist to guide your planning, and remember, the key to a good BBQ party is welcoming friends with tasty food and a good mood. Your first BBQ can be the start of many memorable gatherings.