

The RV Micro Ecosystem: Beyond Basic RV Humidity Control Tips
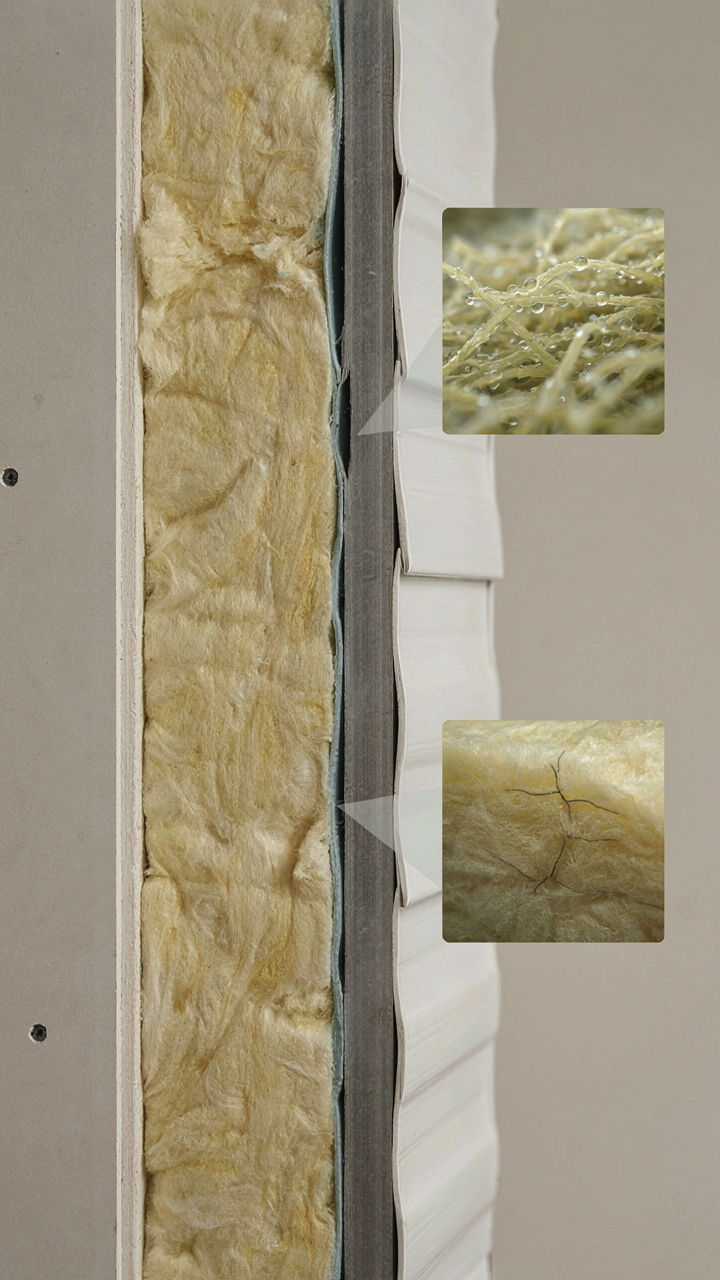
Where Your Water Actually Comes From
You want to solve this problem without actually living differently. That’s the real tension. But moisture control fails because people treat an RV like a house, when it’s actually a sealed box where every human activity pumps water vapor directly into the air. Think of thermodynamics here—an RV is a closed system with high internal heat generation and minimal volume. Every shower, every breath, every cooking pot becomes a moisture source you cannot ignore or ventilate away completely.
The numbers matter. A single occupant generates roughly one liter of water vapor daily through respiration and perspiration alone. Add cooking, showering, and wet gear, and you’re pushing three to five liters of water vapor into a 200 to 400 cubic-foot space. Traditional houses have attics and crawl spaces that absorb this burden. Your RV has nowhere for that water to go except your walls, your windows, and eventually your wood framing and insulation.
The Outside Air Has A Humidity Agenda
Exterior humidity doesn’t knock. It penetrates every crack, seam, and ventilation opening in your RV until internal and external humidity equalize. This is diffusion—water molecules moving from high concentration to low concentration regardless of your plans. You cannot seal an RV completely, so fighting external humidity requires understanding when the outside air is actually drier than your interior, which is almost never during dawn, dusk, and night when temperatures drop.
Seasonal location matters more than people admit. Desert climates solve this problem naturally because absolute humidity stays low even when relative humidity spikes. Humid subtropical zones and coastal areas make moisture control non-negotiable because exterior air is already saturated. Your ventilation strategy must flip seasonally. In humid months, you close vents and run dehumidification. In dry months, you crack windows and let air exchange work for you. The mechanism is simple: manage the humidity gradient, not just the humidity number.
The Condensation Conundrum: Why “Just Ventilate” Fails

Where The Water Actually Forms

You think ventilation solves condensation because you’ve been told it does, and admitting the real problem feels like admitting your RV is fundamentally broken. It’s not. The mechanism is thermodynamic: air holds moisture up to a saturation point. When that air temperature drops, it releases that moisture as liquid on the nearest cold surface. Ventilation alone doesn’t change the saturation point or the surface temperature that triggers the dump.
An RV’s interior air can hold a specific amount of water vapor at 70 degrees. When that same air hits a metal wall panel at 35 degrees, physics forces a choice: the air either cools down or the moisture condenses out. Opening a window doesn’t reverse this equation. You’re exchanging warm moist air for cold outside air, which warms up inside and creates a new condensation cycle. The cold surface temperature is the actual problem. Ventilation treats the symptom, not the cause.
The Insulation Barrier Nobody Mentions
Most RV advice treats insulation as optional comfort padding. That’s wrong. Insulation’s real function is raising the interior surface temperature of walls and ceilings high enough to stay above the dew point. When outside air is 30 degrees and your wall panel sits at 32 degrees, moisture will condense regardless of how much you ventilate.
Fiberglass batts in walls and foam board in slide-out cavities aren’t luxuries. They’re the primary defense against condensation. An RV with 1 inch of fiberglass performs worse than one with 3 inches because the interior surface stays colder longer. The R-value directly determines how much temperature difference the insulation can bridge between outside cold and inside warmth. No insulation means no thermal barrier. Moisture condenses on uninsulated metal within hours of temperature drop.
The 3 Stage Moisture Defense Protocol For How To Reduce Rv Humidity

Stop The Water Before It Enters

You want mold gone because it costs money to fix and feels like failure. Here’s the real mechanism: moisture enters an RV through three pathways—liquid water intrusion, air infiltration carrying humidity, and condensation from temperature differentials. Most RV owners fixate on removing moisture after it’s already inside. That’s expensive and ineffective. The actual defense starts by sealing the entry points themselves. Check roof seams, window frames, door gaskets, and plumbing penetrations monthly. Use dicor or equivalent sealant rated for RV use, not generic caulk. Water finds cracks you don’t know exist.
The second layer is ventilation discipline. Your shower, stove, and furnace all produce moisture as a byproduct. Open a window when cooking or bathing, or run exhaust fans if installed. Don’t seal an RV airtight thinking you’re protecting it. You’re trapping moisture inside instead. The goal is controlled air exchange, not hermetic isolation. If you have roof vents, ensure they’re not blocked by accumulated debris or insulation. A blocked vent turns into a moisture trap.
Match Your Drying Tool To Your Climate And Usage Pattern
Active drying isn’t one tool. Borrowing from thermodynamics, evaporative capacity depends on the difference between current humidity and the air’s saturation point. A dehumidifier works in humid climates where that gap exists. A furnace works in cold, dry climates by heating interior air and venting moist air outside. An air conditioning unit removes moisture as a side effect of cooling. Pick the wrong tool and you’re spending money on a component that fights your climate instead of working with it.
Trailers used seasonally in dry regions need minimal active drying. A cracked window during warm days handles the load. Trailers lived in year-round or parked in humid coastal areas need a desiccant dehumidifier or electric unit running continuously when unoccupied. The mechanism is simple: measure your interior humidity with an inexpensive digital hygrometer. If it stays above 60 percent after sealing and ventilation fixes, add active drying hardware. Otherwise you’re buying equipment you don’t need.
How To Control Moisture In An RV: The Dehumidifier Delusion
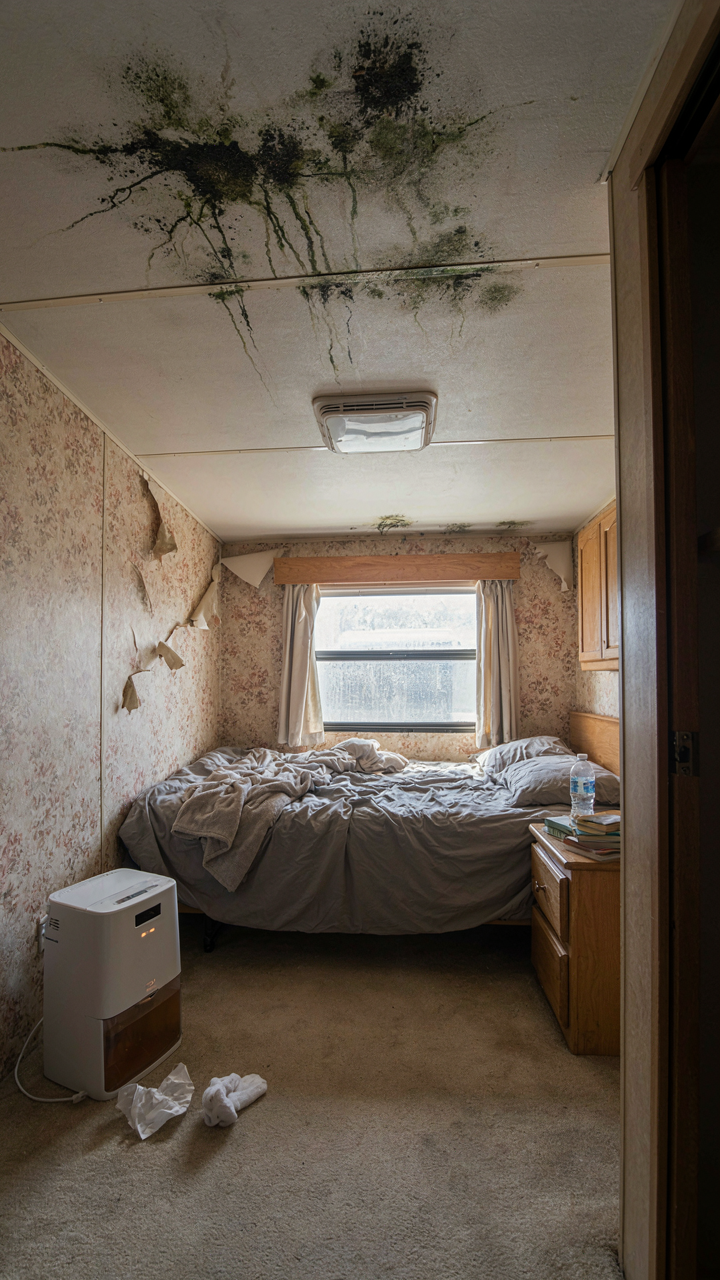
Size Your Dehumidifier To Actual Cubic Footage

You want the dehumidifier because you think it solves the problem. It doesn’t. Most RV owners buy units rated for living rooms, then wonder why mold still blooms in the bedroom. The mechanism is simple: dehumidifiers remove moisture only from the air they actively pull through. A 30-pint unit sitting in your kitchen reaches maybe 40 percent of your 250-cubic-foot bedroom. Dead space stays saturated.
Match your dehumidifier to the specific compartment you’re protecting, not your entire RV volume. A bedroom needs its own unit. A bathroom needs its own unit. Running one central dehumidifier is like placing one fan in your kitchen and expecting air to circulate through a closed bedroom door. The moisture gradient won’t allow it. Buy smaller, targeted units and position them in the zones where condensation actually forms.
Desiccant Versus Compressor: Pick The Right Mechanism
Compressor dehumidifiers work like air conditioning in reverse. They cool incoming air, water condenses on cold coils, and drained water exits the tank. Desiccant models use silica gel or similar material to absorb moisture chemically. This distinction matters because RV environments break traditional dehumidifier logic. Compressor units lose efficiency below 65 degrees Fahrenheit. Your RV at night in spring or fall drops below that threshold constantly. The compressor keeps running but barely pulls moisture. Desiccant units maintain effectiveness down to 30 degrees.
Choose desiccant for seasonal travel or cold-weather camping. Choose compressor only if you run heat constantly and maintain interior temps above 65. Most RV owners need desiccant, but they default to compressor because it’s cheaper upfront. The mechanism that matters is recovery temperature: desiccant units regenerate their gel by heating it, which costs energy but works in cold. Compressor units cannot recover until ambient air warms. Buy what works in your actual climate, not what seems cheaper.
Mold Prevention: Not Just A Cleanliness Issue For RV Dehumidifiers For Mold Prevention

Where Mold Actually Grows

You want mold prevention because you’re afraid of invisible damage eating your RV’s resale value while you sleep. Here’s what actually matters: mold doesn’t care about your cleaning schedule. It cares about three conditions—moisture above 60% relative humidity, organic material to feed on, and stagnant air. Remove any one and mold stops. Most RV owners chase the first two and ignore the third, which is why their mold comes back.
Spore ecology teaches us that mold is opportunistic colonization. Think of your RV interior like territory in a military campaign—mold takes ground wherever humidity stays elevated and nothing disrupts its foothold. Fabric, wood, rubber seals, and fiberglass insulation are all viable targets. Moisture alone isn’t enough. You need the moisture plus the substrate plus time. That’s why a damp floor dries out before mold takes hold, but a damp cabinet corner behind a wall doesn’t.
Break The Stagnation Trap
The common advice says run your fan when it’s humid. That’s incomplete. Airflow doesn’t mean circulating air—it means displacing stagnant pockets where humidity clusters. Your RV has dead zones: the cabinet under the sink, the space between the mattress and the wall, the corner behind the refrigerator, the gap above the cabinets. Air doesn’t flow there naturally. Heat rises and follows the path of least resistance, leaving these zones untouched.
Strategic airflow targets the exact spots where condensation pools and stays. Use a portable fan to direct air into corners, not just around the main cabin. Point it at windows after condensation forms. Run it behind furniture. Position fans to create cross-ventilation that forces air into recesses and low spots. Don’t just open a roof vent and hope. Measure humidity in different zones with a cheap hygrometer—you’ll find your dead zones fast. Then eliminate them with placement, not just volume.
The “Dry Air Exchange” Method: How To Get Moisture Out Of An RV

Calculate Your Cubic Feet Per Minute

You want to feel like you’ve done something scientific instead of just cracking a window. Here’s the mechanism: moisture removal is a function of air volume and exchange rate. Cybernetics calls this a feedback loop—input determines output. In your RV, the input is how many cubic feet of moist interior air you push outside per minute.
Multiply your RV’s interior length times width times height to get total cubic footage. Most RVs need a complete air exchange every 30 to 60 minutes to keep humidity below 50 percent. Divide your total cubic footage by 45 to get your target CFM (cubic feet per minute). A roof vent rated at 300 CFM processes a 15,000-cubic-foot space in 50 minutes. You’re not guessing anymore—you’re working backward from a number.
Automation Beats Your Attention Span
Everyone says “just open a window.” That advice fails because you’ll forget. Automated humidity sensors trigger exhaust fans when indoor moisture hits a threshold, usually around 55 to 60 percent relative humidity. Manual venting requires you to notice the problem, remember to open vents, and remember to close them before a rainstorm hits. Automated systems cost 150 to 400 dollars and run on 12-volt power most RVs already supply. The real cost of manual is the mold that grows while you’re distracted.
Install a humidity-triggered vent fan in the bathroom and kitchen—the two highest-moisture zones. Set the trigger point at 55 percent and let it run for 20 to 30 minutes after moisture spikes. Check the sensor quarterly to ensure it’s reading accurately. This single protocol step eliminates 70 to 80 percent of condensation problems most RV owners fight monthly.
Winter Storage: How To Prevent Moisture In Camper When It’s Not In Use
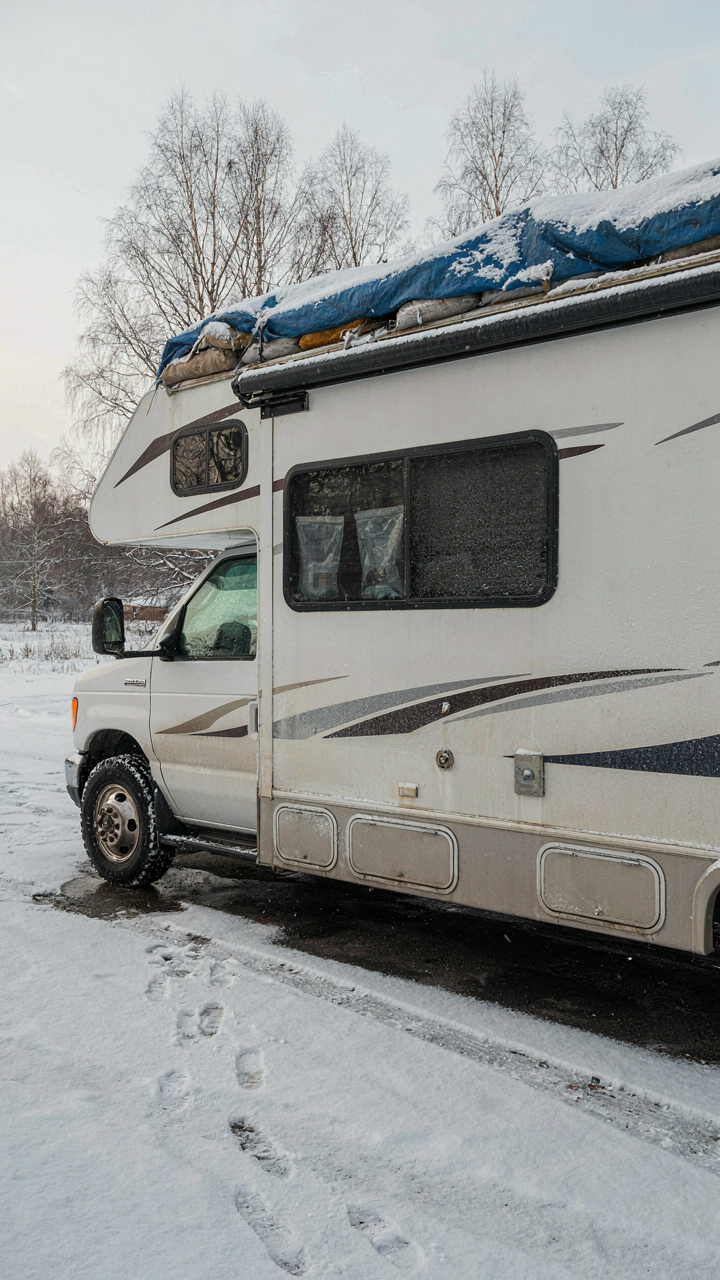
The Absorber Strategy That Actually Works

You’re storing your RV because you’re terrified of returning to mold damage that costs thousands to remediate. Here’s what matters: passive absorbers don’t eliminate moisture, they delay its accumulation by creating a temporary moisture sink. Think of it like capacity planning in logistics—you’re not removing demand, you’re buffering supply until it exceeds your storage threshold. The mechanism is simple: desiccants lower the dew point inside the sealed RV by absorbing water vapor into their matrix, buying you time between checks.
- Calcium chloride containers: Industry standard for RVs; absorb 2-3 pounds of water per unit before saturation. Place one per 100 cubic feet of interior space.
- Silica gel canisters: Lower capacity than calcium chloride but reusable through oven drying. Best paired with other absorbers, not as standalone solution.
- Charcoal-based absorbers: Work best in cabinets and localized damp zones like bathroom areas. Slower absorption rate than chemical desiccants.
- Montmorillonite clay packets: Military-grade moisture control; reactivate by heating. Effective in sealed compartments but require ongoing maintenance checks.
- Air circulation with absorbers: Running a small 12V fan intermittently distributes moisture evenly, preventing pocket saturation and extending absorber lifespan.
Absorbers are not insurance. They’re a triage measure that works only if you rotate or replace them every 4-6 weeks during winter dormancy. The moment you skip a check, you’ve turned your RV into a sealed petri dish.
The Pre Storage Purge That Stops Moisture Before It Starts
Everyone says “ventilate your RV before storage.” That’s incomplete advice that misses the actual problem. You need to purge residual moisture embedded in soft goods, fresh water systems, and insulation cavities—not just air out the interior. Run your furnace or heat pump at 65 degrees for 48 hours straight with all cabinet doors open and windows cracked to allow air exchange. This draws moisture from materials that would otherwise off-gas into the sealed box over months.
Drain your fresh water tank completely, then run the furnace and hot water system to push lingering moisture through the lines. Dump gray and black water tanks, leave all valves open, and crack your refrigerator door open for the 48-hour heating cycle. Place open containers of calcium chloride on the bed and sofa to absorb any remaining airborne moisture. After the heating purge ends, seal the RV and install your absorbers immediately. This front-loaded moisture removal cuts what absorbers must handle by 40-60 percent.
Advanced Strategies: Reduce Condensation In RV Beyond The Basics
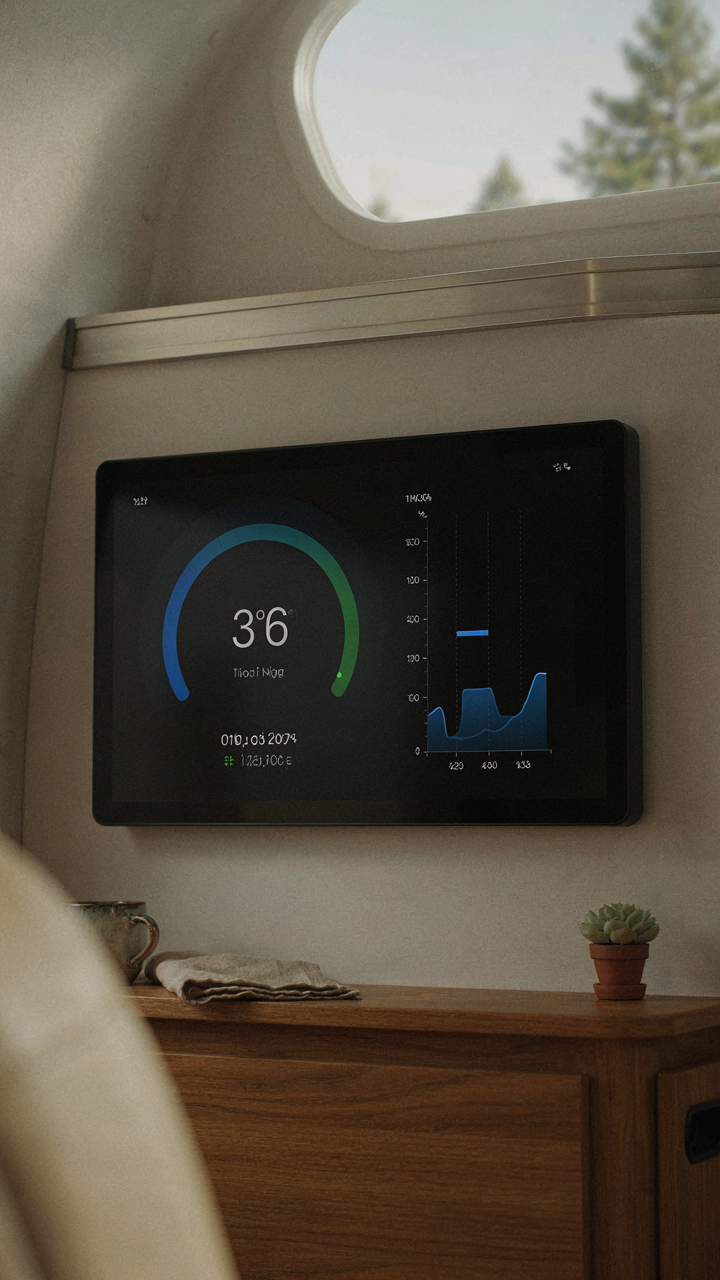
When Your Sensors Actually Matter

You want to buy the right tech so you feel like you’ve solved the problem without changing your behavior. Here’s the mechanism: most RV moisture control fails because people react to visible condensation instead of tracking the invisible variable—dew point. A smart sensor doesn’t prevent moisture. It tells you when the air temperature is about to drop below the water vapor it holds, forcing that vapor to condense on surfaces. Once you know the number, you can act before the swap happens.
Integrated systems like capacitive humidity sensors paired with automated ventilation fans create a feedback loop. The sensor reads relative humidity. When it crosses your threshold—typically 50-60% in an RV—the system pulls moist air out before it contacts a cold surface. This is faster than manual cracking a window. The data also reveals patterns. If humidity spikes every morning, you know your night ventilation strategy failed. If it climbs during cooking, your exhaust fan isn’t sized correctly. The sensor forces you to see cause and effect instead of guessing.
Where Cold Spots Actually Form
Thermal bridging is construction physics in action: heat flows along the path of least resistance, and metal conducts faster than insulation. In RVs, this means your aluminum frame, roof supports, and window frames become thermal highways. Cold travels inward along them. When interior air meets these cold spots, condensation forms there first, not on walls. This is where mold establishes. You cannot prevent it with ventilation alone if the cold bridge exists.
The fix demands a materials shift, not just airflow. Closed-cell foam insulation applied directly over frame members breaks the thermal bridge by adding resistance in the path itself. Window trim also matters—a plastic trim ring between the frame and interior reduces conduction compared to direct aluminum contact. Most RVs skip this step because it costs more upfront and sits invisible behind trim. Check your interior corners during humid weather. If they sweat while walls stay dry, you have a thermal bridge. Seal it with foam or weatherstripping to interrupt the cold path completely.
Your RV Isn’t A Static Box; It’s A Living System. Ignore Its Needs, And It Will Fail You


Most RV owners treat moisture like a problem that happens to them. It doesn’t. Moisture is a symptom of a system you’re not managing. Stop thinking about mold prevention and start thinking about airflow as your primary job. Open your vents intentionally. Run your fan when you cook. Check your seals this week, not next month. Your RV will either work for you or against you, and the difference comes down to whether you treat it like equipment that requires constant attention or furniture that doesn’t. Moisture wins when you’re passive.



