

The Condensation Lie: Why You’re Blaming The Wrong Enemy

The Physics Of Your Box In Winter
You want to believe condensation is unavoidable, a force of nature you can only manage, not prevent. The mechanism is actually thermodynamics: warm air holds more moisture than cold air. When warm, humid air inside your RV meets cold surfaces, it releases that moisture as liquid. That’s the real problem statement, not the weather outside.
Your RV’s interior and exterior operate as separate thermal systems. Cold metal walls and windows pull heat from warm indoor air, causing the dew point to drop below the air temperature at the surface. This isn’t about how cold it gets outside. It’s about the temperature difference between your heated interior and the uninsulated surfaces touching the outside air. Close that gap, and you solve the problem.
Your Breathing Habits Create The Wet
Most RV guides blame winter weather for condensation. They’re wrong. You create 80 percent of your moisture problem through activities nobody mentions: cooking, showering, breathing, and drying wet gear indoors. One person in an unventilated RV releases a gallon or more of water vapor per day through respiration and perspiration alone.
The mechanism here is absorption: water vapor doesn’t stay visible. It saturates the air until your cold surfaces act as a collection point. Stop running heat while cooking or showering without venting, and you pump moisture directly into your living space. Then you turn on the furnace to stay warm, which circulates that humid air across cold windows and walls. The habits are the root cause. Manage those, and surface temperature becomes secondary.
The Humidity Equation: Measuring Your Self Inflicted Misery

What Relative Humidity Actually Measures

You want to know this because you’re afraid of mold and rot, and you think a number will save you. It won’t, but understanding what that number means will. Relative humidity is a physics term: the ratio of actual water vapor in the air versus the maximum amount that air can hold at that temperature. Cold air holds less moisture than warm air. An RV in winter exposes this gap ruthlessly.
When interior air drops to 40 degrees but your breath and cooking and body heat push moisture into it, you get saturation fast. The air becomes full. Water condenses on the coldest surfaces first: windows, exterior walls, metal roof edges. Relative humidity of 60 percent or lower keeps mold dormant. Above 70 percent, it grows. You’re not measuring dampness. You’re measuring how close you are to the point where physics forces water out of invisibility.
The Instruments That Actually Tell You What’s Happening
The common advice here is garbage: buy a cheap digital hygrometer and trust it. Don’t. Most handheld humidity sensors drift within months and read false high or false low depending on temperature swings. A $12 unit will lie to you consistently enough that you’ll make wrong decisions based on it.
Get a thermohygrometer with a data logging function, not just a readout. You need to see humidity patterns over hours, not snapshots. Placement matters more than the tool itself. Mount it on an interior wall at eye level, away from kitchen steam and direct sunlight. Record readings at the same time daily for a week in winter conditions. The trend line tells you if your ventilation strategy works. The single reading tells you nothing.
Ventilation: The Unsexy But Critical First Line Of Defense

Strategic Air Exchange For Moisture Removal

You want ventilation to solve your condensation problem so you don’t have to change your behavior. It won’t. But here’s the mechanism: moisture is a mass transfer problem, not a magic one. Air has a saturation point. Once inside air holds maximum water vapor at a given temperature, it deposits that vapor on cold surfaces. The only way out is replacement. Cold outside air enters, warm saturated inside air exits, and the cycle resets.
Your RV needs purposeful air exchange, not just cracked windows. Install roof vents with manual dampers or passive turbine vents that run continuously during winter trips. Pair these with low intake points near the floor. This creates convective flow: warm moist air naturally rises and exits through the roof vent, while drier cold air enters below and gets warmed by living spaces. Run vents even when the coach feels cold. The energy cost of replacing moist air is lower than the damage cost of condensation rot.
Ventilation Mistakes That Make Things Worse
The common advice says open windows for fresh air. That’s incomplete. Opening windows in below-freezing weather pulls in outside air that’s already dry but instantly warms inside, creating a humidity spike before any moisture actually leaves. You’ve just increased condensation risk in the name of “fresh air.”
Instead, use powered extraction without opening windows. Bathroom and kitchen exhaust fans pull moisture directly at the source before it disperses throughout the coach. Run these fans during and after showers or cooking, venting directly outside through their ducts. Pair this with passive roof ventilation that operates continuously. Active extraction plus passive replacement beats passive-only every time. Set a timer if needed: extract for 20 minutes post-shower, then rebalance with roof vents running steady.
Heat Management: Your RV As A Thermal System

Consistent Heat Distribution Wins The Game

You want condensation to disappear without freezing to death or running your furnace nonstop. The mechanism is simple: your RV is a closed thermal system, and the enemy is temperature gradient. Physics teaches us about equilibrium states. In an RV, you’re trying to eliminate the cold surface where warm air meets exterior walls. That’s where moisture condenses.
Most RV advice says “turn up the heat.” That’s incomplete. Blasting your furnace heats the air but leaves walls cold. You need heat reaching the perimeter surfaces themselves. This means positioning heat sources to warm walls, not just ambient air. Ceiling vents push warm air down. Low-mounted heaters or heat tape on problem walls actually solves the problem instead of masking it.
Layering Heat Sources For Precision Control
Dumping all thermal load onto one furnace burns fuel and wastes money. Strategic layering gives you granular control. Use your furnace as baseline heat. Add secondary sources like a small electric heater near the coldest wall, or insulation with embedded heating cable where condensation clusters. The furnace maintains living space temperature. The secondary source targets the thermal weak points.
Monitor wall temperature, not just air temperature, to measure real progress. An infrared thermometer costs thirty dollars and shows you exactly where heat isn’t reaching. Your goal is no exterior wall surface below fifty-five degrees when interior air sits at sixty-five degrees. This gap eliminates condensation formation without forcing you to run full heat continuously.
The Absorption Protocol: Beyond The Gimmicks
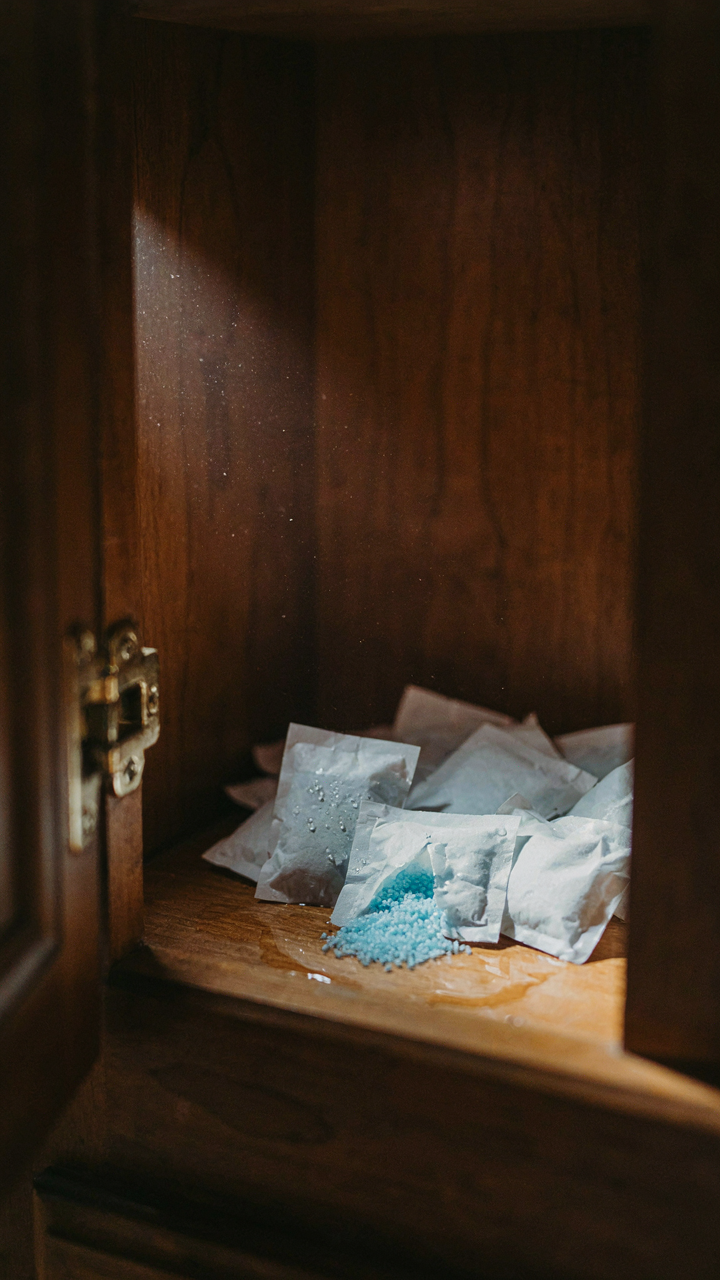
Desiccants: Industrial Grade Moisture Removal

You want a magic solution so you don’t have to change your behavior. That’s not how physics works. Desiccants operate on the same principle as a sponge in chemistry: they have surface area that binds water molecules through adsorption, which is distinct from absorption. Your RV needs active moisture capture, not decoration.
Industrial-grade desiccants like silica gel and calcium chloride work because they’re engineered for high saturation capacity. Silica gel absorbs up to 40 percent of its own weight in water. Calcium chloride towers higher, hitting 150 percent. Both come in bulk form designed for warehouses and should replace the small packets you see online. Size matters because surface area scales the absorption speed.
Placement Strategy That Actually Works
Most people scatter desiccants randomly and wonder why condensation still pools on windows. Placement is mechanism. Position desiccants directly in the path of moisture generation: near the kitchen sink, above the shower, under sleeping areas where breath accumulates. Air circulation moves moisture toward these points, where it encounters the material and sticks.
Rotate or replace desiccants every two to three days during winter trips, or sooner in high-humidity conditions. A saturated desiccant becomes useless and starts releasing moisture back into the air. Check weight and color indicators if using silica gel packs. The protocol is inspect, rotate, replace on a fixed schedule. This is where most people fail: they install the system then abandon it.
Dehumidifiers: The Unavoidable Truth For Winter RVers
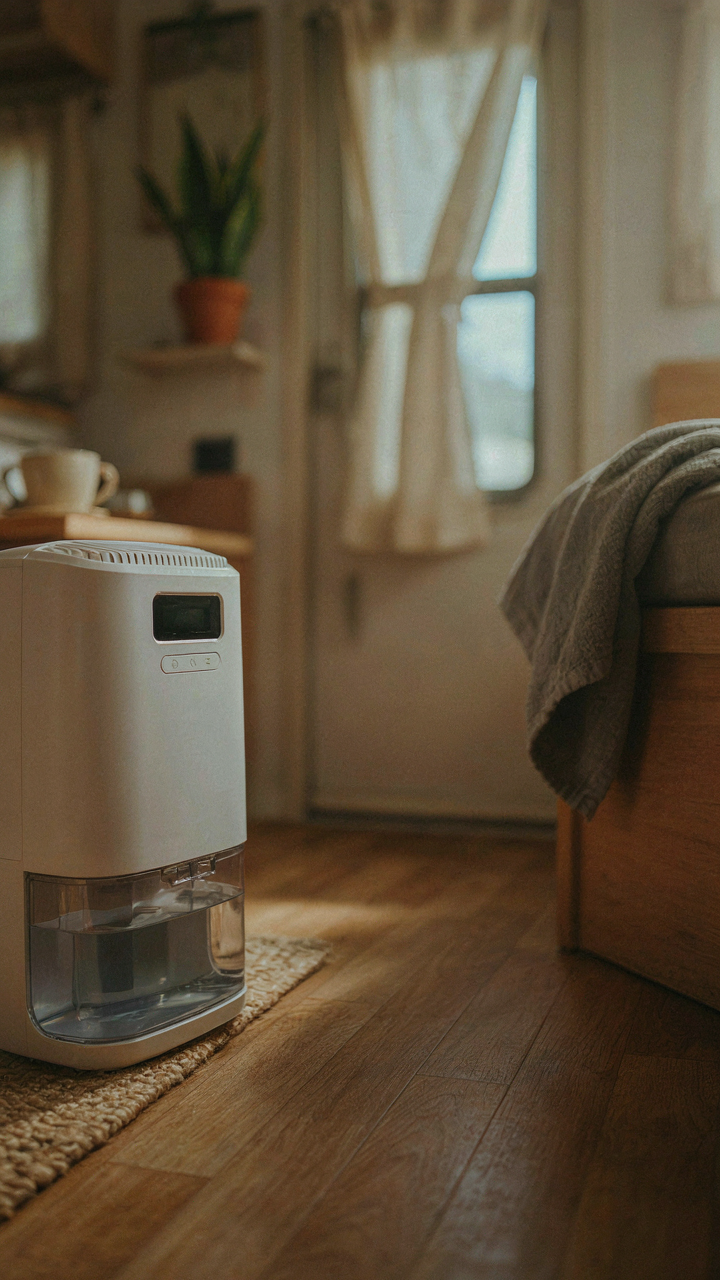
Capacity And Efficiency Match Your Space

You want a dehumidifier because you’re hoping it solves the problem without you having to change behavior, but that’s not how this works. The real mechanism here is thermodynamic equilibrium: your RV is a sealed box where warm air from heating meets cold exterior surfaces, and water has nowhere to go but your walls. A 30-pint dehumidifier pulls 30 pints of water per 24 hours under lab conditions at 80 degrees and 60 percent humidity. Winter conditions are colder and drier, so actual performance drops 40 to 50 percent. Size your unit for your RV’s volume, not for what marketing claims.
Most RVs between 25 and 35 feet need a 50-pint unit running continuously during winter trips to handle condensation from cooking, showers, and human respiration. Smaller travel trailers manage with 30-pint capacity if you ventilate aggressively. The efficiency rating matters less than continuous operation. A cheap dehumidifier running 16 hours beats an expensive one running 6 hours. Check the amperage draw before buying: anything above 15 amps forces you to run it on a dedicated circuit or risk tripping your RV’s main breaker.
Placement Determines Whether It Actually Works
Most RVers put dehumidifiers in the center of the RV and wonder why condensation still pools on windows. That’s wrong. Position the unit where moisture accumulates first, which is always near exterior walls and windows in the coldest zones of your RV. Front near the cab in a Class A. Back bedroom in a travel trailer. The dehumidifier pulls humid air across its coils, cools it to the dew point, and drains the collected water. If it’s 15 feet away from where moisture forms, you’re just moving air around.
Run the dehumidifier continuously when occupying the RV in winter, not on a timer. Empty the drain tank every 8 to 12 hours or run a condensate pump to an outside tank so you don’t interrupt operation. Clean the coils every two weeks with a soft brush to prevent mold growth in the unit itself, which defeats the purpose. Set it to maintain 40 to 50 percent interior humidity. Monitor with an inexpensive hygrometer. Below 30 percent creates static and cracks sealants; above 60 percent breeds mold and rot.
Insulation: The Foundation Your “Hacks” Ignore
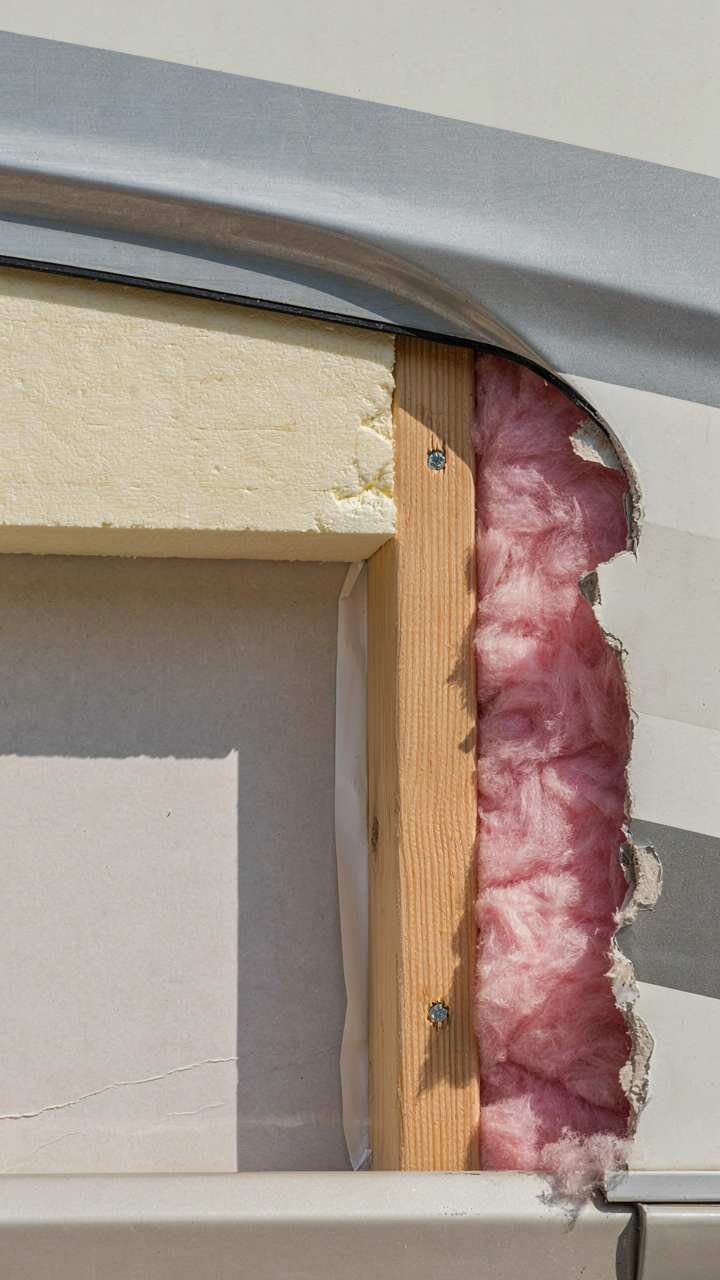
Thermal Boundaries, Not Magic

You want a quick fix because admitting your RV’s shell is compromised feels like failure. Physics doesn’t care about your feelings. In thermodynamics, a system maintains temperature only when energy input matches energy loss across its boundary. Your RV’s insulation is that boundary. No amount of towel tricks or fan spinning changes the rate heat escapes through thin walls, single-pane windows, and aluminum seams. Condensation forms because warm interior air hits cold surfaces. Cold surfaces exist because your thermal envelope is weak.
Most RV walls contain R-7 to R-15 insulation. Stick-built homes start at R-15 and go higher. Your RV was engineered for weight and cost, not winter performance. Vapor barriers in factory insulation often fail or degrade over years. You can’t hack your way around physics. You can only measure where energy bleeds, then plug the gaps.
Upgrade Your Thermal Envelope
Retrofitting insulation is labor intensive and disruptive. It requires opening walls or ceiling cavities, removing old material, installing new batts or spray foam, then sealing everything again. Most RV owners skip this because it means gutting sections of your living space. That avoidance is why condensation seems unsolvable.
Start with the highest-impact surfaces: windows and vents. Window inserts made from rigid foam or reflective materials reduce thermal transfer significantly. Vent covers block convective heat loss when not in use. Seal all seams around cabinets, trim, and plumbing penetrations with removable caulk. Once these are sealed, your interior air temperature stabilizes, reducing the temperature delta that drives condensation onto cold surfaces.
The Condensation Elimination Process: A Systems Approach

Find Where Water Actually Enters

You want to believe condensation is just bad luck, some unavoidable tax on living in an enclosed box. It’s not. Think like a thermodynamic engineer: water doesn’t appear from nowhere. It moves through weak points in your envelope barrier, and those points are findable.
Gaps around plumbing penetrations, roof vents, and window frames are where most moisture sneaks in before it ever condenses on your walls. Run your hand around the base of your toilet, along the shower pan edges, and where your fresh water tank sits. These spots pull cold air from outside and warm moist air from inside collides there first. That’s where condensation pools before you notice it spreading across the ceiling.
One Integrated System Beats Scattered Fixes
The common advice treats condensation like separate problems: crack a window, run the furnace, buy a dehumidifier. Wrong framing. Condensation is a system where moisture generation, air circulation, temperature control, and vapor barriers all feed one outcome. You either manage all of them together or none of them work.
Seal entry points first. Then manage humidity production in the space, not just extraction afterward. This means venting your cooking and shower exhaust directly outside, not into your wall cavity. Control your interior temperature to create a stable dew point. Use insulation strategically to keep walls above that threshold. When these factors align, condensation stops before you need emergency dehumidifying. The mechanic is simple: eliminate the conditions that create water in the air, rather than constantly fighting water that’s already there.
The Real Cost Of Condensation: Beyond The Annoyance
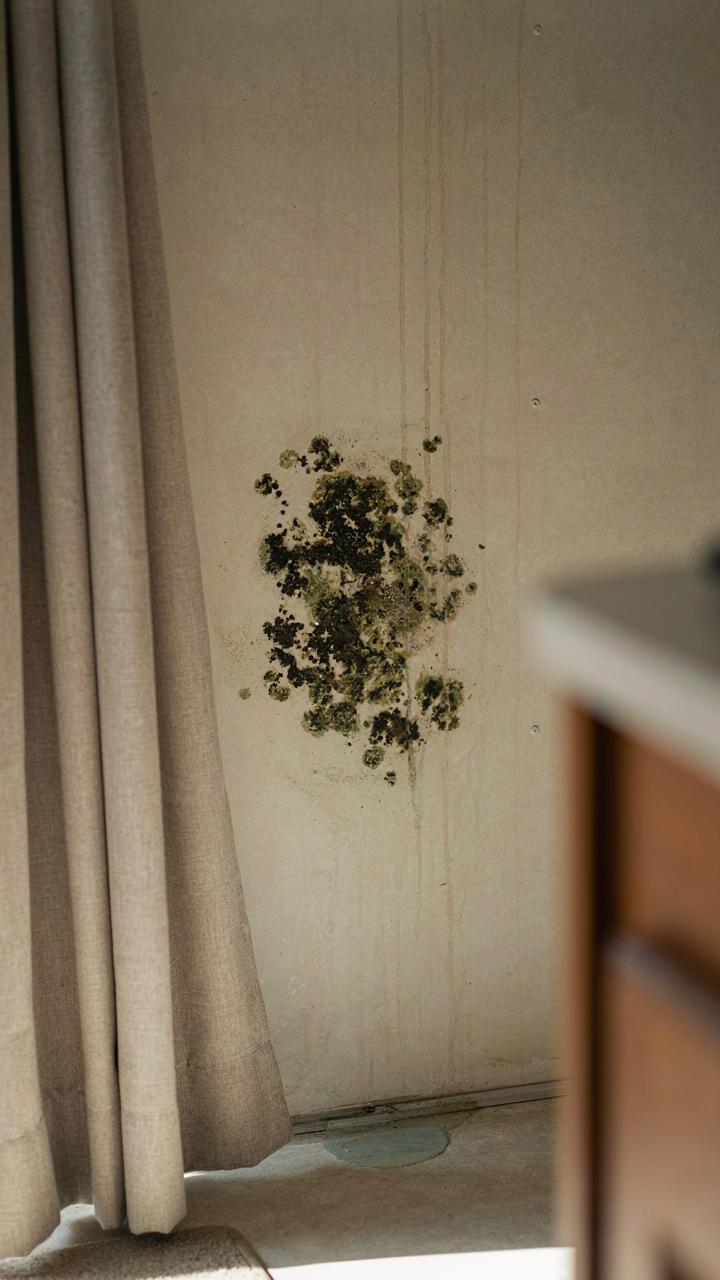
When Mold Becomes Your Roommate

You’re not reading this because you care about moisture. You’re reading this because you’re afraid of what happens when you ignore it. Condensation is a biology problem, and biology doesn’t care about your schedule. Mold needs three things: moisture, organic material, and time. Your RV interior provides all three. Fabric, wood trim, insulation, and drywall are all food sources. Condensation creates the moisture. You just need to fail at ventilation long enough, and colonization begins.
The respiratory damage starts before you see the mold. Mold spores trigger histamine release in your lungs and sinuses. Dust mites thrive in humid environments and produce allergens that accumulate on fabrics and bedding. People with asthma or sensitivity experience symptoms in days, not weeks. Others think they’re getting sick from the road when they’re actually reacting to fungal growth inside their own sleeping space. The mechanism is straightforward: high humidity inside an RV creates ideal conditions for mold and mite populations to establish themselves where you breathe eight hours a day.
Structural Failure Has A Timeline
This is where condensation stops being an inconvenience and becomes a financial catastrophe. Water always moves to the weakest material. In RV construction, that’s typically the insulation layer between interior and exterior walls. Once water saturates foam or fiberglass insulation, it loses R-value permanently. The wood framing beneath rots from the inside out. You won’t see it until the damage is structural.
- Roof and seal deterioration: Water pools in roof valleys and corners, finding micro-cracks in sealant. Repeated freeze-thaw cycles in winter expand these gaps until water penetrates the decking layer underneath.
- Wall delamination: Interior walls separate from the exterior shell when insulation absorbs moisture and loses adhesive bond. This creates cavities where water pools and mold accelerates.
- Floor soft spots: Water migrates downward through walls into the subfloor. The plywood core absorbs moisture, swells, and becomes structurally compromised within one season.
- Window and door frame rot: Condensation pools on windows and frames. Wood frames absorb this moisture daily. Rot progresses silently until the frame crumbles when you touch it.
- Furnace and appliance failure: Moisture corrodes electrical connections and control boards. Components fail prematurely from oxidation rather than wear.
The RV industry doesn’t build these structures with industrial-grade moisture barriers. They use standard consumer materials designed for stationary homes with permanent HVAC systems. Once structural damage begins, repair costs exceed the RV’s resale value. Prevention means addressing condensation sources immediately, not waiting for visible damage to appear.
The Real Problem Isn’t Condensation; It’s Your Resistance To Fundamental Environmental Control
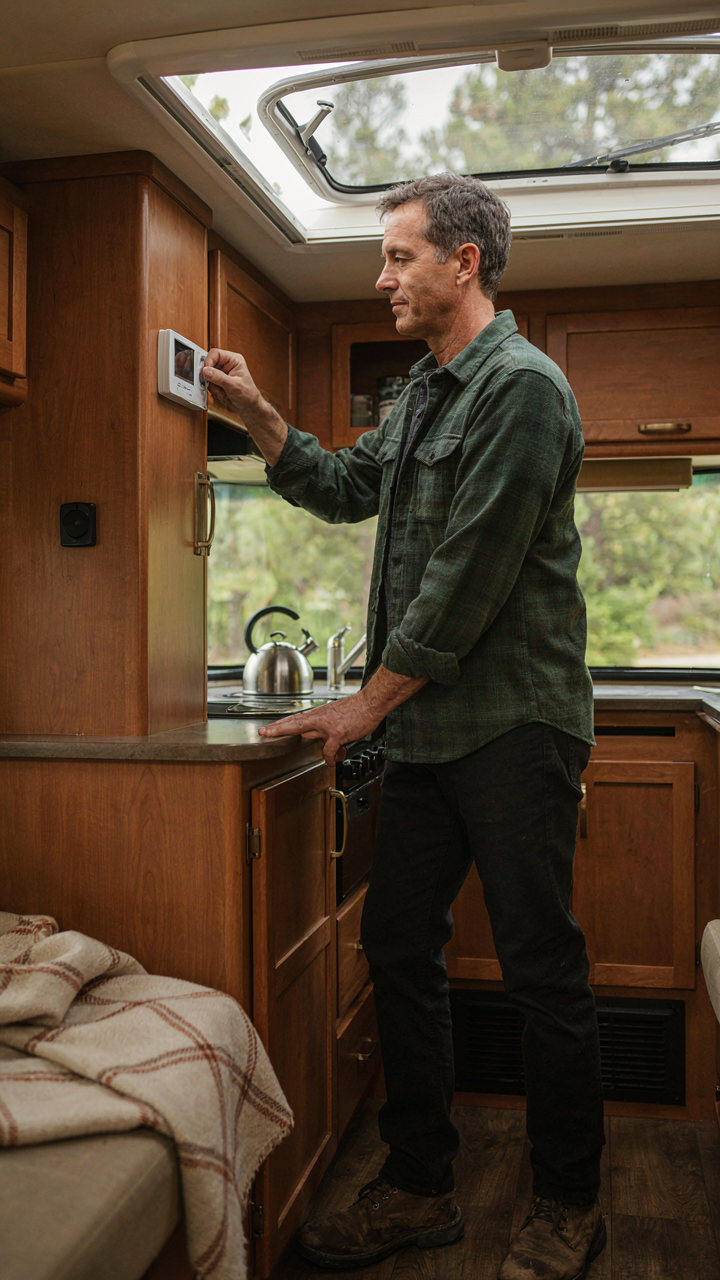
Most RV owners treat condensation like weather—something that happens to them. It doesn’t. You control the air inside your rig. Temperature, humidity, airflow. Pick one today. Drop your interior temp five degrees or crack a window for fifteen minutes after cooking. Stop waiting for conditions to improve and start engineering them. Your RV condensation problem exists because you haven’t decided it won’t.



