
The “Glamping Tent” Deception: Why Most Setups Fail

Ground Preparation Gets Ignored
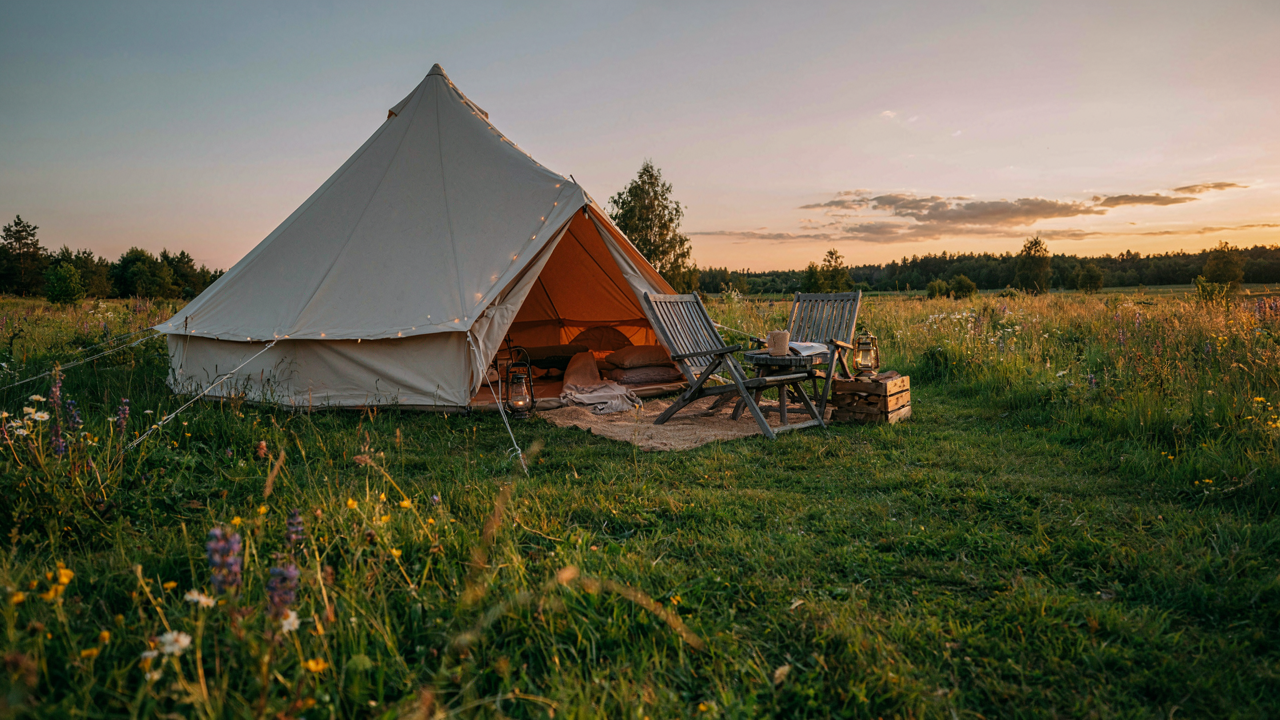
You want the Instagram moment without the work, and that’s exactly why your tent sags after two days. Ground preparation isn’t glamorous, so people skip it. The mechanism is simple: a bell tent’s weight concentrates on anchor points. If the ground beneath those points is uneven, compacted, or wet, the fabric stretches asymmetrically. Soft spots sink. Hard spots resist. The tent becomes a distorted mess.
Most guides tell you to “level the area.” That’s vague enough to be useless. What actually matters: excavate high spots by two inches, compact low spots with a tamper, and slope the ground away from the tent perimeter for drainage. Do this before you stake anything. The tent’s structure depends on tension across all anchor points. Uneven ground breaks that tension immediately.
The Myth Of The Perfect Interior Layout
Everyone envisions a symmetrical, magazine-ready interior the moment they buy a bell tent. That fantasy dies the second wind hits. The real problem people miss is that interior layout determines how air moves and where heat concentrates. Furniture placement isn’t decoration, it’s load distribution and microclimate management. You can’t arrange a 16-foot bell tent like a cabin because the physics are different. The fabric itself is the insulation layer, not walls.
Heavy items toward the center, lighter pieces toward edges. This prevents the fabric from sagging into furniture or creating dead air pockets where condensation collects. Ground-level thermal mass like water containers or stone should sit where morning sun enters. This isn’t style advice, it’s thermodynamics. Where you place a bed determines whether you wake up cold or comfortable. The layout solves a problem before the problem occurs.
Bell Tent Site Selection: The Unseen Foundation

Terrain Assessment For Drainage And Exposure

You want the perfect spot because a bad choice ruins the entire experience before you even hang a lantern. Here’s what matters: drainage wins every decision you make. Use the hydrologic principle of hydraulic conductivity—soil’s ability to move water—to read your land. Clay holds water and creates mud. Sandy or gravelly soil drains fast. Test this by pouring water on the ground. If it pools, that spot fails. Slope matters more than you think. A slight grade toward a downhill direction moves water away from your tent footprint naturally.
Sun and wind interact on the ground in ways most people ignore. East-facing slopes catch morning sun, which dries dew and warms the interior early. West exposure brings intense afternoon heat that can make a bell tent interior unlivable in summer. Wind corridors form where terrain funnels air, creating stress on guy lines and fabric. Walk the site at different times to observe where wind actually moves, not where you think it should. Never rely on cardinal direction alone—the land shape determines real exposure.
Hidden Environmental Factors That Break Setup
Vegetation and debris underneath the tent compress unevenly, creating pressure points that degrade fabric over time. Don’t clear the site bare. Remove rocks, sticks, and roots larger than your thumb, then rake smooth. Leave low grass intact—it cushions impact and prevents direct soil contact. Water table depth matters more than most glampers realize. If you’re within two feet of groundwater, moisture wicks up through soil into your tent floor no matter how flat the land looks. Ask locals or check a county soil survey if you’re unsure.
Root systems from nearby trees create invisible hazards. Roots surface over time and catch guy lines, then pressure builds when wind hits. Trees also drop branches and create dense shade that traps moisture underneath the bell tent canopy. Set your tent at least twenty feet from mature tree trunks. Check weather patterns for that location across seasons—wind direction shifts, rainfall intensity varies, and ground conditions change. Map your site during the season you’ll actually use it, because spring soil feels nothing like summer soil. Footprint placement determines whether you troubleshoot problems every day or never think about them again.
The Minimalist Bell Tent Set Up: Efficiency Over Excess
What Actually Needs To Be There

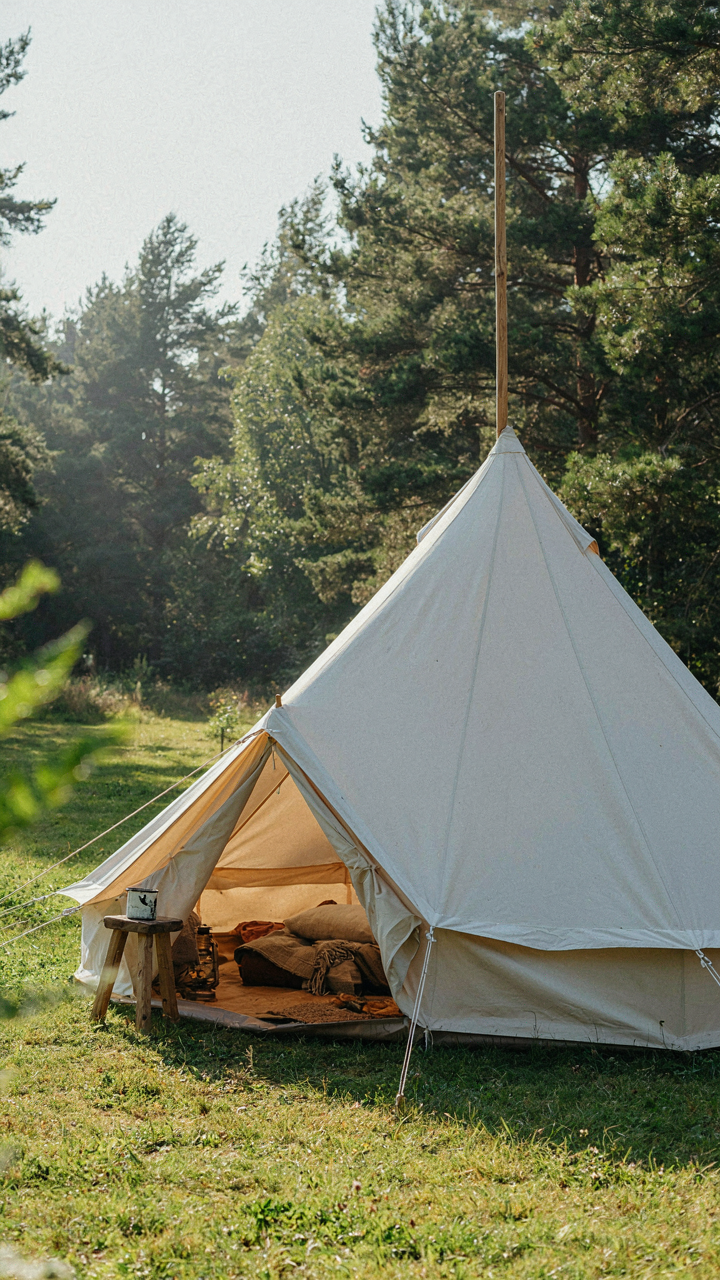
You want to feel like you’ve optimized something without admitting you’re just afraid of forgetting gear and looking unprepared. Here’s the mechanism: bell tents operate on load bearing, not decoration. The canvas structure handles weather. The frame handles tension. Everything else either supports these two systems or it doesn’t belong. Most glamping setups fail because people add comfort items before securing the foundation. You need the tent itself, stakes, guy lines, a ground tarp, and a way to manage interior moisture. That’s the operating system. Everything attached to it after that is a feature, not a requirement.
The interior doesn’t need much either. A quality sleeping layer, a way to manage temperature swings, and storage that keeps gear off the ground. Bell tents don’t need elaborate furniture arrangements or decorative textiles to function. A raised bed frame, two storage trunks, and basic ventilation solve ninety percent of comfort problems. The psychological pull toward “making it feel like home” is why people overpack. Strip that impulse. A minimalist interior in a bell tent actually reads as intentional, not sparse. You’ve removed the noise. That forces the tent’s geometry and light quality to do the work instead.
Get It Standing In Under An Hour
The common advice here is wrong. Most setup guides treat bell tent assembly like IKEA furniture, adding steps that don’t matter. Think like military logistics instead: the goal is functional occupancy, not perfect aesthetics. A bell tent’s setup speed depends on three variables: frame assembly sequencing, stake placement pattern, and guy line tension protocol. Master these three, and your physical effort drops by half.
Start with the frame baseplate centered. Insert poles in sequence, not randomly. Most people waste time adjusting pole positions mid-assembly. Pre-mark your frame assembly order once, then repeat it every setup. Stakes go in at forty-five degree angles, measured from the tent base, not eyeballed. Use a quick-tension system like ratchet straps or carabiners instead of traditional rope knots. Guy lines get tensioned to the point where the tent fabric sits flat against the frame with zero wrinkles, then you stop. Overtightening creates stress points. Once fabric is seated, interior setup takes fifteen minutes. You’re done.
Bell Tent Platform Design: The Ground Game Advantage
Why Your Platform Matters More Than Canvas
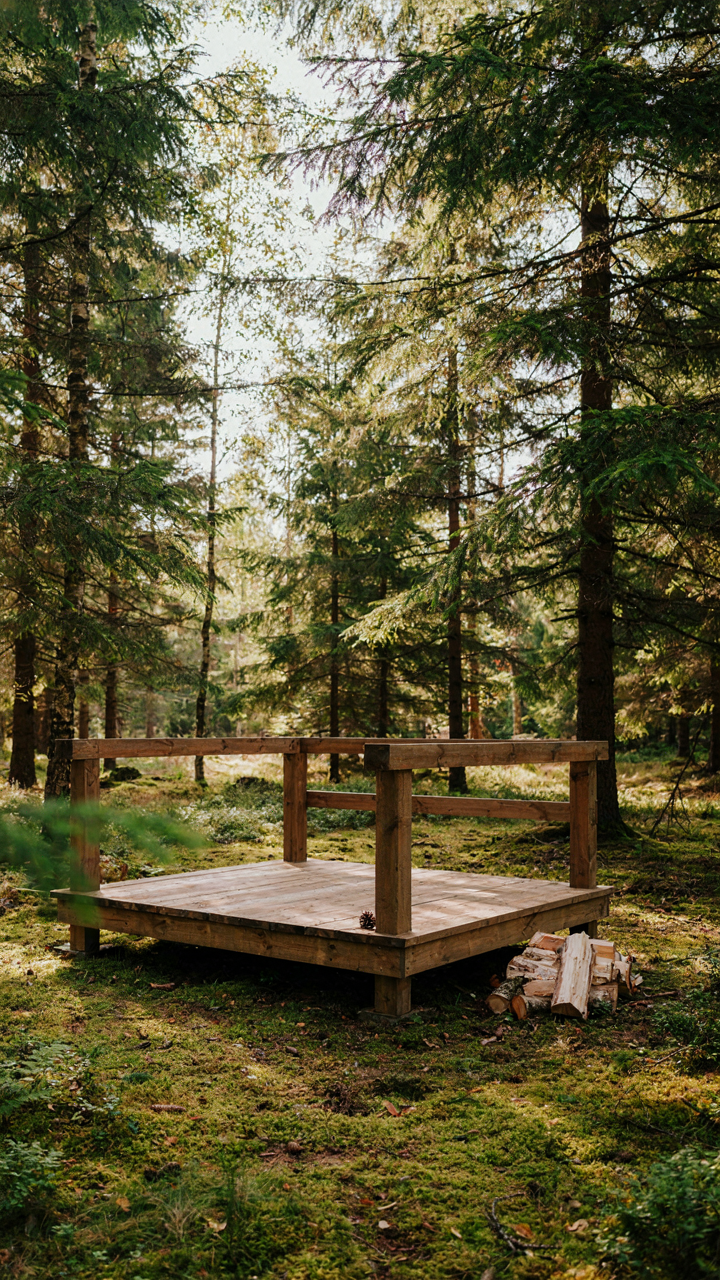
You want comfort without looking like you’re camping. A platform isn’t luxury theater—it’s structural physics. The mechanism is simple: a platform isolates the tent from ground moisture, distributes weight evenly, and eliminates the sag that destroys both sleep and fabric longevity. Ground contact kills bell tents faster than any weather. Water wicks into the base, condensation pools underneath, and uneven settling tears seams. Most glampers ignore this and wonder why their tent fails in year two.
Your platform choice determines three outcomes: thermal performance, structural integrity, and how long you actually own this thing. Decking—whether wooden pallets, composite boards, or gravel with landscape fabric—sits between soil and canvas. Gravel compacts and shifts. Wood platforms rot unless treated and elevated. Composite materials resist moisture but cost more upfront. The real move is choosing based on your climate’s ground saturation pattern and your tent’s footprint, not based on what looks Instagram-ready.
Platform As Force Distribution
Leverage in structural engineering means a smaller force creates larger output through distance and angle. Your bell tent exerts downward pressure on soil. Uneven ground concentrates that force on high points, creating stress fractures in both canvas attachment points and the wood frame itself. A platform extends the contact surface, spreading load evenly across a larger area.
This is why a solid, level platform costs less than replacing a tent with torn stress points or a warped pole structure. Level platforms prevent the slow creep of frame misalignment that happens when one side settles deeper than others. Install your platform with a slight crown—a barely perceptible rise toward center—so water runs off rather than pooling. Measure diagonal corner-to-corner distances to confirm the platform is square before assembly. Square platforms distribute force symmetrically.
Bell Tent Interior Ideas: Function First, Aesthetics Second
The Layout That Prevents You From Living Like A Packrat

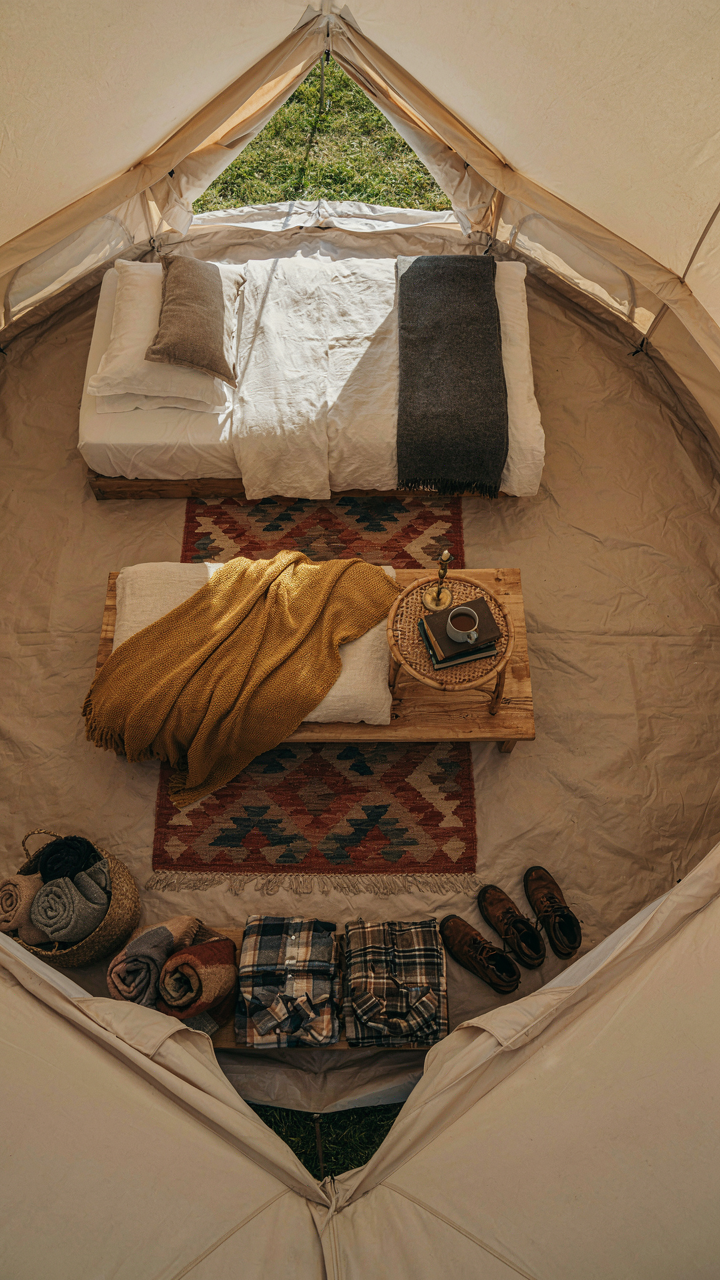
You want your bell tent to feel spacious because a cramped interior signals poor planning, and poor planning signals you don’t belong in luxury camping. This is about movement patterns, not vibes. Think in zones like a warehouse manager does: entry zone, sleeping zone, living zone, storage zone. Each zone needs a clear path. Don’t cluster furniture in the center. Dead space is intentional. It’s what makes the tent feel large.
The floor plan works only if you can move without rotating your shoulders sideways. A standard bell tent ranges from 16 to 26 feet in diameter. Calculate usable floor space by subtracting the wall footprint. Place the bed perpendicular to the entrance when possible, never blocking the door. Position seating to face outward toward views or the entrance, not inward toward the tent’s center. This single choice determines if guests move naturally or awkwardly.
Storage That Actually Holds What You Own
Everyone talks about decorative baskets and vintage trunks. Ignore that advice. It’s expensive set dressing that solves nothing. You need storage that matches what you actually bring: textiles, toiletries, cookware, seasonal gear. Start with the weight distribution rule. Heavy items go low and toward the tent’s perimeter walls where the canvas is strongest. Lighter items go higher or near the center pole where vertical space is accessible but load is minimal.
Use vertical wall pockets and hanging organizers along the bell tent’s interior canvas seams. These don’t take floor space and they keep items visible and reachable. A 4-shelf unit against the perimeter wall stores more than three decorative baskets while occupying identical footprint. Label compartments by function, not by aesthetic theme. When you can find your items in darkness or at 6 AM without waking others, your storage system works.
Glamping Interior: Engineering Comfort, Not Just Decor
Layering Strategies For Temperature Swings

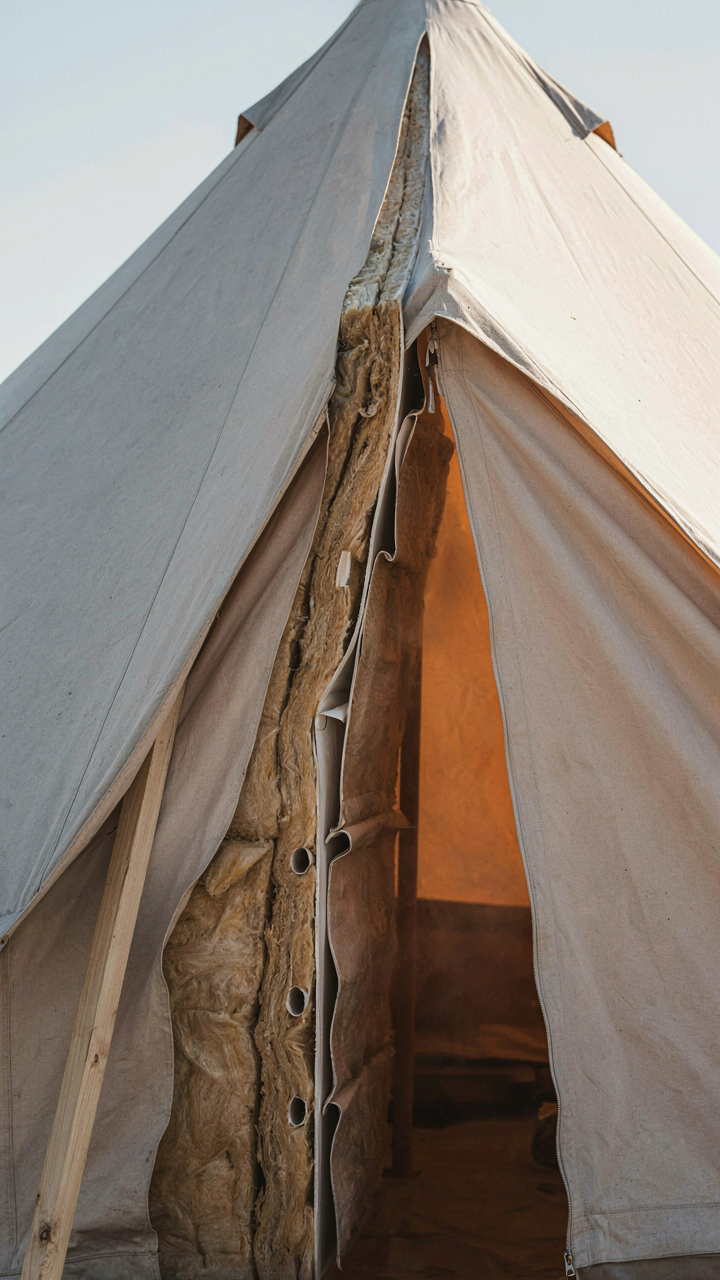
You care about this because staying warm matters more than looking like you’re roughing it. Temperature regulation in a bell tent operates on the same principle as insulation in physics: you need to trap dead air. Canvas itself conducts heat. What stops temperature swings is the gap between your inner setup and the outer shell, plus the layers you add inside that tent.
A bell tent’s single canvas wall gives you roughly R-2 insulation value. That’s nearly nothing. Winter camping requires three layers minimum: a thermal ground barrier (wool or reflective), insulating furniture that doesn’t touch the canvas, and a suspended ceiling liner that traps rising heat. Summer demands the opposite mechanism: airflow paths that create convection, raised beds away from ground cold, and light-colored textiles that reflect rather than absorb. The goal isn’t one perfect temperature. It’s controlling which direction heat moves.
Light And Power Without Grid Dependence
Most glamping guides treat lighting as decoration. That’s wrong. Poor light design creates two real problems: disrupted sleep from wrong-spectrum bulbs, and dead batteries that leave you solving problems in darkness. A bell tent needs a power hierarchy, not just scattered lights. Your primary source should be a lithium battery bank (100Ah minimum) mounted at entry height, kept outside the sleeping zone. This keeps voltage stable and heat output away from your bed.
Fixture placement matters more than wattage. Install your main light at the tent apex on a dimmer, never pointed at sleeping areas. Add task lighting at the entrance and bathroom zones. Use warm-spectrum LEDs (2700K or lower) after sunset to preserve melatonin production. Your battery bank connects to a solar array or charge controller tied to an external generator. The mechanism is simple: centralized power with distributed output prevents the single-point failure that kills comfort in a glamping setup where you can’t just flip a breaker.
The “Glamping Tent Interior Ideas” Fallacy: Beyond Pinterest Boards

What Instagram Won’t Tell You
You’re scrolling through bell tent interiors because you want permission to feel like your space matters. Here’s the mechanism: Instagram-optimized glamping setups prioritize photography over function. They layer textiles, hang pendant lights, and position furniture for angles. The result is a tent that photographs well for 20 minutes and becomes impractical for actual living. The fabric accumulates dust. The lighting creates heat. The arrangement blocks movement. Function loses to aesthetics every time, and you don’t realize it until you’re inside for three days.
Durability and multi-purpose design solve this. A single linen throw that warms you at night can hang as a privacy screen at dawn. One solid wood table serves meals, holds gear, and anchors the space without visual clutter. Canvas storage cubes collapse flat but support weight when needed. This isn’t boring. It’s honest. The interior that works is the one you don’t have to adjust constantly because it was built for use, not for the camera.
Design That Actually Survives Use
Textiles rot. Pendant lights fail. Decorative items become clutter. The industry sells you soft furnishings as if they’re permanent solutions when bell tents are inherently transient spaces exposed to temperature swings, humidity, and condensation. Real glamping interiors use materials that withstand moisture and UV exposure without degrading. Canvas, untreated wood, and wool outlast synthetic fabrics and painted metal. They also age visibly, which means your tent improves with use instead of declining.
Pick items that serve two functions minimum. A wooden bench becomes seating, a storage base, or a work surface depending on the day. Heavy rope can organize gear or serve as a clothesline. Metal S-hooks hang bags, lanterns, or drying laundry. The moment you bring in something that only looks good, you’ve created maintenance work. Maintenance in a temporary structure is wasted time. Select what works first, and let the aesthetic follow from honest materials and clear purpose.
Advanced Bell Tent Glamping: Mastering Environmental Control

Stopping Condensation Before It Kills Your Setup

You want to wake up dry because wet canvas means mold, smell, and a ruined trip. The mechanism is simple: warm air holds moisture, cold surfaces reject it, and your tent becomes the collection point. Think of thermodynamics—the tent operates as a heat exchanger. Outside air cools the canvas shell while interior heat and body moisture create pressure inside. Water condenses on the coldest surface, which is always the fabric.
- Cross ventilation through door and back panels: Open opposing sides to force air movement, not stagnation. This disrupts the temperature gradient that creates condensation zones.
- Raise the bell tent slightly off ground: Use wooden blocks or gravel base under the center pole and perimeter. Ground contact wicks moisture directly into the canvas.
- Install roof vents near the peak: Many setups skip this. A small hole with a rain cap lets warm, humid air escape at the source instead of settling.
- Run a small electric fan at night: Point it toward the door or vent opening. Active circulation prevents pockets of stale, saturated air from forming.
- Leave gaps in your door and window flaps: Don’t seal the tent airtight. Passive airflow between inside and outside equilibrates humidity naturally over hours.
Most glamping guides tell you to “open windows for fresh air” and stop there. They miss that timing matters. Ventilate hardest during the coldest part of dawn, when dew forms. Run fans or crack doors for thirty minutes after you wake and the interior is still warm. By the time the air outside warms up, the humidity inside has already escaped.
Keeping Animals Out Without Toxins
You need pests gone, not dead animals rotting near your tent. The real leverage isn’t poison or traps that work once. It’s understanding that animals follow two signals: food sources and safe pathways. Block both and they move on.
Store all food, toiletries, and garbage in sealed containers at least fifty yards from your sleeping area. Animals can smell a yogurt container from a quarter mile away. Your tent smells like food to them because you eat inside it. Wash your hands and face before bed. Change clothes if you cooked. This isn’t paranoia, it’s signal management. For perimeter control, clear brush and low vegetation in a ten-foot ring around the tent. Most ground animals won’t cross open space where predators can see them. Lay down wire mesh or chicken fencing around the base if you’re in high-risk areas like bear country or regions with badgers. Bury it four inches down so burrowing animals can’t undermine the barrier. Run motion-activated lights on the approach paths. Animals equate light with human presence and avoid it. Check your canvas weekly for holes or tears, especially where the tent touches ground or tree limbs. A single opening is an invitation.
Bell Tent Ideas: The Iterative Improvement Protocol

Track What Actually Happens On Site

You want to avoid repeating mistakes because repeating mistakes feels like incompetence. The real mechanism is memory decay. You think you’ll remember what failed last time. You won’t. The setup that went wrong three months ago will blur into the setup that went right, and you’ll rebuild the same problem.
Write down the specific failure in the moment it happens. Not “wind was bad.” Write “guy rope on north side pulled stake at 2 AM because tent was 6 inches too close to tree line.” Document the fix you applied. Document the weather conditions, ground type, and exact setup time. This becomes your protocol baseline, not your opinion.
Refine Based On Real Conditions
Everyone says “practice makes perfect.” That’s incomplete. Iteration against actual feedback makes better. There’s a difference. You need to test changes in the same environment where problems occur, not in ideal conditions.
Take one documented failure. Change one variable in your next setup. Maybe it’s stake angle. Maybe it’s guy rope tension. Maybe it’s tent orientation relative to wind patterns. Setup multiple times in different seasons and soil types. Record what shifts. After five cycles, you own the mechanism instead of guessing at it. That’s when your setup becomes reliable.
The Real Obstacle Isn’t The Tent; It’s Your Inability To Prioritize And Adapt To The Unpredictable Demands Of Temporary Luxury
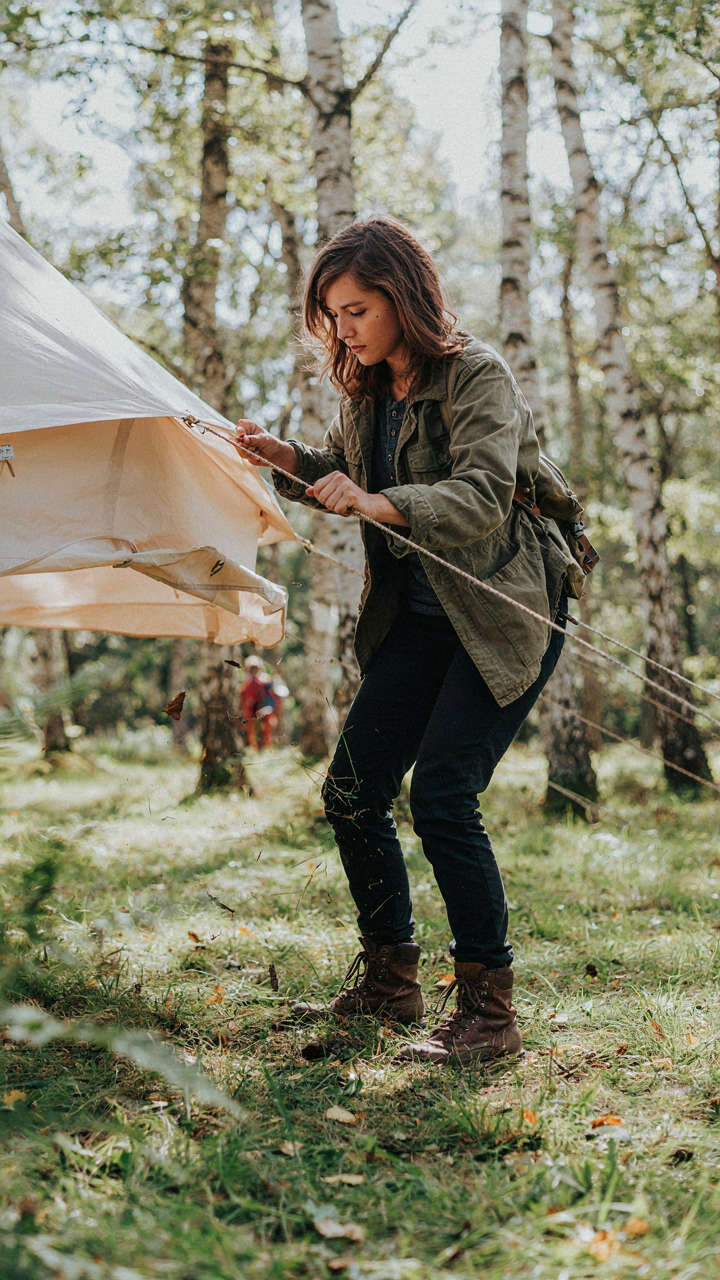
Most people fail at bell tent setup because they treat it like a checklist instead of a problem to solve in real time. You can’t memorize your way through wind, uneven ground, or guest expectations that shift hourly. The real skill is deciding what matters most right now and adjusting without losing your mind. Stop researching perfect setups. Pick a location this weekend, pitch your tent, and spend three hours breaking it. That friction teaches you more than any guide. You either adapt fast or you sleep on the ground.



