
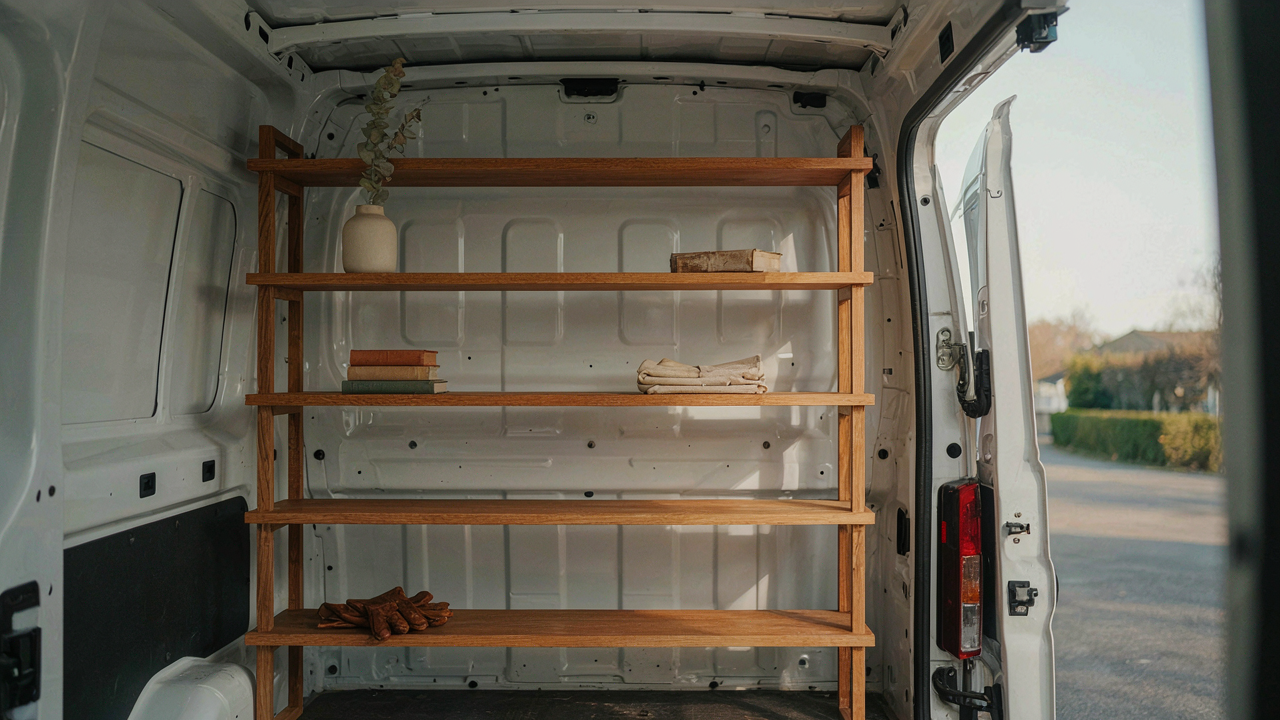
The Unseen Cost Of “Optimized” Van Shelf Storage

The Complexity Trap
You want to feel like you’ve solved the problem before you start building. That’s the real reason complex shelf designs appeal to you. Shelving systems are mechanical leverage problems, borrowed from structural engineering. The principle of load distribution across multiple points seems smart until you realize most van interiors don’t need it. You don’t have warehouses of weight. You have clothes, tools, and a laptop. Over-engineering adds joints, fastening points, and adjustment mechanisms that all fail before the frame does. The shelf itself becomes harder to modify, access, or remove later. Simplicity isn’t the amateur’s path. It’s the professional’s.
Every added bracket, rail, or leveling system increases friction between conception and completion. You spend time sourcing parts that don’t talk to each other, drilling holes to spec, and testing weight distribution on a structure holding 40 pounds. The real cost isn’t the materials. It’s the 12 extra hours of planning and assembly that you bill to yourself as “getting it right” when you could have built something functional in half the time. When you finally move, that “optimized” system stays bolted to your van because removing it takes longer than living with it.
Hidden Material And Time Drains
Building a shelf system that looks good on Pinterest requires precision you won’t maintain. Cutting plywood to exact dimensions, routing edges, applying finish coats, ensuring level installation across a curved van wall, and accounting for movement during travel adds 30 to 40 hours easily. Most builders don’t account for this when they budget materials. They buy lumber, fasteners, and finishes, then spend money on tools they’ll use once: orbital sanders, paint sprayers, level sensors.
The real drain is labor arbitrage working backwards. You’re paying yourself at your hourly rate to do carpentry work that costs 200 to 400 dollars if outsourced, which means every hour spent detailing joints is money you’re not making at your actual skill. Materials for a simple build run 80 to 150 dollars. Materials for an “optimized” build run 250 to 450 dollars. The gap isn’t innovation. It’s scope creep. Stop adding features the moment your shelf holds what you need without sagging after 10,000 miles of driving.
Diy Van Shelves: The Minimalist’s Manifesto

Keep Only What Actually Moves

You want to feel productive and organized without admitting you’re just avoiding the weight problem. Here’s the mechanism: every item in a van costs you space, weight capacity, and mental load. Industrial design calls this the “constraint optimization principle” – you solve for multiple variables at once, not one. In a van, constraint is your actual constraint. You don’t organize better by having more shelves. You organize by eliminating what doesn’t earn its cubic feet.
The common advice is to “start with what you use.” That’s incomplete. You need to count weight per use. A cast iron pan used twice a week costs more than a lightweight titanium one used daily. Strip the van down to items with use-to-weight ratios above your threshold. If something lives on a shelf untouched for three weeks, it’s dead weight funding someone else’s lifestyle fantasy, not yours.
Match Storage To Single Tasks
Each shelf section should solve one problem, not become a junk drawer that happens to be vertical. This cuts retrieval time and prevents the cascade where you stack unrelated items because “there’s still space.” A shelf for cooking gear stays cooking gear. A shelf for hygiene products stays hygiene products. The mechanism is cognitive load reduction. Your brain doesn’t have to parse categories in motion while driving rough roads.
Build your shelf depths around the deepest item that category requires. Cooking: deepest is your pot or large container. Tools: deepest is your longest screwdriver or wrench. Don’t add extra depth “just in case.” Extra depth becomes extra weight becomes reduced cargo capacity becomes fewer trips. Measure your actual items first, then set shelf depth to that measurement plus one inch for easy access and removal.
Work Van Storage Ideas: The Adaptable Grid System

Components, Not Fixed Structures

You want to feel like you’ve solved storage permanently. That won’t happen. The real mechanism here borrows from modular robotics: you build from standardized components that attach to a backbone, not from monolithic boxes bolted into place. Your grid becomes the system, not the shelves themselves.
Robotics solved the problem of adaptation through interchangeable joints and standardized connection points. Apply this directly: install a French cleat system or T-slot aluminum rail as your backbone. Then mount shelves, bins, and brackets that slide, swap, and relocate without tools. This eliminates the false choice between “permanent but wrong” and “removable but unstable.”
Reconfigure When Your Work Changes
Most van owners build once and defend their choices for years. Wrong. Your needs shift when you take different jobs, change clients, or realize what actually works versus what looked good in theory. The grid system lets you iterate without ripping out fasteners or damaging walls.
Start with anchor points spaced at intervals that match your heaviest loads. Mount adjustable shelf brackets every 16 or 24 inches vertically. When your needs change, relocate shelves up or down, swap depths, or redistribute weight across the system. This compounds over time: each reconfiguration teaches you what works, so your next iteration gets better. Document your layout with photos after each change to spot patterns in what actually moves versus what sits static.
Van Life Storage Solutions: Gravity Defying Hacks

The Wall Is Your Real Estate

You want to feel like you’ve optimized something without actually moving. Vertical shelving works because physics doesn’t negotiate. When you stack horizontally, you lose cubic feet. When you stack vertically, you reclaim the entire height of your van’s interior. Most van builds waste the space between shoulder height and ceiling by treating it as dead air. The mechanism is simple: load-bearing capacity stays constant, but the footprint shrinks. A three-foot-tall wall-mounted unit takes zero floor space while holding the same weight as a horizontal shelf taking up three feet of your living area.
Mount shelves at staggered heights rather than uniform intervals. This forces you to organize by item size, not convenience. Uneven spacing means smaller boxes go in tighter spots, larger gear goes where it fits naturally. Use 3/4-inch plywood and 1.5-inch steel angle iron mounted directly to van framing studs, not to fiberglass panels or thin aluminum. Bolt through with grade-8 fasteners into the metal frame itself. The load capacity becomes predictable: each stud can handle 300 to 400 pounds depending on mounting depth and distance from the frame rail.
Under And Behind Everything
This is where amateur builds fail. The real storage capacity isn’t in what you bolt to walls. It’s in the negative space nobody thinks to claim: under existing shelves, inside cabinet kick spaces, and on door surfaces. Most van interiors have six to eight square feet of door area doing nothing. That’s a complete category of storage nobody mentions because it doesn’t look like a “real” shelving system.
- Door panel pockets: Glue 1-inch foam-backed fabric panels to interior door surfaces, then sew or bolt shallow canvas pockets. Holds 20 to 30 pounds per door depending on pocket depth and fastening method.
- Under-shelf slide trays: Install 18-inch deep plywood trays on ball-bearing drawer slides under existing shelves. Slides cost 15 to 25 dollars per pair and double your storage without adding height.
- Kick-space boxes: Build shallow plywood boxes 4 to 6 inches tall that fit under counters. Access them by pulling forward. Most vans have 12 to 18 linear feet of wasted kick space.
- Magnetic strips and hooks: Mount metal strips to shelving undersides for tool storage. Magnets hold 5 to 15 pounds per foot depending on magnet grade and surface prep.
- Vacuum-sealed bags in overhead cabinets: Reduces volume by 60 to 70 percent for seasonal gear. Protects contents from dust and moisture during travel vibration.
The calculation here is brutal and real: if your van is 12 feet long, five feet wide, and five feet tall, you have 300 cubic feet total. Subtract the engine compartment, your bed, and your living space, and you’re working with maybe 80 usable cubic feet. Under-shelf storage adds 8 to 12 cubic feet with zero floor sacrifice. Install trays under every permanent shelf and your usable capacity jumps 15 percent without feeling cramped.
Van Shelving Ideas: Material Science Over Aesthetics

Weight Per Load Bearing Capacity

You want shelving that looks intentional, not salvaged. That’s the real driver here. But the mechanism that matters is load density: how much weight you can store per pound of material added to your van’s structure. Physics calls this the strength-to-weight ratio, and it’s non-negotiable in a space where every kilogram affects fuel economy, handling, and structural integrity.
Plywood dominates van builds because it’s cheap and familiar, not because it’s optimal. A half-inch sheet weighs around 48 pounds and holds roughly 50 pounds per linear foot when properly supported. That’s a 1:1 efficiency ratio at best. You’re hauling the shelf itself almost as much as what sits on it. Birch plywood performs slightly better due to denser grain structure, but the math doesn’t change enough to matter. The real cost isn’t the upfront purchase price—it’s the compounding effect on your vehicle’s payload capacity and fuel consumption over months of use.
Aluminum And Composite Alternatives
The common advice says “aluminum shelves are expensive and overkill.” That’s incomplete. Aluminum’s actual advantage isn’t its weight alone—it’s its modular design potential and corrosion resistance in humid van environments. A 1-inch extruded aluminum profile weighs 1.5 to 2 pounds per foot and handles 40+ pounds of load with proper bracing. Plywood at the same load rating weighs nearly 3 times more.
Composite materials like marine-grade PVC and rigid polymer panels occupy the middle ground nobody talks about. They resist moisture without the galvanic corrosion issues aluminum faces when bolted directly to steel van frames. A quarter-inch PVC composite sheet weighs 30 percent less than half-inch plywood and won’t rot or swell when condensation forms inside your van during temperature swings. Install shelving with aluminum frame supports and composite decking surfaces for the best durability-to-weight outcome.
Diy Camper Shelves: The Deconstructive Approach

Start With Empty Space

You want to feel productive before you’ve solved the actual problem. That’s why you’re tempted to build first and edit later. But shelving in a van operates like inventory management in logistics: you design the system around what actually moves, not around maximum capacity. Empty space is your working material, not your enemy.
Most van builds fail because people treat shelving as storage maximization. They fill every inch, then live in a box where nothing has a home. Start with the van’s dead zones: the awkward gaps above wheel wells, the narrow strip beside the door, the corner nobody uses. Build one shelf there. Live with it for a week. You’ll learn what you actually need before you commit materials and mounting points to the wrong locations.
Remove Everything First
Conventional wisdom says strip the van to bare metal. That’s incomplete. You need to physically remove every object you own from the van, photograph the empty interior in natural light, and identify which walls get direct sun, where condensation pools, and which areas stay perpetually cool. This reconnaissance prevents expensive mistakes like mounting particle board on a wall that sweats daily.
After removal, clean the surfaces you’re mounting to. Dust and residue kill adhesion on contact cement and reduce screw hold in wood. Use isopropyl alcohol on walls and let them dry completely. Then measure twice from multiple reference points. Most people measure once from a moving reference like a door frame. Measure from the frame, from the floor, and from the roof line. The van’s interior dimensions aren’t square, and shelves built without accounting for that taper will bind or gap within months.
Van Shelving Ideas Transit: The ‘Zero Waste’ Philosophy

Design To Minimize Material Offcuts

You want to feel smart about waste, but the real mechanism is economics: every inch of plywood you cut and discard is money burned. Industrial design treats offcut minimization as a constraint that forces better solutions, not a moral choice. Start with your van’s actual dimensions and work backward. A 48-inch sheet of plywood fits standard Transit heights with one cut. A 96-inch sheet requires two cuts but yields zero waste if you stack compartments. Measure twice, plan cuts once, execute with a single pass.
The sheet layout matters more than the tool. Most builders buy material then cut, leaving scattered remnants. Reverse the process: sketch your shelving footprint first, then source sheet sizes that match. A Transit van typically needs shelves between 18 and 26 inches deep. Order 24-inch depths that cut cleanly from 48-inch widths with no trim. Use edge trim from one cut as spacers or bracing for the next. Material cost drops when you eliminate the waste stream before it starts.
Existing Van Features As Built In Storage
The van manufacturer already framed your storage opportunities. Walls, floor channels, and factory mounting points are load-bearing infrastructure you paid for but mostly ignore. Bolt shelves directly to factory seat tracks instead of building free-standing units that eat floor space. Transit vans have reinforced sidewalls designed for cabinets. Attach shelf standards to these walls, not to the floor, to preserve usable depth. The studs are already there. You’re not adding structure, you’re using what exists.
Most builders miss one critical fact: factory ribs and channels in the van floor can support shelf feet if you align them correctly. Before drilling into walls, map where these ribs run lengthwise. A shelf positioned on ribs stays stable without fasteners into the floor itself. Check your van’s manual for load ratings on different sections. This approach saves fastener holes, preserves floor integrity, and uses the geometry the manufacturer gave you.
Van Shelf Ideas: The Imperfection Principle

Flush Mounting Wastes More Space Than It Saves

You want your shelves perfectly flush because you think it looks professional. That’s the real reason. But flush mounting creates dead zones where your actual cargo won’t fit. In cabinet design, there’s a principle called “negative space optimization”—the idea that unused gaps are design failures, not features. A perfectly flat shelf against a curved van wall leaves 2-4 inches of unusable space behind it. You’re paying for square footage you can’t access.
The van interior isn’t rectangular. Your walls curve, your floor isn’t perfectly level, and your ceiling height varies by several inches depending on where you measure. Standard shelving that ignores this reality means you either lose clearance or you lose depth. The fix: measure at five different points along where your shelf will sit, then build to the tightest constraint instead of the average. Accept the imperfection of a shelf that’s intentionally uneven in depth. It fills actual space instead of air.
Build For The Space That Exists
Stop designing around what a shelf should look like and start designing around what your van actually is. Slight angles and curves aren’t compromises—they’re the difference between wasted volume and usable storage. Furniture makers in boat interiors learned this decades ago out of necessity. A shelf that angles 3-5 degrees along its length fits the actual floor slope and gains 6-8 additional linear inches of usable depth without taking more floor space.
The mechanism is straightforward: use a flexible template before you cut a single piece of plywood. Cardboard, kraft paper, or thin hardboard bent along your actual wall contours gives you an exact pattern. Transfer that to your plywood and cut accordingly. Your shelf won’t be perfectly straight, but it will be perfectly functional. The seams will hide uneven edges, fasteners adjust for minor gaps, and you stop losing storage to geometry. Start with your longest shelf dimension and measure every 12 inches along the planned route.
Homemade Van Shelving: Beyond The Blueprint Fallacy

Build First, Plan Later

You want permission to skip the overthinking phase. Here’s the real mechanism: most van builders treat shelving design like architects, spending weeks rendering perfect layouts that ignore how bodies actually move through two hundred square feet. That’s backwards. Feedback loops in mechanical systems require real-world iteration to expose constraints invisible on paper. Your body, your cargo, your daily reach patterns—none of these live in a CAD file.
Start with rough framing. Use 2×3 or 1×4 lumber, basic fasteners, and zero precision. Build a shelf. Live with it for two weeks. Then measure what fails: does your head clear it by two inches or zero? Do you bang your shin loading groceries? Does weight sag the span? The data you gather beats any design theory. Tear it down and rebuild with actual information.
The Space Teaches You Constantly
Most shelving advice treats the van as static. It’s not. Every journey reveals different load patterns, different door swing interference, different lighting needs that change where you want visibility. This is systems thinking applied to interiors: the shelf isn’t separate from how you enter, load, sleep, cook, or pack for the next leg.
Document one change per week for the first month. Adjust shelf depth by two inches. Move a rail three inches higher. Add one cross brace. Each micro-iteration compounds. You’ll discover that what looked perfect on day one creates friction on day fifteen. The mechanism that drives real improvement isn’t planning—it’s measuring the gap between expectation and use, then closing it methodically.
The Real Obstacle Isn’t Your Van’s Size, It’s Your Scarcity Mindset

You don’t have a shelving problem. You have a belief problem. Most people design van storage around what they think they need to keep instead of what they actually use. They hoard because space feels finite, so they build cramped shelves that waste more room than they save. The shift happens when you design for flow, not accumulation. Measure your van today and build one shelf section this weekend. You’ll realize the constraint was never the metal and wood, it was your fear of letting go.



