

The “R Value Religion” Fallacy: Why Your DIY Camper Insulation Fails

R Value Alone Tells Half The Story
You want a number to hide behind because numbers feel safe. R-value measures one thing only: resistance to conductive heat transfer through material thickness. This is physics’ formal term for heat moving through a solid object. But here’s what gets buried in spec sheets: R-value ignores how heat actually escapes your camper. A batts insulation with R-21 rating performs differently in a vertical wall cavity than horizontal ceiling cavity, differently still when air moves across it or when moisture condenses inside it. Most DIYers stop at R-value and wonder why their camper still freezes. They installed the number but not the system.
The real failure happens because insulation rating assumes static, lab conditions that don’t exist in a moving vehicle. Your camper experiences temperature swings, vibration, and moisture that degrade performance over time. Air leaks around studs, gaps, and seams bypass insulation entirely, making high R-value material irrelevant at those points. The number tells you nothing about installation quality, thermal bridging through metal frames, or whether you sealed the envelope first. You can install R-38 batts everywhere and still lose more heat than you gain because you treated insulation as a standalone product instead of one component in a heat control system.
The Two Heat Thieves Nobody Names
Conduction gets the attention, but radiation and convection steal the heat your insulation was supposed to stop. Physics calls convection the movement of heat through air currents. In a camper, convection happens inside wall cavities when warm air rises along the inside surface and cool air drops along the outside. Batts insulation doesn’t stop this cycle. It only slows conductive transfer through the material itself. Meanwhile, radiant heat passes straight through fiberglass like it isn’t there, bouncing off surfaces and warming objects directly. Together, these two mechanisms can account for 25 to 40 percent of your total heat loss even with proper R-value installed.
The standard fix is incomplete. Blocking convection requires air barriers that your batts alone don’t provide. You need continuous drywall, rigid foam, or sealed membranes on at least one side to stop air movement inside cavities. Stopping radiation requires reflective surfaces like foil, which is why radiant barriers work in RVs and why camping blankets with reflective backing beat thick blankets of the same weight. Install a foil-faced rigid foam board over your batts, and you address both mechanisms at once. Without this, R-value becomes marketing data instead of performance guarantee.
The Air Seal Imperative: Mastering DIY Van Insulation For True Comfort

Why Airtightness Beats R Value Every Time

You want R-value because it sounds scientific and you think higher numbers mean you won’t freeze. That’s the trap. Thermodynamics doesn’t care about your insulation thickness if air moves through it. A single gap the size of a quarter bleeds as much heat as adding six inches of foam. Airtightness is your actual control variable. The mechanism is convection: moving air carries thermal energy. Stop the air, and you stop the energy transfer regardless of insulation depth.
Most DIY camper builds fail because people spray foam or stack batts, then leave gaps around penetrations, edges, and transitions. You can’t insulate your way out of a leaky envelope. The order matters. Seal first. Insulate second. This is the only sequence that works. A camper with mediocre insulation and tight air sealing beats a camper with premium insulation and loose joints every single time in winter conditions.
Finding And Closing Every Thermal Breach
Thermal imaging reveals where your money actually goes. Grab a handheld thermal camera or rent one for a day. Heat loss concentrates at penetrations: plumbing, electrical, ductwork, and frame seams. These points are predictable. They’re not hidden. Cold air doesn’t sneak in through solid walls. It finds paths. Your job is to map the paths, then plug them.
Start with the frame itself. Camper chassis and van bodies have seams where panels meet. Caulk these seams with polyurethane or silicone rated for expansion and contraction. Then attack penetrations. Every wire, pipe, or duct that passes through a wall gets sealed with caulk or spray foam. Tape seams between your vapor barrier or house wrap before any insulation goes in. This isn’t finishing work. This is foundational.
Vapor Barriers Aren’t Optional: The Unseen Enemy Of Campervan Insulation

Where Moisture Destroys Insulation From Inside

You want four-season comfort without discovering mold two years in. Here’s what nobody tells you plainly: condensation forms when warm interior air meets cold exterior surfaces, and insulation traps moisture instead of blocking it. Physics governs this exchange like supply and demand governs markets. Your camper’s warm inside air contains water vapor. That vapor migrates through walls seeking cold spots. When it hits the cold outer wall, it condenses into liquid. That liquid rots insulation, plywood, and framing.
Most people think insulation alone solves winter camping. It doesn’t. Insulation slows heat transfer but does nothing to stop moisture migration. A fiberglass batt or foam board lets vapor pass through like a screen door. You need a deliberate barrier on the warm side of the insulation that stops vapor while allowing trapped moisture to escape on the cold side. Without this, your insulation becomes a sponge, loses R-value, and fails faster than you’d expect.
The Correct Installation Sequence
Vapor retarders go on the interior wall surface, directly against the living space. This placement matters because it intercepts moisture before it travels into the insulation cavity. Common advice says any plastic sheet works. Wrong. You need material rated between 0.1 and 1.0 perms. Six-mil polyethylene works. Kraft paper-faced batts work if you face them toward the interior. Closed-cell spray foam acts as its own barrier. Open cell foam or unfaced fiberglass requires an added retarder.
Install the barrier as a continuous layer with overlaps sealed at seams and penetrations. Gaps defeat the system entirely. Use caulk, tape, or a compatible adhesive to join sections. This single barrier stops 95 percent of interior moisture before it touches insulation. After the retarder, install your insulation. The air gap between retarder and insulation provides a buffer zone. On the exterior cold side, use an air-permeable material or leave the cavity slightly vented so any trapped moisture can escape outward over time.
The “Thermal Bridge Annihilation” Protocol: Best Insulation For Van Build

Where Heat Actually Escapes Your Camper

You want thermal bridge elimination to sound complicated so you feel like you’re doing something sophisticated. Here’s the truth: heat doesn’t care about your insulation thickness if it has a metal shortcut. Physics calls this conduction—direct heat transfer through a conductor. In van builds, your metal frame is the conductor. Steel and aluminum transfer temperature 200 times faster than fiberglass. Every stud, bolt, and frame rail that touches both the inside and outside of your camper walls creates a thermal highway that renders nearby insulation useless.
The common advice says “just add more insulation.” Wrong. You need to break the path first. Tape foam between the frame and your outer skin before installing any batts or boards. Use closed-cell polyurethane spray foam around penetrations, window frames, and roof rails where metal meets air. Don’t insulate around these shortcuts—you’re just wasting material. The metal wins every time if it’s not physically separated from your living space.
Framing Strategy That Actually Stops Heat Loss
Real builders use the staggered-stud method: one frame for structure, a second offset frame for insulation. This prevents any single metal member from spanning the full wall depth. In a camper, you can’t always reframe, so furring strips become your weapon. Mount vertical strips perpendicular to existing frame members with a half-inch gap. This gap kills conduction. Your insulation then wraps around the furring, not the frame behind it. The metal no longer forms a continuous thermal path from outside to inside.
Tape matters here in ways people skip. Foil-faced tape on seams between foam boards, around window perimeters, and at floor-to-wall transitions stops convection loops inside wall cavities. Air leaking through gaps will carry heat faster than conduction does. After furring and foam are set, seal every joint with closed-cell spray or expanding foam. Mechanically fasten nothing directly through insulation to the frame. Every fastener becomes another thermal bridge. Use washers on fastener heads to distribute load and reduce the point-contact heat transfer effect.
Sweat Equity Isn’t Just Labor: Managing Moisture Like A Biological System

Your Van Breathes Whether You Plan For It Or Not

You want to avoid the repair bill. That’s the real reason you’re reading this. Here’s what everyone misses: your camper is a closed organism producing metabolic waste through human respiration and activity. Using biology as the framework, your van needs a vapor gradient the same way lungs need oxygen diffusion. You exhale roughly one liter of water vapor per night. That moisture doesn’t vanish. It condenses on cold surfaces, pools in cavities, and feeds decay. Insulation alone stops heat transfer but traps moisture inside. Without a vapor management system, your insulation becomes a moisture trap.
The mechanism is pressure differential, not magic. Warm interior air holds more moisture than cold exterior air. When that warm air contacts cold surfaces or moves through wall cavities, it cools and releases water. Your insulation materials absorb this moisture unless you create a controlled escape route. Vapor barriers on the wrong side amplify the problem. The standard advice to “just add a vapor barrier” creates a moisture prison. You need strategic permeability, not blockade.
The Van’s Immune System: Preventing Mold Before It Wins
Mold appears after the system fails, not because of random contamination. Your van’s immune response is ventilation rate and surface temperature control. Without adequate air exchange, humidity climbs above 60 percent and mold establishes a foothold. The common fix is opening windows, which defeats insulation gains and wastes heat energy. Real prevention requires forced ventilation sized to your occupancy and activity level.
Install extraction vents that actively remove interior air moisture on a schedule, not just when you remember. A roof vent fan running two to four hours daily removes accumulated moisture before condensation triggers. Pair this with thermal breaks that keep interior surfaces above dew point. Insulation that covers structural members but leaves thermal bridges creates cold spots where condensation occurs first. Mold colonies start at these cold zones. Measure interior humidity with a hygrometer, maintain it below 50 percent, and inspect wall corners monthly for early discoloration.
Material Science, Not Marketing Hype: Choosing Van Insulation That Works

The Real Trade Off Between R Value And Space

You want the magic number that proves you made the right choice. R-value sells that story. Here’s what actually matters: insulation performance follows the physics principle of thermal resistance, where R-value measures how effectively a material blocks heat flow per inch of thickness. The mechanism you’re missing is that R-value alone ignores density, vapor permeability, and installation gaps that destroy performance in real vans.
Most camper builders chase the highest R-value per inch and end up with foam that off-gasses, absorbs moisture, or compresses over time. The material you choose determines whether your van stays warm in December or becomes a condensation box by January. Your actual thermal comfort depends on the material’s ability to resist heat transfer while tolerating the damp environment unique to a mobile living space.
Fiberglass, Closed Cell Foam, Open Cell Foam, And Mineral Wool
Fiberglass delivers consistent R-value between 3.2 to 3.8 per inch and costs the least upfront. It tolerates moisture better than closed-cell foam and doesn’t require specialized installation equipment. The catch: it settles over years, it’s fragile to handle in cramped van spaces, and moisture can reduce its effectiveness if not properly sealed.
- Closed Cell Spray Foam (R6 to R7 per inch): Highest density and R-value per inch. Seals air gaps automatically during application. Expensive, requires professional installation, and off-gasses significantly in sealed spaces. Can trap moisture if applied over damp surfaces.
- Open Cell Spray Foam (R3.6 to R3.8 per inch): Allows vapor transmission, reducing condensation risk in wet climates. Cheaper than closed-cell. Lower R-value requires thicker installation. Absorbs water if flooded, making recovery difficult.
- Rigid Polyiso Boards (R5.5 to R6 per inch): Lightweight, easy to cut, and install without equipment. Requires careful sealing at seams. Degrades in direct sunlight without protection. Works well for floors and ceiling where you control the environment.
- Mineral Wool Batts (R3.2 to R3.8 per inch): Non-combustible and naturally vapor-permeable. No off-gassing. Expensive compared to fiberglass and harder to fit irregular van cavities. Holds moisture longer if exposed to condensation.
- Cork Sheets (R3.6 per inch): Natural material with decent insulation value and high vapor permeability. Resists mold and bacterial growth. Hard to source in standard van thicknesses and costs significantly more than synthetic alternatives.
The material you pick determines your moisture strategy. Choose based on your climate pattern and your tolerance for future maintenance, not the marketing claim with the biggest number.
Material Selection By Van Location And Climate
Walls, floors, and ceilings experience different moisture and thermal stress, so one insulation type works poorly everywhere. Walls contact condensation first in cold climates because they’re thin boundary barriers between inside air and exterior cold. Floors sit on wet ground and need materials that tolerate capillary moisture without losing function. Ceilings trap heat and humidity, demanding vapor control to prevent mold.

Closed-cell foam works for ceilings in dry climates because it seals out air infiltration and you can apply it thick without thickness concerns. In damp coastal regions, open-cell foam or mineral wool works better on walls because they allow vapor to escape instead of trapping it. Floors in wet environments demand rigid boards over a moisture barrier rather than foam that absorbs groundwater. Your climate zone determines whether you prioritize R-value density or moisture tolerance. Install the wrong material in the wrong location and you trade condensation for inadequate insulation within two seasons.
The “Envelope Of Exclusion” Strategy: How To Insulate A Van Conversion

Building The Thermal Boundary
You want this to work because you’re tired of waking up cold or sweating through a sealed box that traps heat like a tomb. The real mechanism is simple: you’re not insulating the van. You’re creating a continuous thermal barrier that treats the entire interior as one sealed system, not individual walls that leak into each other.
Thermal bridging destroys amateur builds. Metal studs, unbroken seams, and gaps between foam panels create highways for heat transfer. The envelope strategy means every point on your perimeter must connect thermally to the next point. Spray foam does this automatically. Rigid foam boards require staggered placement and sealed joints so cold air finds no path to your living space.
Handling The Irregular Spaces
Everyone suggests “just fill the cavities,” which is useless advice because van interiors aren’t regular geometric shapes. Apply the naval architecture principle of internal redundancy: treat difficult cavities as potential failure points, then eliminate them through layered defense.

Use two-part expanding foam for irregular spaces first, then cover it with rigid insulation afterward. The foam fills voids completely but degrades under UV and isn’t a vapor barrier. Rigid foam over top seals the foam, compresses it into place, and creates the continuous barrier. For wheel wells and curved sections, cut rigid boards into wedges and stagger them like roof shingles. Thermal continuity requires overlap, not precision fit.
Condensation’s Silent Kill: Your Van Insulation Guide To Avoiding Disaster
What Moisture Actually Does Inside Walls
You care about this because water damage becomes expensive fast, and most people don’t realize it’s happening until the structure fails. Condensation works like a thermodynamic trap: warm interior air holds more water vapor than cold air. When that warm air hits a cold surface, the vapor converts back to liquid. In van insulation, this liquid pools inside wall cavities where you can’t see it, breeding mold and rotting wood framing in months.
The mechanism is simple physics. Your breath, cooking, and body heat generate moisture. That moisture rises and migrates toward cold spots. Your van’s metal skin conducts heat outward fast in winter. The insulation sits between that cold metal and warm interior air. If your insulation or vapor barrier fails to manage this gradient, water condenses inside the wall assembly and stays there because vans lack air circulation like houses have.
Vapor Barriers And Cold Bridging Reality
Most DIY advice tells you to slap a vapor barrier on the warm side and call it done. That’s incomplete. A vapor barrier only works if it’s continuous and properly sealed. More critical: you need to eliminate cold bridges where metal framing conducts heat straight from outside to inside, creating condensation zones even with good insulation. Adhesive-backed foam tape on metal studs before insulation installation reduces this effect significantly.

Install your vapor barrier as one continuous layer before adding interior wall panels. Seal every seam with compatible tape, not generic duct tape. The real leverage point is reducing the temperature difference between inside air and the insulation surface. Thicker insulation achieves this. Use rigid foam or spray foam, not loose batts, because batts compress and leave air gaps where moisture collects. Seal all penetrations for plumbing and electrical before closing walls.
Beyond The Walls: Floor And Ceiling Diy Van Insulation Project Realities
Where Heat Actually Escapes First
You want the floor and ceiling solved because you’re afraid of waking up cold after spending money and time. Here’s the mechanism: heat rises, yes, but the real problem is surface area and contact. Your roof and floor touch the outside world across the largest uninterrupted planes in your camper. Physics calls this conduction loss. In insulation terms, conduction loss means your thermal energy transfers directly through material into cold air or cold metal. Most people obsess over wall thickness when floors and ceilings account for 40 to 60 percent of total heat escape depending on your rig’s dimensions.
The floor matters more than most admit. Your camper sits on a metal chassis that touches the ground. That metal is a thermal highway. You can insulate the underside aggressively, but if you ignore the floor cavity above it, you’ve wasted effort. Foam board, spray foam, or rigid mineral wool in the floor cavity stops conduction before it happens. The ceiling works the same logic in reverse. Metal roof skin radiates and conducts heat away faster than any wall because it has nothing between it and outside air on both sides. Install insulation there first, before walls, if you’re choosing priority.
Installation Without The Myths
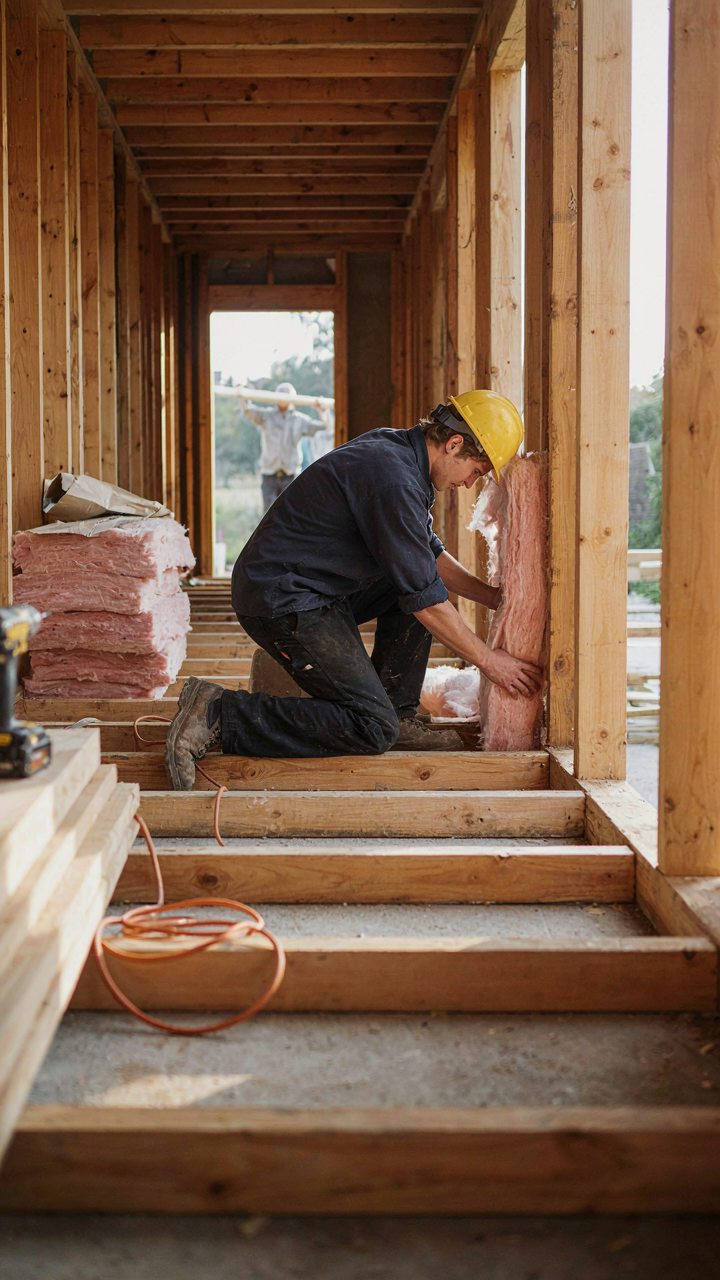
Forget the idea that thicker always wins. The real variable is coverage continuity, not depth alone. Gaps, thermal bridges, and incomplete coverage destroy an otherwise solid insulation layer faster than using slightly less material perfectly. For floors, you have two realistic approaches. One: install rigid foam between floor joists, then tape every seam and edge. Two: spray foam the entire cavity, accepting that some material bonds to metal framing but creates an air seal worth the waste. Both work. The choice depends on whether you value precision labor over material cost.
Ceiling installation requires addressing the metal roof panel directly. You cannot just glue foam to metal and expect it to stay or perform. Condensation forms in the gap behind it. Instead, create an air space by mounting furring strips perpendicular to the roof’s corrugation or ribs. Glue or mechanically fasten foam between those strips. Tape every seam with foil or specialty vapor tape. This creates a thermal break and allows any moisture to migrate without pooling. Seal around penetrations like vents or skylights with compatible foam sealant, not silicone. Silicone cracks when metal thermally expands and contracts seasonally.
The Unfinished Business: Ventilation Is The Other Half Of Insulation

Why Air Movement Matters More Than You Think
You’re focused on insulation because it feels like control. But here’s what nobody says plainly: insulation alone creates a dead zone where moisture, CO2, and off-gassing accumulate until your camper becomes a petri dish. Borrowing from thermodynamics, think of your camper as a closed system where entropy increases—disorder spreads. Without intentional air exchange, heat retention traps the problem, not just the warmth. Your insulation is only half the equation.
Moisture is the mechanism. When you insulate without ventilation, condensation forms on cold surfaces because warm interior air meets the cold exterior wall. That moisture migrates into fiberglass, foam, or wood framing and stays there. Mold grows. Materials degrade. You’ve paid for insulation that now rots from the inside out. The fix isn’t better insulation—it’s controlled airflow that removes moisture before it accumulates. One exhaust vent at the roof ridge and passive intake near the floor creates pressure differential that moves stale air out continuously.
Balancing Heat Retention With Continuous Air Exchange
The conventional wisdom says seal everything and rely only on insulation. That’s incomplete. You need both airtightness and active ventilation working together, not against each other. Airtightness stops unwanted drafts and air leaks. Controlled ventilation removes the specific problems you can’t insulate away: moisture, odors, carbon dioxide, and volatile organic compounds from new materials and propane combustion.
The protocol is simple. Install one roof vent with a mushroom hood that passively draws air upward without requiring power. Position it over the sleeping area where moisture generation peaks. Add intake vents or cracked windows at opposite ends of the camper to establish cross-flow. On cold nights, crack a window slightly rather than running the vent continuously. In humid conditions, run the vent intermittently or install a small 12-volt exhaust fan on a timer. The goal is six air changes per hour minimum during sleep, achieved through passive design first, active fans second.
Your Biggest Insulation Problem Isn’t The Cold, It’s Your Incomplete Mental Model Of Thermodynamics

Most people treat insulation like a barrier. It’s not. It’s a speed bump for heat movement. You can stack the best materials available, but if you don’t understand vapor drive, thermal bridging, and air infiltration, you’re just throwing money at the problem. Start today by identifying one thermal bridge in your camper, then eliminate it. You can’t insulate your way out of a design flaw.



