
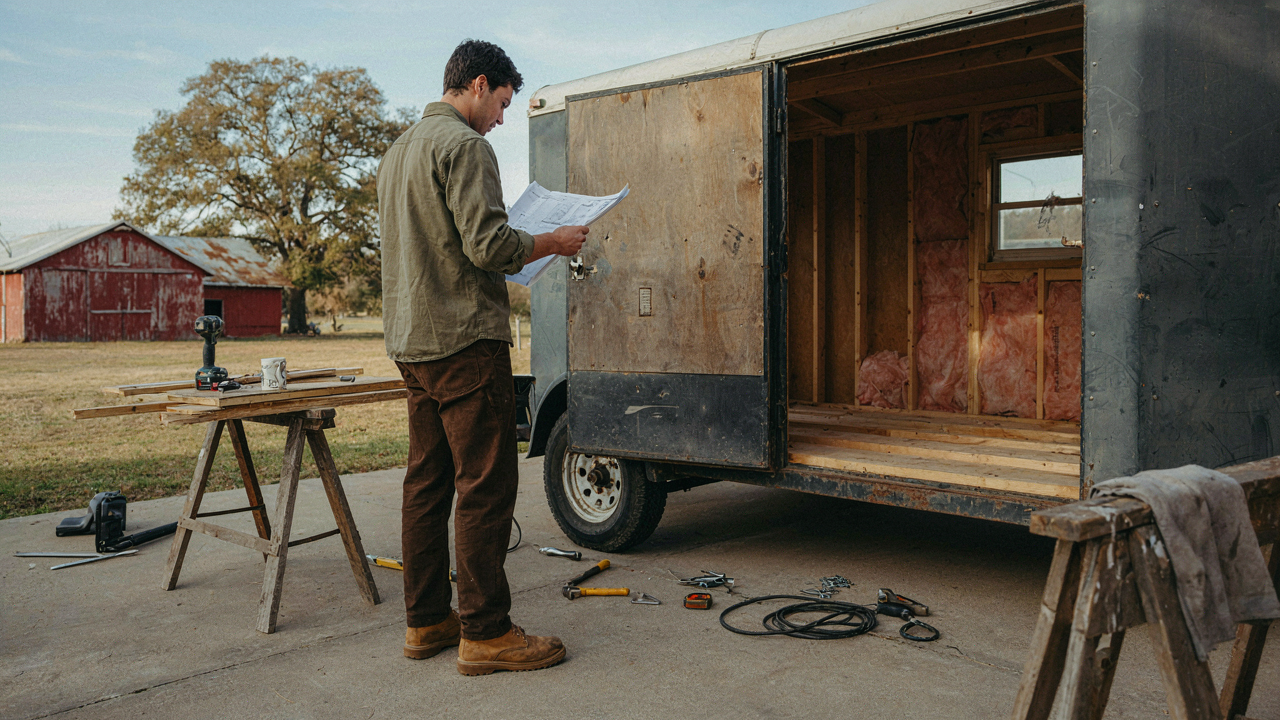
The Unseen Costs: Why “Cheap” Cargo Trailer Camper Conversions Bleed You Dry

Materials Nobody Mentions Until The Receipt Arrives
You want to believe a utility trailer camper conversion costs under five grand because admitting otherwise means your budget fantasy dies. The actual material expenses start before you touch insulation or cabinetry. A bare cargo trailer runs $2,500 to $4,500 depending on size and axle configuration. Electrical systems, plumbing, propane setup, and structural reinforcement add another $3,000 to $5,000 in materials alone before any interior work begins.
Most conversion guides skip the expensive middle layer: waterproofing and vapor barriers. Self-adhesive Eternabond tape costs $80 to $150 per roll and you need three to five rolls. Marine-grade sealants run $20 to $40 per tube, and proper sealing requires twelve to twenty tubes for a small trailer. Spray foam insulation adds $500 to $1,200. These materials fail catastrophically when omitted, meaning rot, mold, and structural damage that costs more to fix than getting them right the first time.
The Tool Tax You Never Budget For
Economics calls this the “barrier to entry,” and your trailer conversion is a textbook case where beginners vastly underestimate it. You cannot build a camper with a cordless drill and a tape measure. Proper work requires a circular saw, drill press or step bit kit, jigsaw, orbital sander, rivet gun or pop riveter, level, stud finder, and a quality tape measure. New versions of these tools total $1,200 to $2,000 for actual usable equipment, not the dull Harbor Freight versions that break mid-project.
Then comes the opportunity cost: time spent learning tool operation eats the hours you expected to dedicate to build. A novice with a rivet gun wastes material and time figuring out proper technique. Using wrong tools (or cheap alternatives) extends a one-month build to three months. That extended timeline means extended trailer parking fees, delayed use, and the real cost: three months of your life spent in a garage instead of actually camping. Calculate your hourly rate and multiply it by the extra weeks a poor tool choice creates.
Structural Integrity Is Not A Suggestion: The Physics Of Your Utility Trailer Camper

What Your Trailer Frame Actually Does

You want this to work because the alternative is catastrophic failure at 65 mph. Structural integrity isn’t abstract—it’s the load-bearing capacity of your frame under real conditions. Physics doesn’t negotiate. Your utility trailer’s frame is a beam system. Like a cantilever in architecture, it distributes weight from the tongue to the axles to the ground. Add camper weight above that beam unevenly and the frame flexes, cracks, and fails. The trailer manufacturer designed for a specific payload. Exceed it and the frame becomes unstable.
Most builders ignore the actual weight distribution math. They pile cabinets, water tanks, and batteries wherever space exists, then wonder why welds crack or the frame bends. Start with your trailer’s GVWR (Gross Vehicle Weight Rating) and payload capacity, printed on the VIN plate. Subtract the dry weight of the trailer itself. That remainder is your budget. Every component—framing, appliances, water, fuel, cargo—gets weighed and logged. This is not optional precision. It’s the difference between a functioning camper and a twisted pile of metal on the shoulder.
High Speed Instability Starts With Where You Put Weight
Trailer stability is governed by the same principle as a pendulum: lower center of gravity equals stable motion. Put heavy items high and forward, and your camper becomes a pendulum that swings on curves and brakes hard. The tongue weight should sit between 10 and 15 percent of total trailer weight. Too light and the trailer sways. Too heavy and you overload the tow vehicle. The mass distribution matters more than total weight because unbalanced mass creates moment forces that initiate yaw at highway speeds.
Water tanks, lithium batteries, and propane bottles must sit low and centered. Roof-mounted solar panels look clean but raise your center of gravity—acceptable only if you’ve calculated the math and confirmed stability. The real mechanism is this: when your trailer rocks on curves, a high center of gravity amplifies that rock. The frame experiences greater lateral force. Welds strain. Everything flexes more. Load the bottom third of your camper first. Build upward only after you’ve locked in stability on the highway.
The “Minimum Viable Shelter” Protocol: Designing For Actual Use, Not Instagram

Start With Constraint, Not Wish Lists

You want to believe your conversion will be different because you’ll use it differently. You won’t. The mechanism at work here comes from industrial design: the principle of constraint forces specificity. When you have unlimited space, you default to recreating your house. When you don’t, you solve actual problems. Start by naming what you’ll actually do in this trailer. Sleep. Cook basic meals. Store gear. Everything else is negotiable.
Most people reverse-engineer their design from Pinterest conversions. They see a full kitchen, a shower, an entertainment system, and work backward into specs. That’s backward. You land on the real layout by asking what you’ll genuinely use daily versus what makes the conversion look complete. A two-burner stove beats a full range. A wet wipe beats a shower enclosure. Your bed should occupy the most square footage because you’ll spend the most time there.
Layout Follows Function, Not Symmetry
Nobody says this plainly: aesthetic balance makes a terrible camper. A symmetrical interior layout wastes usable width and depth. Function trumps visual harmony. Your galley kitchen doesn’t need to sit centered in the trailer. Place it where you cook most efficiently. Your bed doesn’t need to be against the longest wall. Put it where your body actually fits and where ventilation works best.
The mistake is treating the trailer interior like a living room you’re decorating. It’s a workspace. Your fridge should be within arm’s reach of prep space. Your sleeping area should be away from the entry to trap heat and reduce drafts. Your storage should cluster near what you use it with, not scattered for “visual interest.” Map every movement you make on a typical day, then draw walls and fixtures around that traffic pattern, not around symmetry.
Regulatory Roulette: Avoiding Legal Pitfalls With Your Enclosed Trailer Camper Ideas

Your State’s Titling Rules Determine Everything Before You Build

You want to avoid paperwork hassle, but what you’re really afraid of is discovering mid-build that your trailer doesn’t legally exist. Titling and registration operate like property law, not vehicle law—each state governs what it recognizes as a camper versus a utility trailer, and that classification shifts the entire legal foundation. Some states title enclosed trailers as RVs automatically once you install habitation systems. Others require you to apply for a special classification. A few don’t care what you do inside the box.
Contact your state’s Department of Motor Vehicles directly and ask for their specific classification criteria for enclosed trailers with living systems. Don’t rely on forum posts or what worked in another state. Request the exact statute or administrative rule in writing. Some states trigger RV classification at 400 square feet of living space. Others look at whether you have a permanent bathroom. A handful use sleeping capacity as the threshold. You need the actual rule for your jurisdiction before cutting a single piece of material.
Axle Rating And Braking Laws Are Non Negotiable Physics
Utility trailers fail inspections because builders treat weight capacity like a suggestion instead of a hard ceiling that physics enforces. Your trailer’s GVWR (Gross Vehicle Weight Rating) is set by the axle manufacturer and frame design—exceed it and you’ve created an uninsurable liability with no legal towing status. Most states require electric brakes or surge brakes on trailers over 1500 pounds, and many require them below that threshold too.
Calculate your total loaded weight before ordering components. Dried food, water tanks, batteries, propane, insulation, and framing add up faster than builders expect. A single gallon of water weighs 8.3 pounds. A full water tank for a tiny camper reaches 200-400 pounds. Check your axle’s GVWR on the axle tube itself—usually stamped on the housing. If your build exceeds the axle rating, you need a heavier axle, which requires frame modifications and new registration. Some states conduct DOT inspections on enclosed trailers, others don’t, but liability follows you across state lines when you’re towing an illegally overweight structure.
Beyond The Build: Real World Longevity For Your DIY Cargo Trailer Conversion

Seal Every Penetration Point First

You want your conversion to hold value and not become a money pit within two seasons. Here’s the mechanism: water doesn’t flow downhill into your trailer because gravity pulled it there. Water enters because you left gaps. Every hole you drill for wiring, plumbing, or venting becomes a highway for moisture if you don’t seal it properly. The difference between a five-year trailer and a fifteen-year trailer is the obsession with eliminating entry points before they matter.
Start with the roof. Use marine-grade sealant, not caulk. Caulk cracks and shrinks in UV exposure. Sealant stays flexible and bonds to metal. Run a bead around every vent, every antenna, every protrusion. Drill weep holes at the lowest point of your electrical conduit so water that does enter can escape instead of pooling inside your walls. This isn’t optional detail work. This is structural defense.
Air Flow Beats Moisture Every Time
Condensation wins when stagnant air meets temperature swings. Mold doesn’t grow because you opened a window. Mold grows because you sealed your box too tight and trapped humidity with nowhere to go. Think of trailer ventilation using the principle from HVAC systems: the stack effect. Hot, moist air rises naturally. If you create a path for it to exit at the top while fresh air enters at the bottom, you’ve built passive circulation without fans or power consumption.
Install a roof vent with a rain hood on the highest point of your trailer. Place an intake vent or open louver near the floor at the opposite end. The temperature difference between inside and outside does the work for you. Add a small solar vent if you’re parked in direct sun regularly. Don’t fight physics by sealing every gap. You need controlled airflow, not perfect insulation.
The “Antifragile” Method To Cargo Trailer Camper Build: Embracing Imperfection
Build Redundancy Into Every System

You want permission to build it wrong the first time and still sleep at night. Here’s the mechanism from cybernetics: a system with redundancy doesn’t fail when one component fails, it degrades. Apply this to your trailer camper. Don’t run a single battery bank. Don’t use one water source. Don’t rely on a single ventilation path. Redundancy isn’t backup, it’s survival architecture.
Most conversion guides treat redundancy as luxury. It’s not. It’s the difference between a dead system and a limping system you can actually use while you fix it. Your propane setup needs a manual backup. Your electrical system needs a secondary charge pathway. Your fresh water needs both gravity feed and pump options. Redundancy costs upfront but saves you from abandoning the build halfway through a trip because one failure cascaded into total system collapse.
Stress Forces Better Design
Evolution doesn’t reward perfection. It rewards adaptation under constraint. Your build will face actual conditions—heat cycles, vibration, moisture, weight shift—that render theoretical design obsolete. Instead of pretending you’ll anticipate every variable, structure your build to absorb stress and reveal what actually needs fixing.
This means building testable subsystems first, not the full shell. Run your electrical system on the frame alone for two weeks. Load your water tanks and plumbing at capacity before sealing walls. Tow an empty shell to feel frame flex and vibration. Each stress test exposes real failures, not imagined ones. You adapt the build based on what the road teaches you, not what forum posts promised. This costs time upfront but eliminates catastrophic redesigns mid-build.
Electrical Systems That Won’t Kill You (or Your Battery)

The Wire Gauge That Actually Matters

You’re worried about looking stupid when you ask about wire size, so you Google it and find a chart. That’s not the real problem. The real mechanism is voltage drop: current flowing through resistance generates heat and loses power over distance. Thicker wire costs more upfront but saves your battery from slow death and your appliances from running weak. Most people undersized their trailer wiring because they didn’t understand this trade-off.
The National Electrical Code exists for a reason, and it’s not bureaucracy theater. A 12-volt circuit running 30 amps through thin wire over 20 feet kills your system before you notice. Start with a proper fuse panel mounted near your battery. Run 4-gauge cable from battery to panel, then size branch circuits based on amperage and distance, not convenience. A 15-amp circuit pulling power 25 feet away needs 10-gauge minimum, not 12-gauge. Undersizing here means voltage sag, dead batteries, and failed LED lights.
Solar Charging And System Sizing
The common advice says get more solar panels than you think you need. That’s incomplete. What actually matters is matching three variables: panel wattage, charge controller capacity, and battery amp-hour rating. The charge controller acts like a traffic cop, and it cannot accept input beyond its rated current. A 60-amp MPPT controller paired with 400 watts of panels works. A 30-amp controller with the same panels wastes half the solar resource.
Battery capacity determines how many days you can run on stored energy. Most beginners buy 200 amp-hours, feel cautious, then live like they have 400. The math is simple: calculate daily consumption in amp-hours, multiply by days of autonomy, add 20 percent buffer for battery health. A 12-volt inverter pulling 2000 watts for two hours drains 333 amp-hours gross. Install an inline fuse between battery and charge controller, and another between battery and inverter. These fuses prevent catastrophic shorts that melt wiring inside your trailer walls where you can’t reach them.
Insulation: The Unsung Hero Of Comfortable Cargo Trailer Conversions

R Value Myths Versus Real World Performance

You want the magic number that proves you did it right. Here’s what actually matters: R-value measures resistance to heat flow in lab conditions, but your trailer lives in wind, humidity swings, and thermal bridging that shred those ratings. The mechanism is simple. Heat moves through the path of least resistance. Metal trailer walls conduct heat fast. Insulation slows it. But metal studs, fasteners, and structural points bypass insulation entirely, cutting your effective R-value 20 to 40 percent below what the material promises.
Most builders chase R-30 or R-40 as if the number guarantees comfort. It doesn’t. A poorly sealed R-40 cavity with thermal bridging performs worse than R-20 with sealed seams and interrupted studs. Performance depends on continuity, not rating. Stop buying insulation based on thickness alone. Buy based on where you place it and what you block it from touching. Spray foam minimizes thermal bridging better than batts, but costs more. Rigid foam boards placed on the outside of framing interrupt bridges but require careful sealing. The real decision matrix runs through your budget, your tool access, and your tolerance for vapor management complexity.
Vapor Barrier Installation And Thermal Bridging
Thermodynamics teaches us that energy moves from hot to cold and moisture follows pressure differentials. Your trailer cabin becomes a pressure vessel where water vapor wants to migrate through walls, and when it hits a cold surface inside the insulation, it condenses and rots framing. Vapor barriers stop this migration, but placement determines whether they help or destroy the whole assembly.
Install the vapor barrier on the warm side of insulation, which means inside your living space in winter climates and outside your framing in hot humid climates. Get this wrong and you trap moisture in the cavity instead of releasing it. Most converters put it on the wrong side because they think “inside is always warm.” It isn’t. Northern nights cool your interior fast. Thermal bridging through metal studs and the trailer frame itself cools insulation from behind, inverting pressure and pulling moisture inward. Seal all seams with compatible tape. Do not assume compression fit or friction holds vapor barriers tight. Gaps let moisture slip through and negate the barrier entirely. Tape every edge, every penetration, every corner before you install drywall or finished walls.
The Exit Strategy: What Happens When Your Utility Trailer Camper Doesn’t Work Out?

How To Recover Your Money Back

You’re reading this section because you’re afraid of being stuck with a depreciating asset nobody wants. Here’s the mechanism: utility trailers hold value because they solve a functional problem, not because they’re status symbols. Economics calls this “intrinsic value” versus “positional value.” Your camper conversion trades on function. It lives or dies on whether the next buyer sees utility in it.
- Sell as a completed camper: A finished conversion pulls higher per-dollar value than a bare trailer. Buyers pay for eliminated labor. Price competitively against RVs and travel trailers in your region, not against new construction costs.
- Part out the components: Strip the built-in systems and sell separately. Lithium batteries, solar panels, and marine toilets hold strong resale. Individual components often recoup 60-75% of their purchase price if well-maintained.
- Revert to utility trailer: Remove all camper infrastructure and sell as a bare utility trailer. You recover the base trailer value, minus wear. This is your floor, typically 40-50% of original trailer cost depending on age and condition.
- Wholesale to dealers: RV dealers and trailer consignment shops buy used conversions as-is. Expect 20-30% below market rate, but the sale closes fast with zero effort on your end.
- Local private sale leverage: Facebook Marketplace and Craigslist attract nearby buyers who avoid shipping costs. Photos of actual interior systems outperform generic listings. Local sales command 10-15% premiums over dealer buyouts.
The trailer itself almost never becomes worthless. Utility trailers have structural demand from contractors, farmers, and equipment haulers. Your bet isn’t that you’ll lose everything. Your bet is whether you finish the project or bail halfway. Halfway conversions sell for 30-40% of completion value because buyers inherit your unfinished systems and design compromises.
Upcycling And Responsible Disposal
Most people don’t mention disposal because it’s unsexy. Here’s what actually happens: a damaged or unsalvageable utility trailer camper becomes scrap metal value plus hazardous waste liability. The frame and axle go to metal recycors for roughly $0.30-0.50 per pound. Batteries, propane tanks, and wiring require certified disposal. Abandoned conversions become environmental violations in most counties.
Pull the batteries, tanks, and electrical components first. These carry resale or recycling value. Donate usable fixtures to Habitat for Humanity ReStore or tiny home builders if the conversion is structurally sound but financially unrecoverable. Metal recyclers handle the frame and chassis. Verify your local waste management accepts the materials you’re splitting out. Dumping a camper trailer without proper disposal costs $300-800 in fines and creates liability you don’t need. Strip it yourself, haul components to appropriate facilities, and let the recycler handle the skeleton.
The Only Thing Worse Than Not Having A Camper Is Having One That Actively Works Against You

Most people fail their utility trailer camper conversion because they treat it like a shopping list instead of a systems problem. You need one clear constraint to build around—weight, budget, or timeline. Pick it today. That single decision eliminates ninety percent of the paralysis that kills projects. Everything else follows from there. A bad conversion with purpose beats a perfect one that never leaves your driveway.



