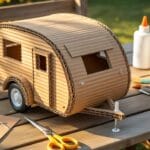
Planning Your Homemade Cardboard Trailer Project

Conceptual Design
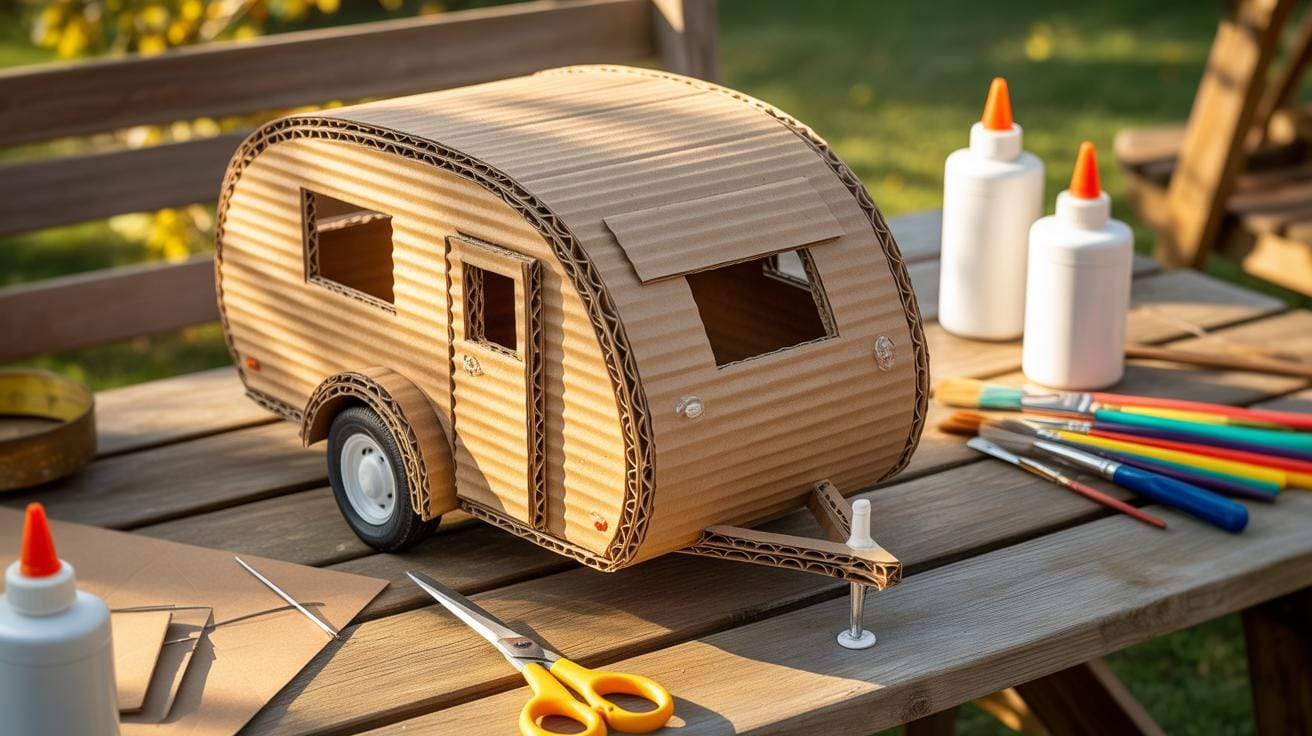
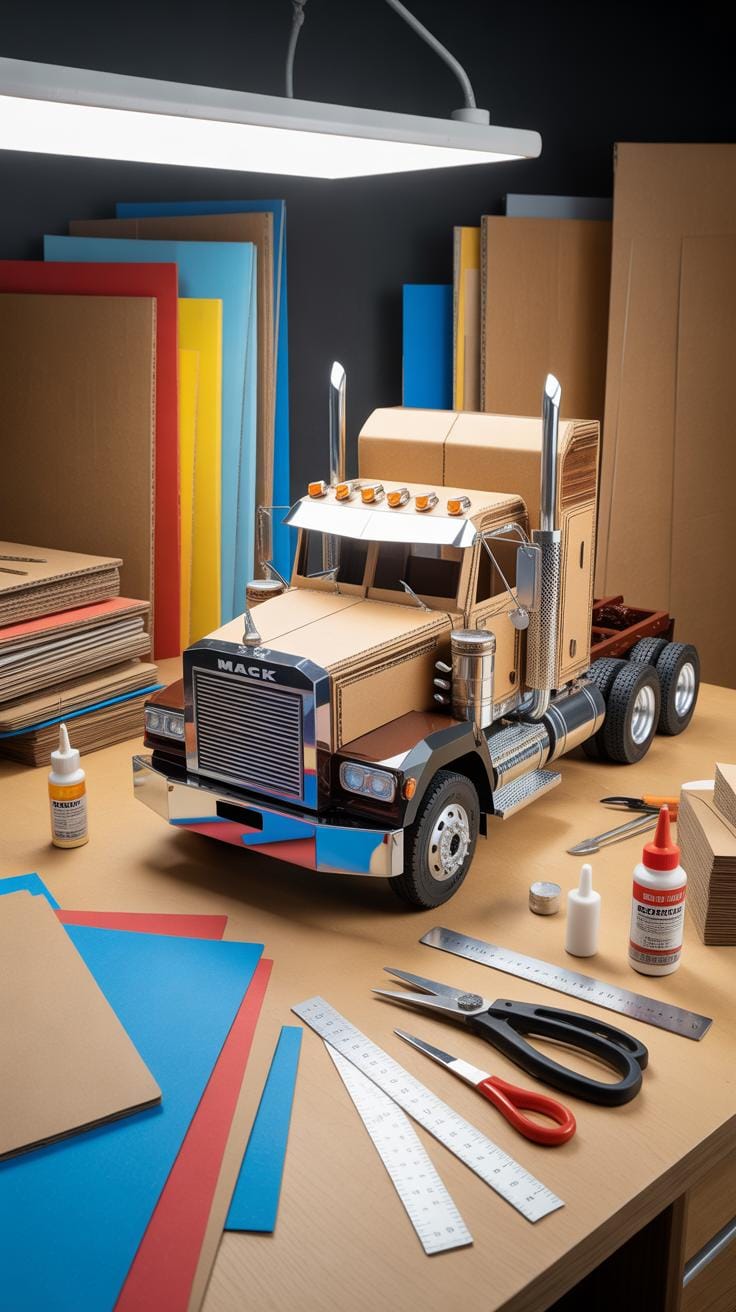
Building a sturdy homemade cardboard trailer starts with a clear vision of the final model. You must choose a specific type of vehicle like a vintage tiny house or a heavy duty Cardboard Semi. The choice defines how you will layer the material to prevent sagging over time. A small Cardboard Camper Diy project stays upright easily while a large Diy Mack Truck Cardboard requires internal ribs for support.
Think about how the trailer will function in your display or play area. A Cardboard Rv Camper needs a strong base to hold its tall walls together. Many builders look back at classic mid-century designs for inspiration because their boxy shapes are easy to recreate. Keeping the scale consistent ensures the Cardboard Camper looks realistic next to other toy cars. Decide on the size before cutting any panels.
Sketching Blueprints
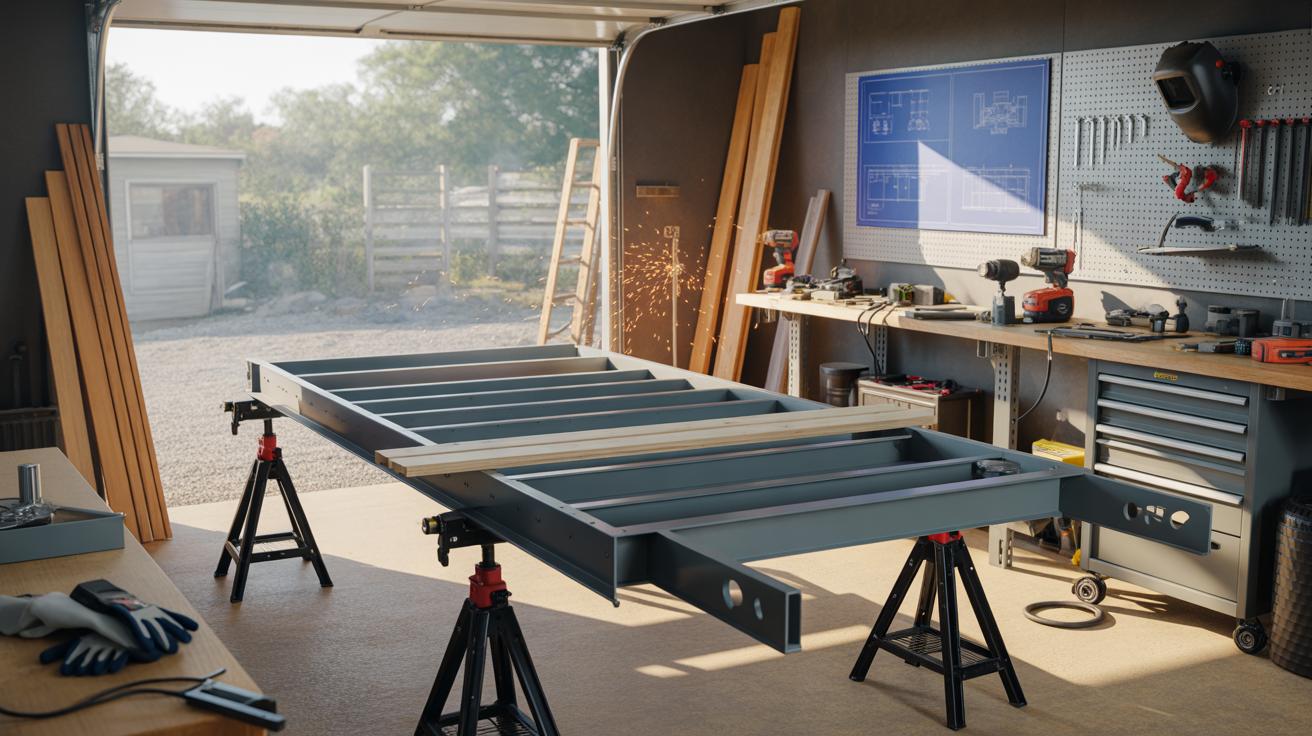
Detailed drawings act as a roadmap for your Trailer Diy project. Use a ruler to create a precise Cardboard Truck Template on paper before touching the cardboard. These sketches should show how the floor connects to the side walls and the roof. Marking where the glue goes helps you avoid messy mistakes. A well-planned Cardboard Rv will have fold lines that create natural strength at every corner.
Your blueprints must also account for the weight of the roof on a Cardboard Camper Van. Draw small tabs on the edges of your panels to help them lock into place securely. This technique is similar to how real manufacturers build vehicles with interlocking frames. Using a simple Cardboard Truck Template allows you to test the fit with paper first. Proper planning ensures the finished model stands straight and lasts through years of use.

Essential Materials For A Cardboard Camper Diy

Supply List
Creating a sturdy Cardboard Rv Camper begins with choosing high quality sheets. Triple wall corrugated fiberboard provides the best strength for large structures. This material mimics the real wood used in a Trailer Diy project. You need sharp utility knives to make clean cuts along your Cardboard Truck Template. Precise edges ensure every part fits together like a professional model.
- Heavy Duty Corrugated Fiberboard: This thick material serves as the main body for your Cardboard Camper. It consists of multiple layers of fluting to prevent sagging. Triple wall sheets offer the most support for large walls.
- Precision Cutting Tools: Sharp utility knives and box cutters are necessary for shaping your Cardboard Camper Van. Clean cuts make assembly easier and look better. Always keep spare blades nearby to ensure every slice stays smooth.
- Metal Straight Edge: A long steel ruler helps you guide your knife for perfectly straight lines. It protects your fingers while you cut out windows for your Cardboard Rv. Accurate measurements lead to a symmetrical build.
- Measuring Tape: Accurate dimensions are vital when following a Diy Mack Truck Cardboard plan. You must measure twice to avoid wasting your precious paper materials. Consistent sizing keeps the roof aligned with the walls.
- Marking Pencils: Graphite pencils allow you to draw your design before making permanent cuts. They work well on the brown surface of the fiberboard without bleeding. These marks help you visualize where to place doors and wheels.
Gathering these items makes building a Cardboard Semi much easier for beginners. You should organize your workspace to hold these large sheets flat. Flat storage prevents the material from warping or bending before you start. Many builders also use Painter tape to hold pieces together temporarily. This step helps you check the fit of your Cardboard Camper Diy before applying permanent glue.
Adhesive Selection
Choosing the right glue keeps your Cardboard Rv from falling apart over time. Hot glue guns work fast for small details and internal braces. Wood glue provides a deeper bond for structural joints because it soaks into the fibers. You should apply glue evenly across surfaces to avoid soft spots. Strong bonds allow your creation to stand tall during long hours of play.
Thick craft glues help when you assemble a heavy Cardboard Semi or large trailer. These adhesives take longer to dry but offer incredible durability once set. You can use clamps or heavy books to hold the layers together while the glue cures. Proper drying time ensures your Cardboard Camper stays rigid and strong. Solid construction techniques turn simple paper into a lasting toy for your backyard adventures.
Working With A Cardboard Truck Template
Scaling Templates
A Cardboard Truck Template provides the foundation for your project. You must scale the proportions to match your specific vision for a Homemade cardboard trailer. Start by measuring your available workspace and core structural materials. If you want a large Cardboard Semi or a heavy duty Diy Mack Truck Cardboard build, multiply every dimension on the paper guide by a consistent ratio. This ensures every piece fits together perfectly during assembly.
Accuracy is vital for a successful Cardboard Camper Diy project. Using a ruler or a yardstick helps you transfer small lines to large sheets of corrugated paper. A Cardboard Camper Van requires balanced proportions to look realistic and stay sturdy. Small errors in scaling create gaps in the corners. Pay close attention to the wheel wells and cabin height to maintain a charming vintage look across the entire frame.
You can do anything with cardboard and glue and staples. Keep your tools simple and your imagination wide.
— Red Green
Cutting Precision

Clean cuts define the quality of a Cardboard Rv. Use a sharp utility knife and a metal straight edge to guide your hand. This method keeps the edges crisp for your Cardboard Rv Camper. Avoid using dull blades because they tear the paper fibers. Press firmly against the metal ruler to prevent slipping. Smooth edges allow the glue to bond better across the different sections of the frame.
Precision is necessary when following a Cardboard Camper design. Scoring the surface creates clean folds for the roof and sides of the unit. This technique improves the final appearance of a Trailer Diy craft. It makes the seams look professional rather than messy. A well cut piece makes a Cardboard Truck Template much easier to assemble. Your hard work results in a tidy structure that stands tall and straight.
Structural Foundations For A Cardboard Semi

Chassis Reinforcement
A strong base remains the most vital part of your Cardboard Semi project. You must create a long rectangular frame using thick double-wall corrugated sheets. Glue several layers together to prevent the floor from sagging under the weight of the cabin. This heavy duty foundation supports the future walls of your Cardboard Camper or a long Trailer Diy project. Use wood glue for a permanent bond.
Measure your Cardboard Truck Template carefully before cutting the main beams. These parallel rails mimic the steel frame seen on a real Diy Mack Truck Cardboard build. Aligning the structural ribs helps distribute the load of the roof. A solid chassis ensures your Cardboard Rv Camper stays straight and level. Proper layering adds the strength needed for a large scale model that lasts for years.
Axle Integration
Axles provide the necessary support for the wheels of your Cardboard Rv. For a static display, use thick cardboard tubes or wooden dowels glued directly to the chassis. Position the rear axles toward the back to mimic a real Cardboard Camper Van. This placement keeps the long Trailer Diy balanced. Make sure the axles are level so the Cardboard Semi sits evenly on the ground without tilting.
Functional axles require more planning for a Cardboard Camper Diy project. Pass a sturdy rod through holes in the frame to allow for rotation and movement. You can use a Cardboard Truck Template to mark the exact center point for each wheel. This precision helps your Diy Mack Truck Cardboard roll smoothly. Strong axle housing prevents the cardboard from tearing when you push the finished model across the room.
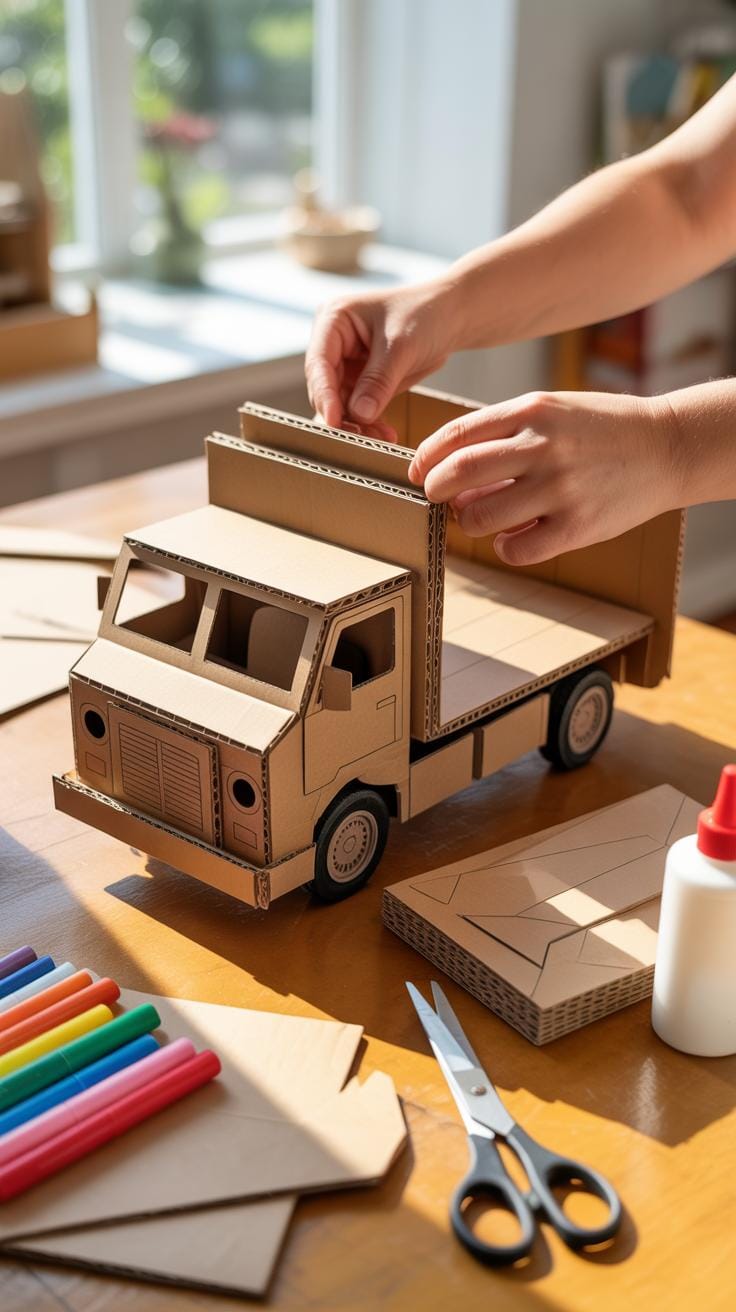
Assembling Your Cardboard Rv Camper Body

Wall Bracing Techniques
Building a sturdy Cardboard Rv Camper requires strong internal supports. You should use vertical ribs made from thick corrugated board to keep the sides upright. These ribs act like the studs in a real house. Glue small triangular gussets at the corners where the walls meet the floor. These pieces stop the Cardboard Camper Diy project from leaning or wobbling when you move it around.
Proper bracing ensures your Cardboard Camper holds its shape for a long time. Double the thickness of the panels in high stress areas for extra strength. Using a Cardboard Truck Template helps you place these supports in the right spots. If you are making a Cardboard Semi or a Diy Mack Truck Cardboard, horizontal braces prevent the long side walls from bowing outward or collapsing under their own weight.
Roofing Installation
The roof of a Cardboard Rv needs a perfect fit to keep the structure stable. For a flat roof, cut a panel slightly wider than the body. Glue support ledges inside the top edge of the walls first. This gives the roof a surface to sit on. If you are building a Cardboard Camper Van, a flush fit looks professional and keeps the corners sharp and clean.
Creating a curved roof for your Cardboard Rv Camper requires scoring the material. Press lines into the board with a blunt tool to make it bend smoothly. Attach the curved piece to the front and back gables using strong wood glue. This technique is vital for a Trailer Diy project. It gives your Cardboard Rv the classic aerodynamic shape seen on real highways and makes it look like a professional model.
Detailed Finishing For A Cardboard Camper Van

Exterior Detailing
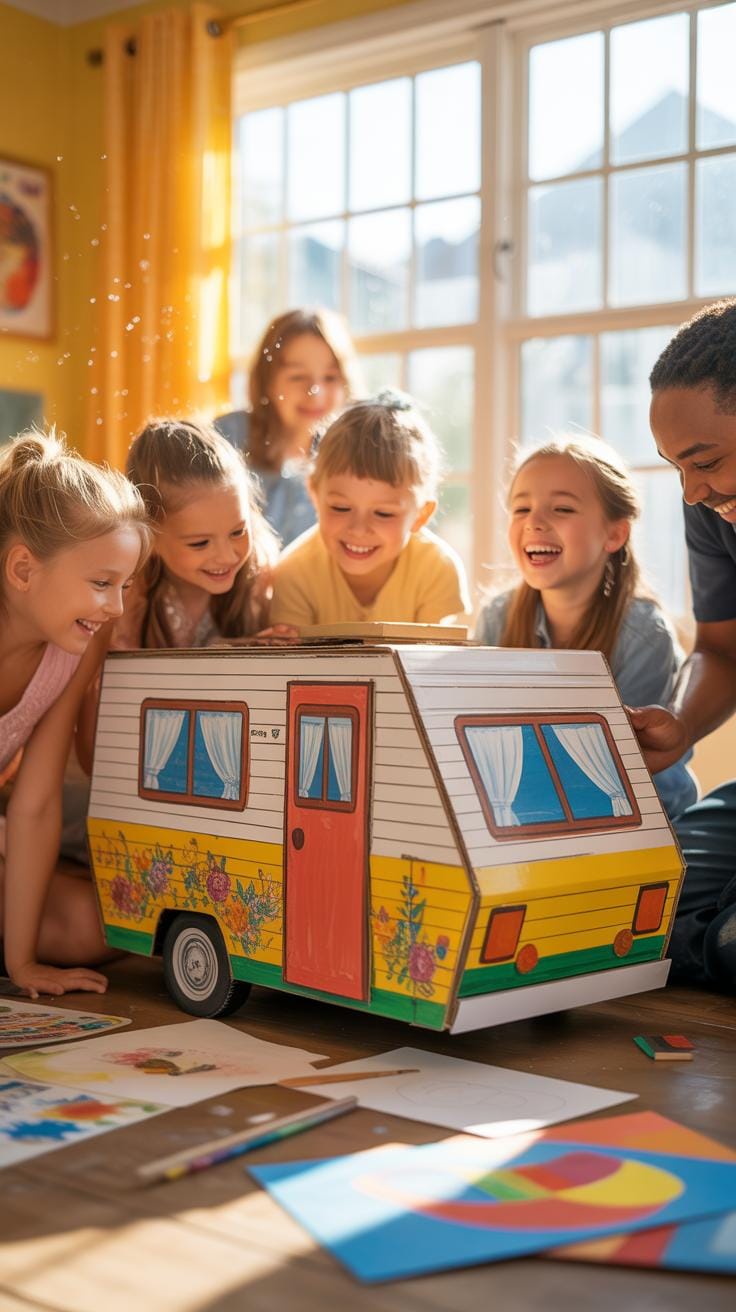
Building a Cardboard Camper Van requires careful attention to small parts. Cut out rectangles for windows and use clear plastic scraps for glass. Use thin cardboard strips to create window frames and door handles. This adds depth to your Cardboard Camper. You can mimic the look of a Cardboard Semi or a Diy Mack Truck Cardboard by adding tiny mirrors and wipers made from toothpicks or wire.
Focus on the rear of your Cardboard Rv Camper to make it look real. Glue small red and orange paper circles for taillights. Use a Cardboard Truck Template to help you draw straight lines for body panels. These details turn a simple box into a tiny Cardboard Rv. Adding a small ladder or a roof rack makes your Trailer Diy project look like it is ready for a trip.
Sanding And Prepping
Your Cardboard Camper Diy project needs a smooth surface before you paint. Rub fine sandpaper over dried glue spots and seams. Be gentle so you do not tear the top layer of the paper. This step removes bumps and makes the Cardboard Truck Template shapes look sharp. Smoothing the edges helps your Cardboard Rv look like a professional model rather than a rough school project.
Apply a thin layer of white glue or primer to seal the porous surface. This prevents the cardboard from soaking up too much paint later. Make sure all joints are tight on your Cardboard Camper Van. If you see gaps, fill them with a mix of saw dust and glue. This preparation ensures your finished Cardboard Semi looks solid and clean. A well-prepped surface is the secret to a great Trailer Diy build.
Creative Customizing Of A Cardboard Rv

Interior Modelling
Creating a realistic interior for your Cardboard Rv adds charm and depth to your project. Use thin scraps to build tiny kitchen counters and sleeping bunks that fit inside the walls. These small details make your Cardboard Camper Diy project feel like a real home on wheels. You can glue simple shapes to the floor to divide the space into separate living rooms or bedrooms.
A Cardboard Rv Camper looks best when you add textures like fabric scraps for rugs or curtains. Use a Cardboard Truck Template to measure the specific dimensions of your seating areas. This ensures every mini chair and table fits perfectly inside the main frame. Proper scaling helps your Cardboard Camper look professional. Small touches like paper cups or tiny maps create a lived-in feel for your miniature vehicle.
Lighting Effects Integration
Adding light to your Cardboard Camper Van makes it stand out on any shelf. Small battery-powered LED bulbs work perfectly for simulating functional headlights and taillights. You can run thin wires along the floor of your Trailer Diy to keep them hidden from view. Bright lights bring your Cardboard Semi to life and make it look like it is ready for a long night drive.

Carefully poke small holes in the front of your Diy Mack Truck Cardboard to mount the bulbs. Use clear plastic from old packaging to create realistic lenses over the lights. Interior cabin lights give your Cardboard Camper a cozy glow from within. This simple upgrade enhances the visual appeal of your machine. It makes the final model feel like a high-quality collectible rather than just a simple paper craft.
Advanced Trailer Diy Construction Tips

Layering For Strength
Building a sturdy Cardboard Rv requires a process called cross-lamination. You glue multiple sheets of corrugated board together to create a thick panel. Orient the internal flutes of each layer in opposite directions. This technique mimics the structural integrity of plywood. It makes your Trailer Diy project strong enough to hold its shape. Use a heavy object to press the layers together while the wood glue dries.
A solid base is vital for a heavy-duty Cardboard Camper. You can achieve high strength by bonding three or four layers for the floor and walls. This method helps your Cardboard Semi resist bending or sagging over time. It provides a stable foundation for a Cardboard Truck Template to sit upon. Thick walls also help your Cardboard Camper Diy look realistic and professional. Proper layering ensures your creation stands tall for years.
Weather Proofing Methods Fake
Cardboard absorbs moisture quickly because it is a porous material. Protecting your Cardboard Rv Camper from humidity requires a dedicated sealing stage. You can apply a thin layer of diluted white glue over the entire surface. This creates a basic skin that stops the fibers from soaking up water. It is a slow process but keeps your Cardboard Camper Van safe from damp indoor air.
For a better finish, use acrylic paint or a clear varnish on your Diy Mack Truck Cardboard. These coatings act as a shield against light splashes and spills. You should apply several light coats rather than one thick layer. This prevents the paper from warping or bubbling during the drying phase. A well-sealed Cardboard Camper stays rigid and keeps its vibrant colors. Proper sealing turns a simple paper model into a lasting piece of art.
Building A Diy Mack Truck Cardboard Rig
Cab To Trailer Hitch
Creating a functional fifth-wheel connection is the most important part of your Diy Mack Truck Cardboard project. You must build a circular plate on the truck rear to hold the weight. Use thick layers of corrugated sheets glued together for strength. This base allows your Cardboard Semi to pivot smoothly during play. A sturdy wooden dowel or rolled paper tube serves as the kingpin to lock the units together safely.
The hitch system must remain flexible enough for sharp turns while staying secure during transport. This Trailer Diy technique mimics how real heavy trucks operate on the highway. You can apply this same engineering logic when building a Cardboard Rv or a smaller Cardboard Camper Van. Proper weight distribution ensures the front of the trailer does not crush the back of the cab. A strong bond here prevents a total collapse.
Aesthetic Mimicry Tips
A Diy Mack Truck Cardboard rig needs a signature look to feel authentic. Use silver or chrome spray paint to give the bumpers and fuel tanks a metallic finish. Real trucks from the mid-twentieth century featured bold vertical grilles and round headlights. You can cut these shapes from a Cardboard Truck Template to ensure everything looks symmetrical. Dull gray paint helps create a realistic industrial appearance for the chassis.
Adding small details brings your Cardboard Rv Camper to life. Use plastic bottle caps for wheels and small discarded boxes for side mirrors. These touches make your Cardboard Camper look professional rather than like a simple toy. If you want a Cardboard Camper Diy project that stands out, add hand-painted logos on the side panels. These visual elements capture the nostalgic spirit of long-haul trucking and heavy duty American machinery.
Displaying Your Cardboard Camper Masterpiece
Base Mounting Ideas
A sturdy base provides a professional finish for your Cardboard Rv. You can use a thick piece of plywood or extra layers of corrugated board to support the weight. Paint the surface to look like a dusty desert road or a grassy forest campsite. Adding small pebbles and faux moss helps your Cardboard Camper Diy project feel like a real miniature outdoor scene.
Position your model to create a narrative within the display. If you built a Cardboard Semi or a Diy Mack Truck Cardboard, place them on a paved black surface with white dashed lines. These small details ground your Cardboard Rv Camper in a believable environment. A well-designed base protects the bottom edges of the Trailer Diy build from fraying over time during handling.
Long Term Preservation
Cardboard absorbs moisture from the air which causes soft spots or sagging. Keep your Cardboard Camper away from damp basements or humid laundry rooms to maintain its shape. Direct sunlight also fades any ink from a Cardboard Truck Template or custom paint colors. A cool and dry shelf inside a glass cabinet offers the best protection against these environmental factors for your art.
Dust often settles into the small grooves of a Cardboard Camper Van or other corrugated structures. Use a soft makeup brush or a pressurized air can to clean the surfaces gently. Avoid using wet cloths because water ruins the glue bonds and weakens the paper fibers. Proper care ensures your Cardboard Rv Camper stays rigid and looks brand new for many years of enjoyment.
Frequently Asked Questions

Is it really possible to build a functional trailer using only cardboard and glue?
Yes, it is entirely possible to build a functional model or lightweight play toy using these simple materials. By using a technique called lamination—gluing multiple layers of corrugated cardboard together—you create a surprisingly rigid and durable structure. While it won’t haul heavy machinery, a homemade cardboard trailer is a fantastic, eco-friendly project for children’s toys, school presentations, or lightweight decorative displays inside your home.
How do I ensure my homemade cardboard trailer is sturdy enough to hold items?
Strength comes from structural integrity and the type of adhesive you choose. Always cross-grain your cardboard layers, placing one sheet vertically and the next horizontally before gluing. Use a high-quality wood glue or construction adhesive for a permanent bond. This layering method ensures your homemade cardboard trailer can support more weight without bending or collapsing, making it a reliable project for hauling plush toys or light craft supplies.
What is the estimated cost of making a trailer from recycled cardboard?
One of the best parts of this hobby is that it is incredibly budget-friendly. Since the primary material is often sourced from shipping boxes, your only real expenses are a bottle of strong glue and perhaps some utility knife blades. Most enthusiasts can complete this project for under ten dollars. It is an accessible way for anyone to practice engineering and design principles without investing in expensive wood or metal materials.