

The Minimalist Mindset: Why Most DIY Truck Bed Campers Fail

The Overbuilding Trap
You want to prove you built something real. That’s why you’re reading this. The mechanism is simple: a truck bed has finite weight capacity and space, yet most builders treat it like a blank canvas instead of a constraint problem. They add features instead of removing them. They insulate when they should question why. They build cabinets before they’ve slept in the truck once.
The truck bed camper fails not because it lacks features, but because the builder never established what actually matters for their specific trips. Weight creep kills fuel economy and handling. Complexity breaks on rough terrain. Features you never use waste money and real estate. The question isn’t what you could add. It’s what you’d regret not having after three nights in the field.
Function Over Finish
Don’t waste time on aesthetics before the core system works. A plywood interior looks rough. It also costs thirty dollars and can be replaced in an afternoon if your layout fails. Painted trim and custom cabinetry trap you in bad decisions. Rough functionality first means you camp, learn what you actually need, then refine.
Test everything on real trips before refinement. Ventilation beats insulation if moisture becomes your problem. Accessible water storage beats a fancy sink if you camp dry. A simple platform bed reveals sleep comfort before you build frame details. Use your first three trips to identify the one thing that would genuinely improve your experience, then solve that single problem instead of redesigning the whole system.
Deconstructing The DIY Truck Camper Myth: What You Actually Need

What Actually Matters Vs. What Kills Your Build

You want permission to buy stuff without feeling guilty about it. That’s the real reason you’re reading this section. The mechanism is simple: most DIY truck bed camper builds fail not because they lack features, but because builders confuse “nice to have” with “functional.” Every component you add increases weight, complexity, and failure points. The truck bed has finite payload capacity. That’s the hard limit. Exceed it and your suspension fails, your brakes suffer, and your entire rig becomes unsafe. You cannot negotiate with physics.
The only components that matter are shelter, sleeping, and water. Everything else competes for the same truck bed real estate. A roof and walls keep weather out. A bed lets you sleep without back pain. Fresh water lets you stay longer than a day. Propane heat, LED lights, a kitchen, solar panels, a composting toilet, cabinet storage, an awning—these are optimizations. They’re not the foundation. Most first-time builders install five systems before they finalize one. That’s the real problem. Commit to the minimum first. Upgrade only after a full weekend in the field reveals what you actually miss.
The Real Cost Of Adding One More Thing
Economics calls this the principle of opportunity cost: adding feature X means removing budget and weight for feature Y. Your truck bed camper operates under hard constraints. You have roughly 1,500 to 2,000 pounds of payload on most half-ton trucks, and weather sealing takes priority over comfort. A propane heating system costs 400 to 800 dollars and weighs 50 pounds. That same budget and weight could build insulation into all four walls, which solves the cold problem without active systems that can fail.
Most builders justify additions through false scenarios. “What if I’m stuck in freezing weather?” happens once every five years. “What if I need to cook?” happens every trip. The cost-benefit calculation demands you weight frequency against total system cost and failure risk. A simple propane stove costs 100 dollars and weighs 5 pounds. A full kitchen with sink, plumbing, and storage costs 1,500 dollars and weighs 200 pounds. One feeds you every day. The other sits unused 80 percent of the time. Strip the rig down to what you will actually use on your next three trips, then build from there.
The “Cargo First” Protocol: Designing Your Truck Bed Camping Space
Start With Weight Distribution, Not Aesthetics

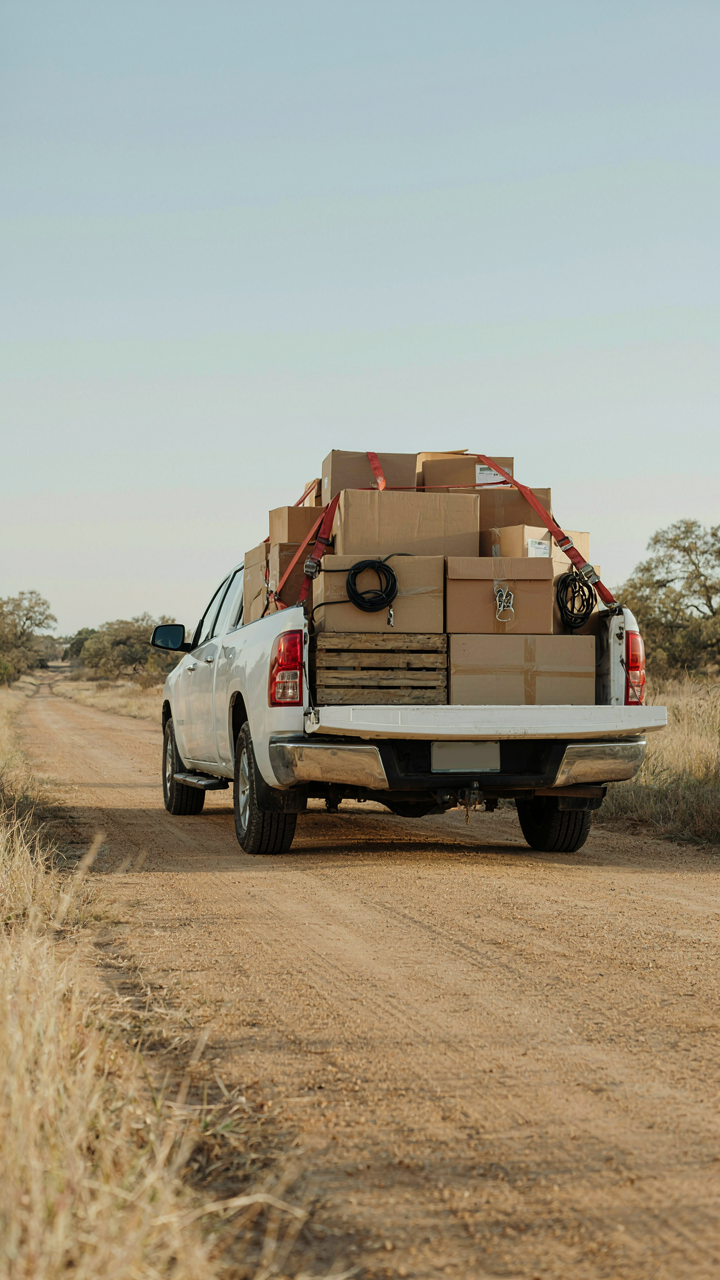
You want your camper to look intentional and put-together. That’s not the actual problem you’re solving. The mechanism is weight distribution: a truck bed has load limits, and how you stack matters more than how it looks. Front-to-back balance keeps the suspension from bottoming out on bumps. Side-to-side balance prevents the truck from sitting crooked, which kills fuel economy and steering response. Load the heaviest items low and centered—batteries, water, fuel—then build around them. This isn’t decoration.
Most DIY builds fail because people design vertically first, then panic when the truck sags. Reverse the order. Calculate your payload capacity by subtracting the cab weight from your truck’s GVWR. Subtract crew weight. What remains is your cargo budget. Heavy batteries go under the platform. Propane canisters mount low and forward. Water tanks sit centered. Only after weight is locked does the frame go vertical. This prevents mid-trip discoveries that your camper rides like a sack of potatoes.
Interchangeable Systems Over Fixed Build
The common advice says to bolt everything down permanently so nothing shifts. That’s incomplete. Permanent mounts work for weekend trips, but they create two problems: you can’t adapt for different trip types, and removal for service takes hours. The real move comes from systems thinking in logistics. Your truck bed is a shipping container, not a sculpture. Design mounts that let you swap modules without tools or frustration.
Build a plywood platform with a grid of holes spaced sixteen inches apart, running both directions. Use threaded inserts and quick-release clamps instead of bolts. Your water tank, cooler, and sleeping platform all slide into the same frame using identical mounting points. Need less capacity for a solo trip? Leave modules at home. Broken refrigerator? Swap the whole unit in minutes. This approach costs slightly more upfront but eliminates the rebuild treadmill that kills projects.
The “Kinetic Energy” Method: Optimizing Weight Distribution For Your Truck Camper Build

How Your Truck Actually Handles Weight

You care about this because an unstable camper kills the whole project—either it handles like garbage or it rolls. Physics doesn’t care about your intentions. Vehicle dynamics borrowed from motorsport engineering reveals one hard truth: your truck’s center of gravity determines everything. Moving weight up or back shifts that point rearward and upward, which changes how the chassis responds to turns, braking, and uneven terrain. Most builders ignore this until they feel the truck wandering on the highway or the rear end bottoming out.
Your camper’s weight distribution affects how your truck’s suspension compresses and how axles load. If you stack everything high and far back, you’re essentially lifting the front wheels’ grip while overloading the rear springs. The truck becomes a pendulum. Even a well-built camper in the wrong position will make your truck feel unsafe because it fundamentally is. Get the weight low and centered over the axles, and the truck performs like it was designed to.
Securing Everything Against Movement
The common advice about “strapping things down” misses the actual mechanism. Cargo shift during acceleration, braking, and cornering isn’t a safety concern—it’s a physics failure. Any unsecured weight that moves during transit changes your center of gravity mid-drive. That’s catastrophic for handling. Every item in your camper needs to be immobilized relative to the truck bed, not just the camper relative to the truck.
Use heavy-duty tie-down points bolted directly to the truck frame, not just the bed. Secure your camper shell to the bed with corner brackets that prevent sliding, not just reduce it. Pack dense items low and forward. Distribute weight so the rear axle carries no more than 60 percent of total vehicle weight when loaded. Run a test drive on empty roads and feel the difference before heading to highway speeds.
Materials That Matter: Smart Choices For Your Diy Truck Bedding

Weight And Durability Trade Off

You want your build to last forever without turning your truck into a mobile anchor. That tension is real, and pretending it doesn’t exist is how people end up rebuilding their camper every two years. In engineering terms, this is a constraint optimization problem: you’re maximizing lifespan while minimizing payload burden on your suspension and fuel economy.
Aluminum framing costs more upfront than steel but saves 40 to 50 percent of weight while lasting just as long in weather. Plywood sheathing is cheaper and stronger in compression than foam composites, but absorbs water and rots if your seal fails. The actual mechanism is straightforward: heavier materials survive abuse but degrade your truck’s handling and efficiency. Lighter materials preserve performance but demand better execution on waterproofing or you’ve paid for nothing.
Sealing Your Investment From Moisture
The common advice here is incomplete. Most guides tell you to caulk gaps and call it done, missing the fact that moisture doesn’t just come through holes, it comes through material transmission and condensation cycles. Your truck bed camper functions like a thermal envelope: temperature swings between inside and outside create pressure differentials that push water vapor into your structure.
EPDM rubber membrane is the mechanical answer. It’s a single continuous layer that stops bulk water at the source rather than trying to patch entry points after damage starts. Install it as your first layer on the truck bed floor, overlap seams by six inches minimum, and tape every joint with compatible adhesive. Roof penetrations need flashing that extends under your top membrane and over your roofing material, creating a drainage plane that water can’t cross. This sequencing prevents saturation at the critical interface where your camper shell meets the truck frame.
The “Adaptation” Principle: Modular DIY Truck Box Camper Ideas

Design For Environmental Variability

You want modularity because you’re afraid of building something that only works one way. The mechanism is biological adaptation: organisms that survive variable conditions build redundancy into their systems, not specialization. Your truck bed camper faces temperature swings, weather shifts, and terrain changes. Static designs fail under this variance. Modular systems distribute load and function across removable components. A sleeping platform that detaches lets you swap storage underneath. Walls that slide out create airflow in summer, seal tight in winter. The camper becomes a system that reconfigures, not a fixed box that breaks under stress.
The engineering principle here is modularity through standardized connection points. Use 80/20 aluminum framing or bolt patterns that repeat. This means every module you build later fits into the same structural grid. You’re not redesigning mounts each time. When a cooler needs to go where a stove sat last month, the connection is already there. This saves material, weight, and rebuild time. The framework stays. Only the modules change.
Quick Change Modules For Different Trips
Most people treat their camper like a car: drive it the same way every time. That’s the wrong frame. Think of it like a military loadout system. Soldiers reconfigure gear for specific missions, not for all missions at once. Your truck bed should work the same way. A two-night desert trip needs different modules than a week-long mountain camp. You shouldn’t haul extra capacity you won’t use.
Build modules around removable boxes, slide-out drawers, and quick-disconnect components. A galley box with a stove and counter slides in for cooking trips. A storage locker replaces it for gear-heavy adventures. Battery and power modules connect via Anderson connectors, not permanent wiring. Mattress platforms sit on ledgers, not bolted frames. This means you pull what you need, leave the rest home, and stay under your truck’s payload limit. Test each module’s attachment and removal process before your first trip. Record the order so setup takes minutes, not hours.
Powering Your Adventure: Realistic Expectations For Truck Bed Camping Diy
Know Your Actual Load Before Buying

You want to feel prepared without admitting you have no idea what you actually need. Most builders buy power systems based on what sounds impressive, not what they’ll use. Power consumption works like a budget constraint from economics: your total draw cannot exceed your supply capacity, or the system fails completely. Start by listing every device you plan to run simultaneously, then multiply each wattage by daily hours of use. A 100-watt fridge running 18 hours daily needs 1,800 watt-hours. A phone charger drawing 10 watts for 2 hours adds 20 watt-hours. This isn’t sexy, but it’s the only number that matters.
Write down actual usage patterns from your regular life, then adjust for camping reality. Most people overestimate entertainment and underestimate refrigeration. A 200-amp-hour lithium battery provides roughly 2,400 usable watt-hours at 12 volts, assuming 80 percent depth of discharge. Your fridge will demand the most power. Lights, fans, and USB devices fill the remainder. Stop guessing; build a spreadsheet. This one document prevents every power-system mistake downstream.
Simple Wins Over Complexity
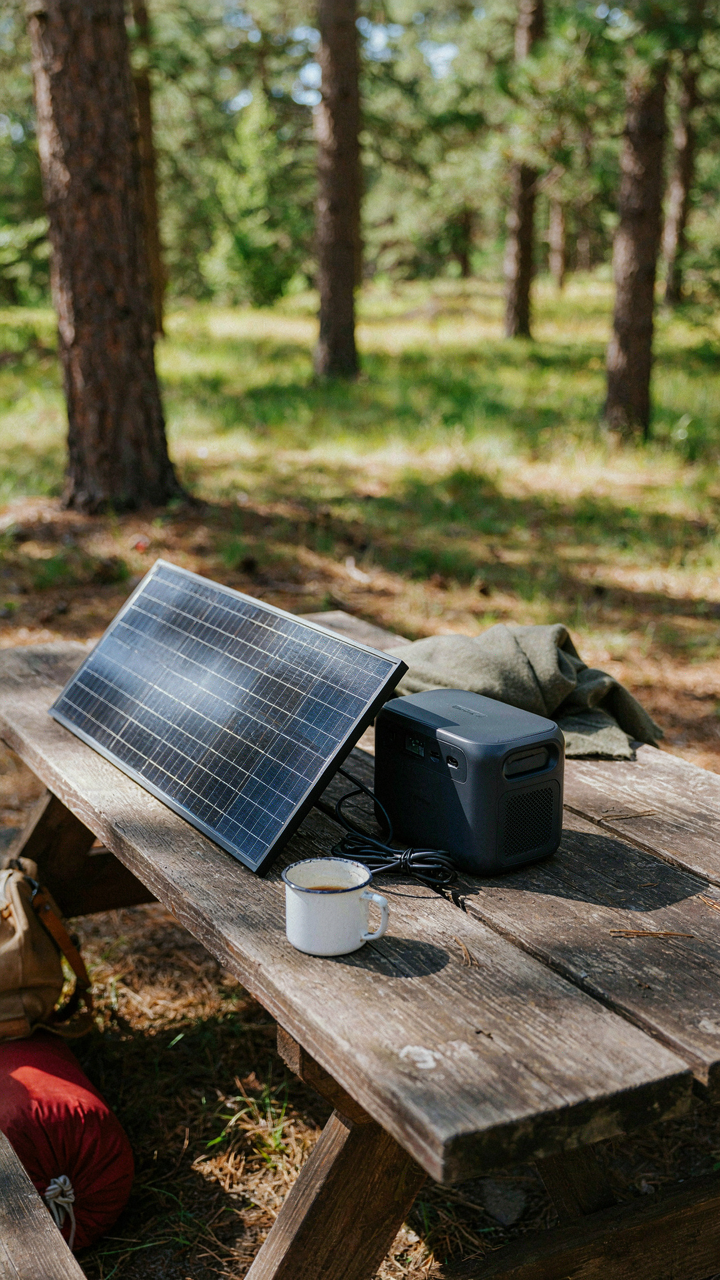
Conventional wisdom says add solar panels and fancy charge controllers to feel secure. You don’t need either for a weekend trip. A 100-watt solar panel takes eight hours to recover 800 watt-hours on a clear day, which won’t fully recharge your battery if your fridge ran overnight. You’re better off running a second trip to town or keeping charging cycles short.
The strongest move is a single quality battery paired with proper charging at home before departure. A LiFePO4 battery from a known manufacturer like Battle Born or Relion charges fully in four hours from a standard 20-amp home charger. Bring this battery charged, use it for three days, and top it up at home again. This costs less than a solar setup and eliminates the weight, wiring, and failure points. For most weekend campers, this protocol removes the power problem entirely.
Security And Stealth: Protecting Your Diy Truck Camper Assets

The Invisible Camper Principle

You want to feel safe without looking paranoid. The real mechanism is visual hierarchy: thieves scan for value signals, not trucks. A box that blends with working vehicles disappears from the decision tree entirely. This comes from target selection in predatory behavior. Your camper isn’t the target if it reads as ordinary infrastructure. Plain materials, no exterior logos, no solar panels glinting in sunlight, no ladder racks suggesting expensive gear inside. The camper that looks like it belongs to a contractor—not an adventure enthusiast—stops the scanning process before it starts.
Paint matters because contrast creates memory. Use matte black, gray, or primer-color finishes. Gloss reflects light and announces presence. Window coverings should match the truck bed sides in tone. Reflectors, LED strips, and polished metal trim are visual invitations. Build the camper to sit level with or below the truck bed rails so it reads as cargo, not accommodation. Keep the profile boxy and utilitarian. A sleek, custom shape signals money and craftsmanship. Utility signals nothing worth stealing.
Simple Locks And Predictable Patterns
Most advice on truck bed security is incomplete because it treats the camper as separate from the truck. They’re not. A thief evaluates the whole system: truck locks, bed cover locks, camper access points, and owner behavior patterns. Break any one link and the effort-to-reward calculus shifts in their favor. Standard deadbolts on camper doors work because they require tools and time. Padlocks on exterior storage fail because bolt cutters defeat them in seconds. Interior deadbolts with reinforced strike plates make forced entry loud and slow.
Your entry routine is the real vulnerability. Park in different locations when possible. Don’t leave the camper unattended in the same spot for weeks. Store expensive gear inside locked compartments, not on racks or in open truck beds. Use a basic door alarm on the camper entry point—battery-powered, under fifty dollars. It doesn’t stop entry but signals forced access to you. If someone breaks in while you’re gone, you know it happened rather than discovering items missing days later. Install a simple motion-activated light on the rear of the truck. Most theft occurs under cover of darkness because it removes the social risk of being seen.
The “Iteration Cycle”: Continuous Improvement For Your Truck Bed Camper Build

Test Your Build Before You Need It

You want to believe your camper will work perfectly the first time because admitting otherwise means wasted money and labor. That’s denial talking. The real mechanism is simple: a truck bed camper is a system of moving parts, materials, and environmental exposure. No system performs as designed until it actually performs under load.
Take your build camping before you need it for a real trip. Drive it hard. Load the weight you’ll actually carry. Sleep in it. Cook in it. Get rained on. This isn’t theory testing. You’re collecting failure data in a low-stakes environment. Every crack, rattle, leak, or design flaw surfaces when you use the thing, not when you theorize about it. One weekend trip beats a hundred hours of sitting in your driveway.
Track Changes And Why You Made Them
Everyone says to “document your build.” That advice is useless without mechanism. Documentation only matters if you capture why you changed something, not just that you changed it. The difference is massive.
Create a simple log: date, component, what failed or underperformed, what you changed, and the result. Example: “Sept 12. Roof seal. Water pooled at corner joint. Added steel angle iron backing before re-sealing. Dry after next rain.” This pattern prevents you from repeating the same fix twice or abandoning a working solution because you forgot why it worked. Your camper’s evolution becomes reproducible knowledge instead of scattered memory.
The Biggest Obstacle To Your Perfect Truck Bed Camper Build Is Your Own Overthinking

You don’t need the perfect plan. You need to buy one piece of plywood today and cut it. That’s it. Every builder who actually finished their rig started by doing something instead of researching. Analysis paralysis kills more truck bed campers than bad welds ever will. Stop watching videos and start measuring your truck bed this afternoon. The difference between someone with a camper and someone with a dream is one decision made in the driveway.



