Introduction
Unique Wedding Crafts Diy Projects To Try can bring a personal touch to your special day. Creating DIY crafts for your wedding lets you add unique details that reflect your style. It can also be fun and fulfilling to work on projects that make your celebration stand out.
In this article, you will discover a range of wedding craft ideas. From simple décor to keepsakes, you will learn how to plan and create projects that fit your wedding theme. These ideas will inspire you to put your creativity to work and try new techniques that make your wedding memorable.
Planning Your Wedding Crafts DIY Projects
Starting your wedding DIY crafts means making some early decisions that set the whole course. First off, you’ll want to nail down a budget—how much you’re ready to spend specifically on crafts. Maybe it’s tempting to imagine grand, expensive projects, but often, a clear number upfront keeps things from spiraling. Don’t forget to include costs for materials, tools, and even a little extra for unexpected needs. Sometimes, I’ve found that setting a flexible range feels less stressful than a strict cap, though that depends on your personality.
Choosing a theme comes next. This has to fit your wedding’s style and overall decor. Are you going for rustic charm? Elegant minimalism? Or maybe something quirky and colorful? The theme guides everything—from colors to textures to the types of crafts that work best. It’s easy to get carried away with trendy ideas that don’t quite fit the vibe you want, so keep checking back with your main wedding vision.
When picking which crafts to tackle, think about what truly adds to your day. Some projects may be too complicated or time-consuming and might not yield the impact you expect. It’s useful to write down a list of possible crafts and then narrow them based on how much time you have and your comfort level with the skills required.
- Set a clear, reasonable budget specifically for DIY crafts.
- Choose a theme that matches your wedding’s style, not just something trendy.
- List potential projects and consider their time and skill demands.
- Be honest about what you can realistically complete before the big day.
Time management is key. You might feel driven to complete every little idea, but running out of time is common. Maybe aim to finish a few standout crafts well, rather than many half-done ones. The balance between what’s ideal and what’s realistic is tricky—sometimes you have to compromise and that’s okay.
Essential Materials and Tools for Wedding DIY Crafts
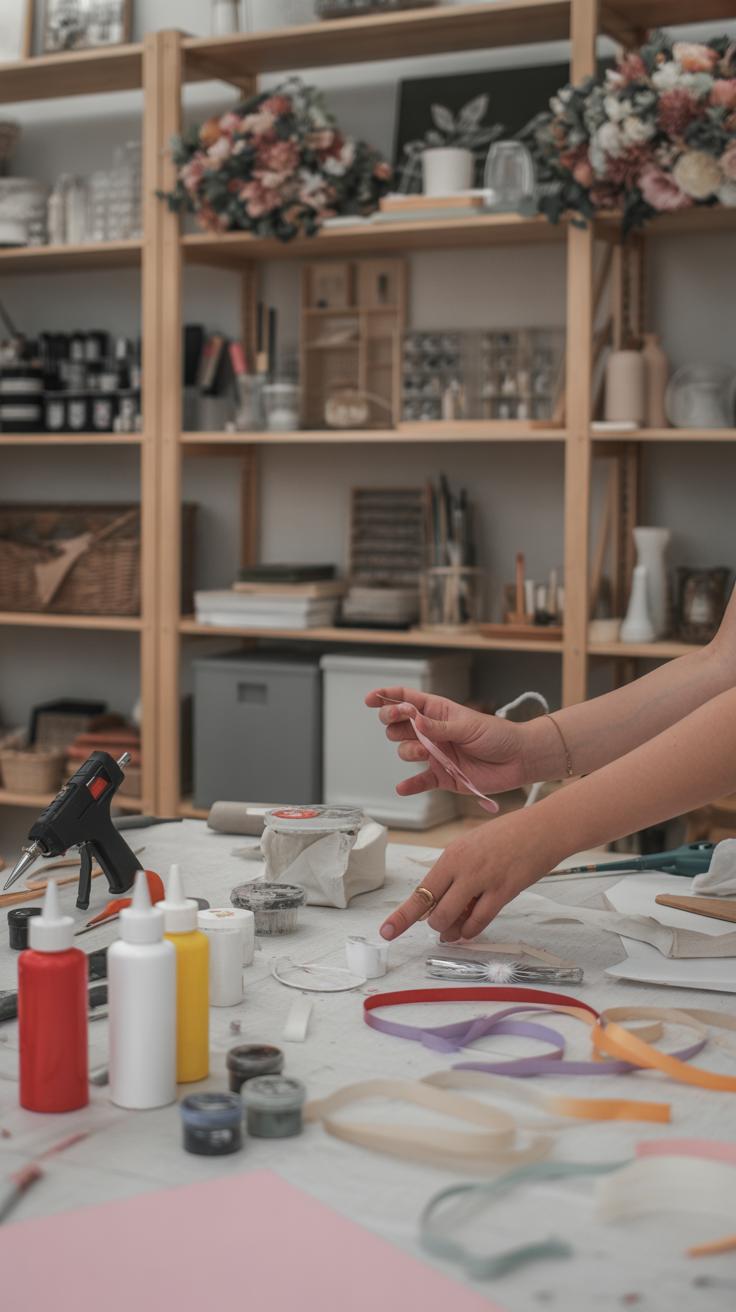
When diving into wedding DIY crafts, gathering the right materials sets the tone for your entire creative process. You’ll probably want to stock up on some basics like quality paper—think cardstock for invitations or softer sheets for decoration accents. Fabrics come next, often in the form of tulle, lace, or burlap, depending on your wedding’s mood. Ribbons are surprisingly versatile; they tie together themes and add texture. Don’t underestimate adhesives either—glue sticks for paper, fabric glue, and a trusty hot glue gun all play their parts.
Finding these supplies without breaking the bank can be a bit of a puzzle. Craft stores have sales—watch for them. Online marketplaces sometimes offer bulk discounts, which is handy if you’re making a lot of items. I’ve also found dollar stores surprisingly helpful for basic ribbons and tapes. Organizing your materials right from the start saves a lot of time later. Use clear containers or labeled bins; it doesn’t have to be perfect, just functional.
For tools, scissors are essential—but having a pair dedicated to fabric and another for paper makes things easier. A self-healing cutting mat protects your workspace and helps keep cuts straight. You might want a bone folder or scoring tool for crisp folds, especially when making invitations or place cards. Hot glue guns speed up assembly, though they do require some patience not to burn your fingers—it’s almost a rite of passage in crafting!
Think about your space too. Can you leave your supplies out, or do they need to be packed away each time? I sometimes spread my tools across the dining table, which works in the moment but isn’t ideal long term. It’s a small detail, but it adds up.
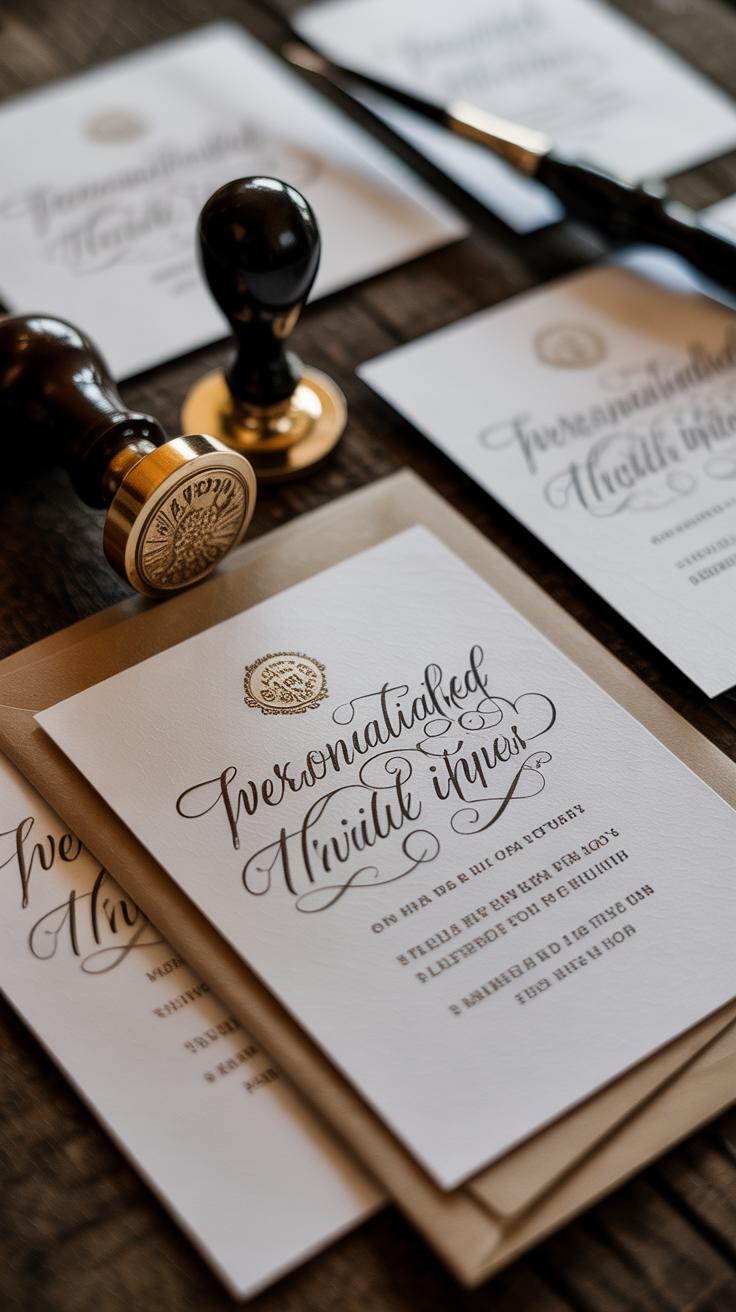
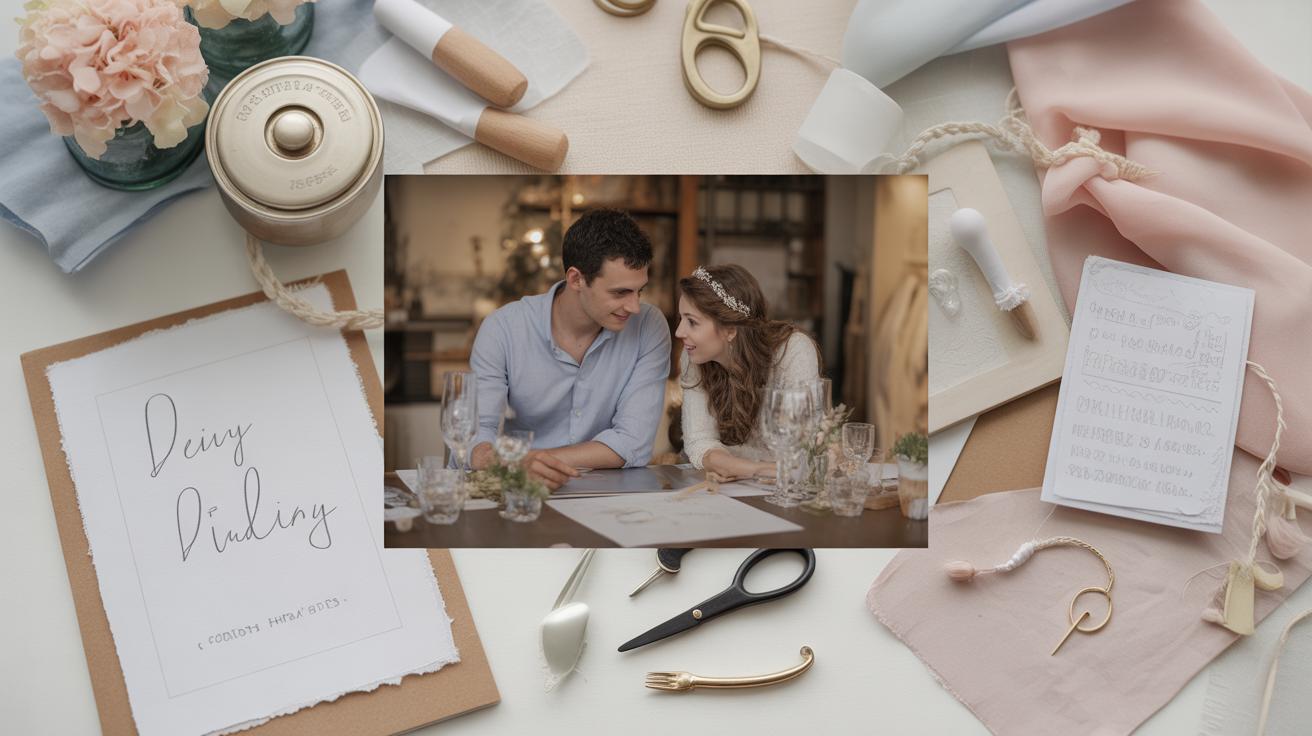
Creating Personalized Wedding Invitations

Designing Your Own Invitations
When you start planning your invitation design, think about your wedding theme first. Is it rustic, modern, or maybe vintage? Matching your invitations to this vibe helps set the tone early on. Sometimes, choosing just one or two colors from the wedding palette to focus on can make the process feel less overwhelming.
Sketching a rough layout can help too. For example, placing the couple’s names prominently or deciding between a traditional vs. minimalist style. You don’t need fancy software; even basic design tools or hand-drawing ideas can work well. Just be mindful of spacing and readability, as these are easy to overlook in excitement.

Printing options range from home printers to local print shops. Try printing a test invite first to check colors and paper quality. Matte paper often looks smoother, but textured cardstock can add extra character. Consider if you want flat cards or folded invitations—each choice changes the look and feel quite a bit.
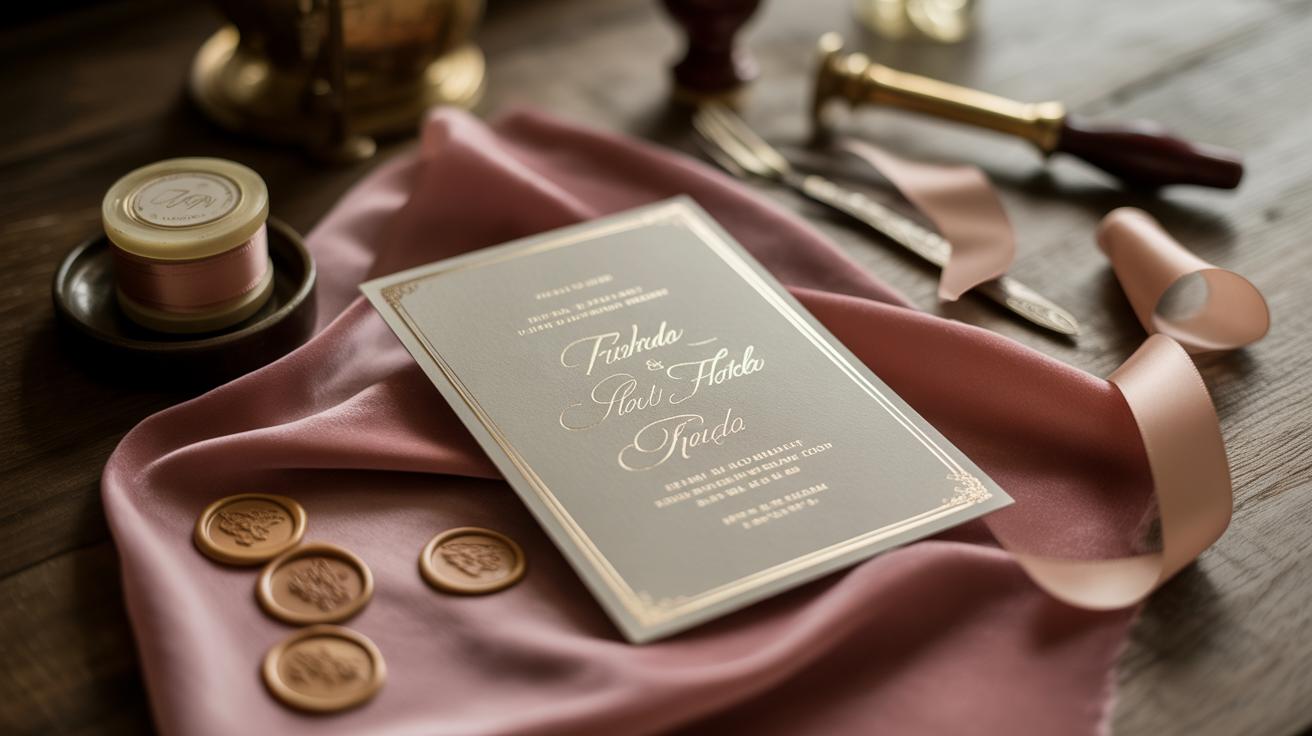
Adding Special Details to Invitations
To give your invitations a personal touch, try adding calligraphy for names or addresses if you have the patience or a neat hand. It doesn’t have to be perfect—sometimes, small imperfections make hand-lettering feel more genuine. If calligraphy sounds intimidating, printed fonts that mimic handwriting can also do the trick.
Decorations like pressed flowers, ribbons, or wax seals can make your invites stand out. Using little elements that relate to your story—maybe a tiny charm or a meaningful symbol—adds layers of meaning. Don’t forget, simple embellishments like a colored border or a stamped detail can catch someone’s eye without going overboard.
Are there ways to include your guests in this process? A thought might be to leave room for handwritten notes or messages inside. These kinds of touches can create anticipation before the big day and feel quite warm.
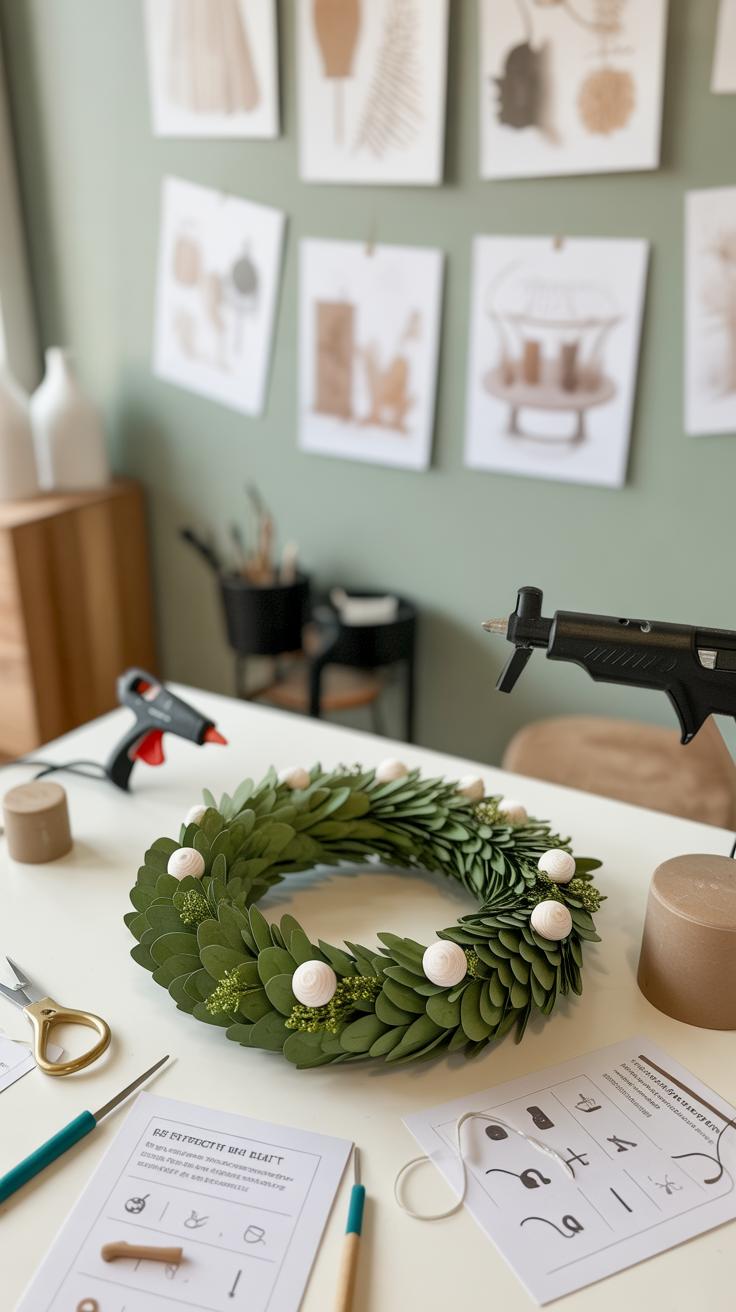
DIY Wedding Decorations That Impress
Making Centerpieces with Everyday Materials
You don’t need fancy store-bought pieces to make charming centerpieces. Glass jars, simple candles, and freshly cut flowers can create a delicate, inviting look that feels very personal. Start with clear or tinted jars—mason jars work great but any jar will do. Fill them with water and place a few stems of flowers, perhaps something seasonal or wildflowers if you want a casual vibe.
Try floating candles on top for a soft glow. If you’re feeling more creative, add a ribbon or lace tied around the jar’s neck to match your wedding colors. For bases, a small mirror or wooden slice adds texture and height. The materials list really isn’t complicated:
- Glass jars or vases
- Fresh flowers or faux ones
- Tea light or floating candles
- Ribbon, lace, or twine
- Optional: wooden slices or mirrors
This setup lets you scale easily. Pick one flower type for simplicity or mix several if you prefer a fuller look. The best part? These centerpieces double as keepsakes or gifts if guests want to take one home. Funny enough, the simplest jars often end up looking the most elegant, though you might want to experiment a bit before the big day.
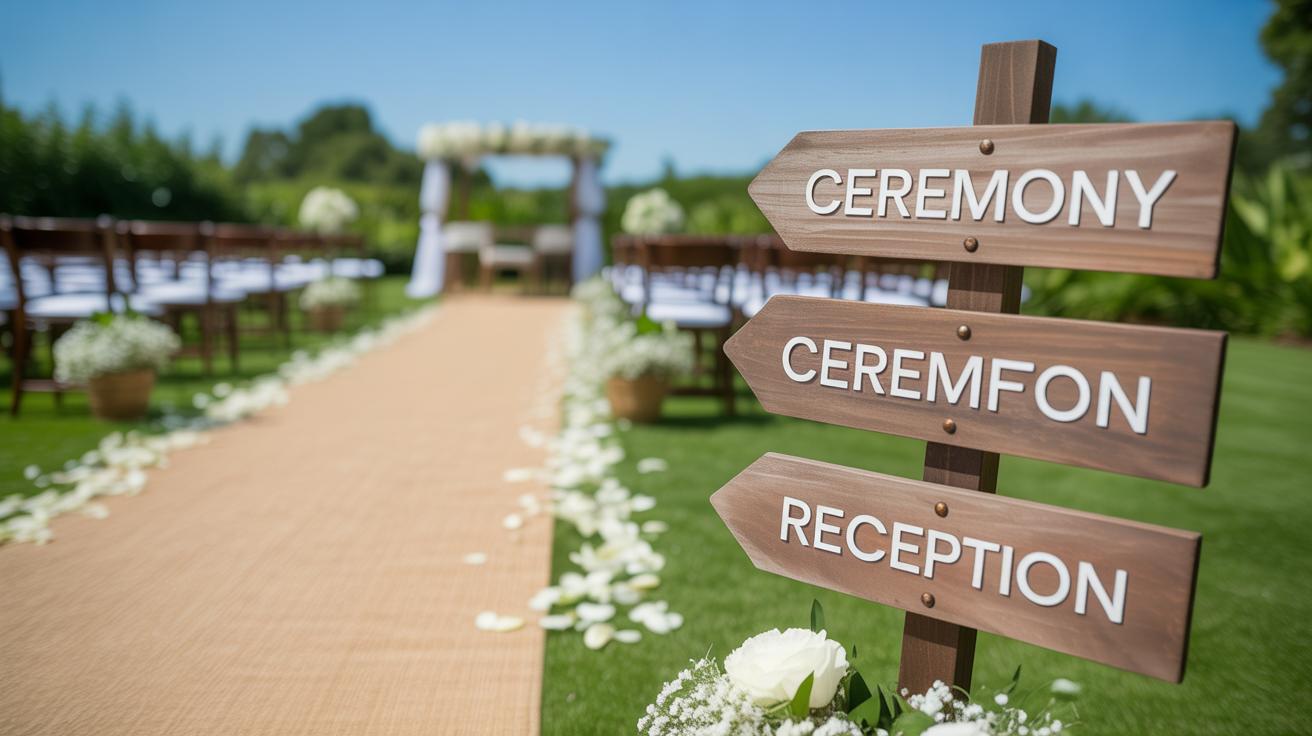
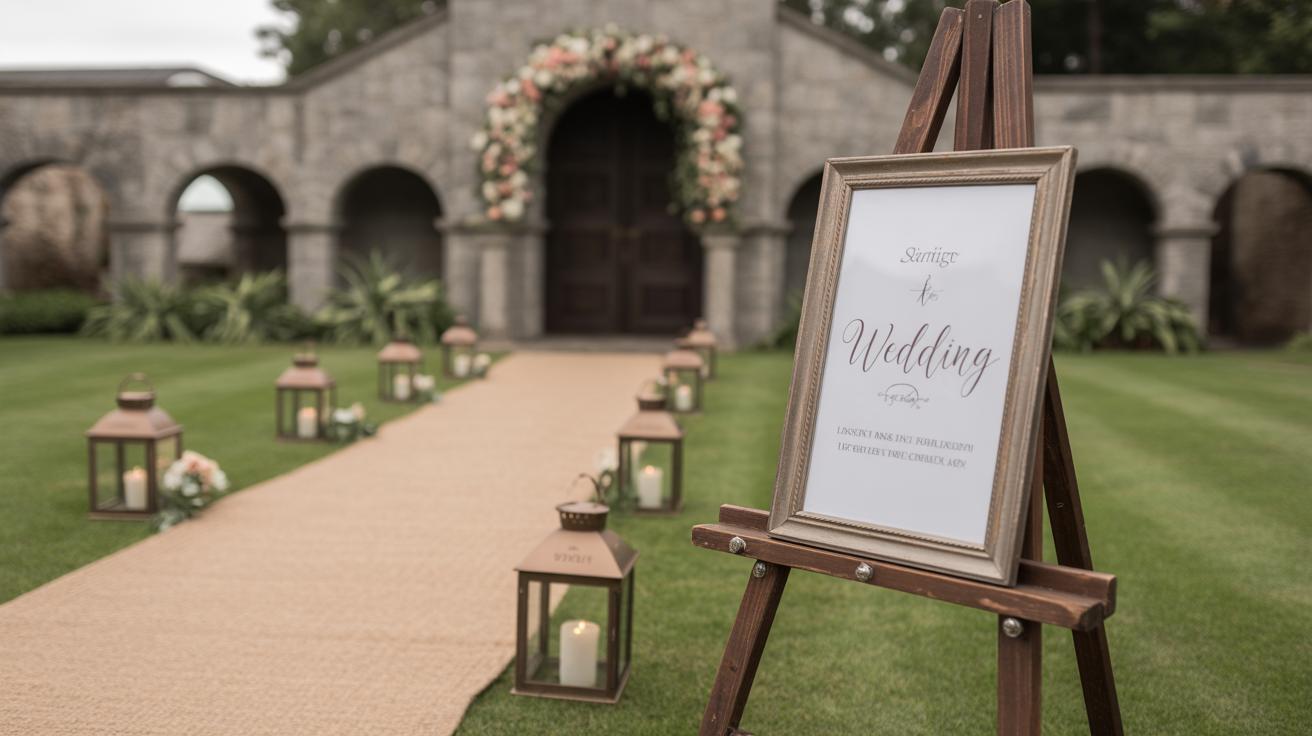
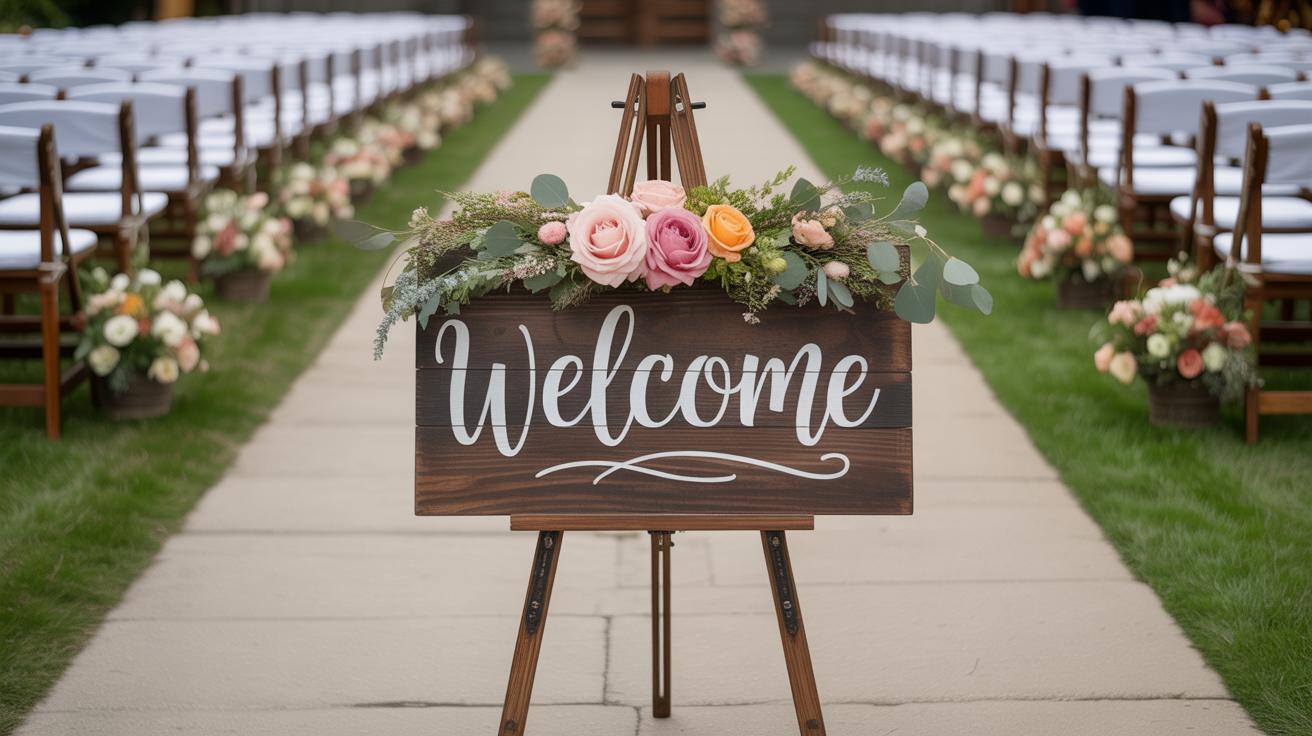
Crafting Banners and Signs
Banners and signs aren’t just directional tools—they set a tone and create a welcoming atmosphere. You have plenty of options—from painted fabrics to hand-cut paper letters. For banners, start with a sturdy base like burlap, canvas, or heavyweight paper. You can stencil or paint letters, or even use markers. If painting intimidates you, try printing out letters and gluing them onto the fabric or paper.
Signs pointing the way to the ceremony or reception can be simple wooden boards repurposed with chalk paint or acrylics. For a more delicate look, fabric signs with sewn edges and hand-painted messages work well too. Materials to keep on hand include:
- Burlap, canvas, or heavy paper
- Acrylic paints, markers, or stencils
- Wooden boards or plaques
- Glue, scissors, string or twine
- Optional: chalk paint or stencils
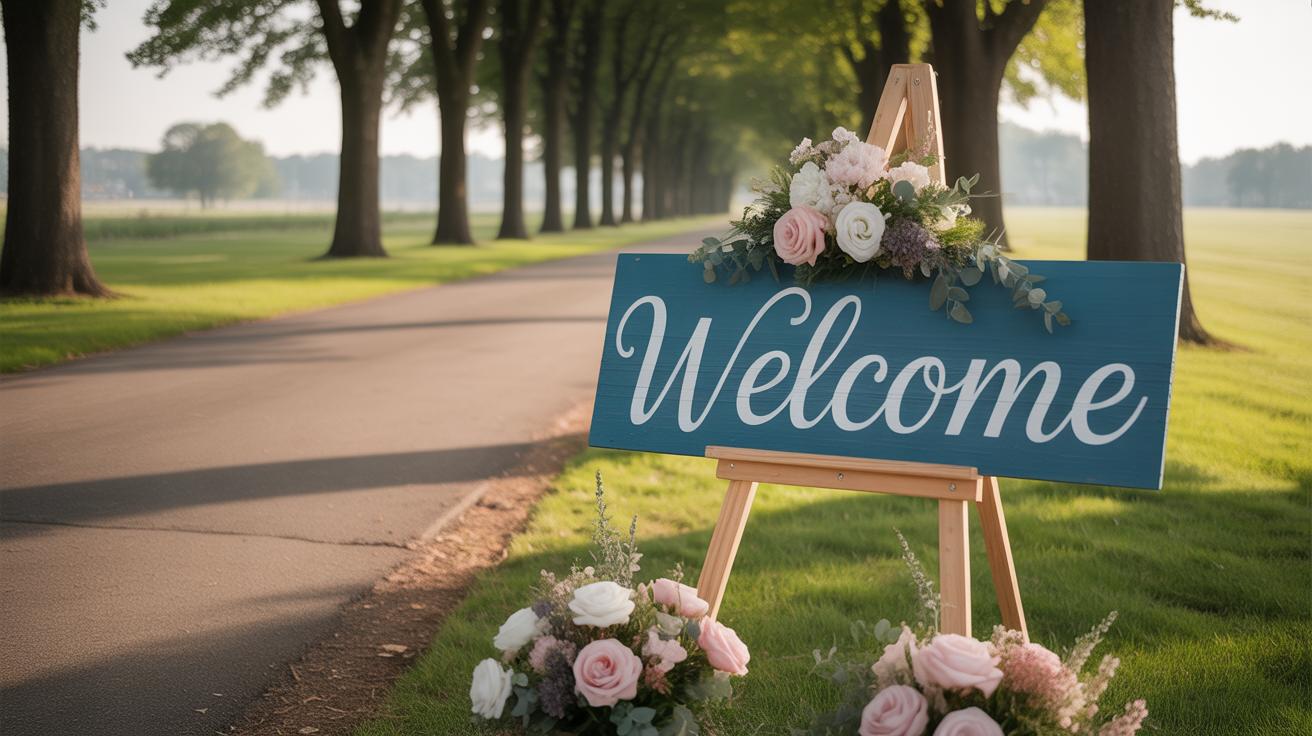
One tip I found useful was to lay everything out on a flat surface before assembling. Sometimes, letters shift or colors dry differently. And don’t hesitate to mix materials—a paper banner framed by fairy lights, for instance, can feel more lively. What kind of message or style do you want for your signs? That might actually decide your materials and look more than anything else.
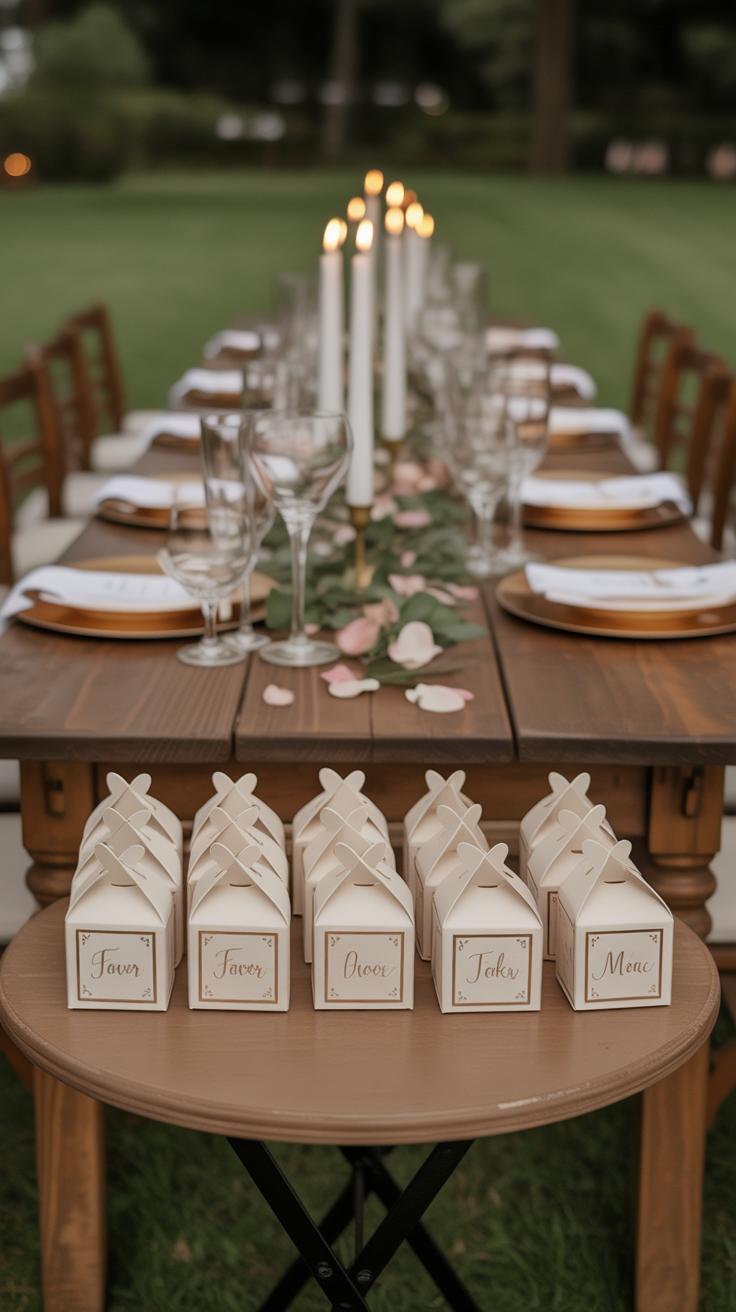
Handmade Wedding Favors Your Guests Will Love
Making your own wedding favors can add a real personal touch that guests notice and appreciate. Edible treats like cookies or jam jars are wonderful options you can whip up ahead of time. For cookies, try baking simple sugar cookies and packaging them in clear bags tied with ribbon. You could even stamp initials or a small symbol on each cookie before baking for extra charm. If jam feels more your style, small jars filled with homemade preserves—maybe strawberry or peach—wrapped in fabric and labeled with your wedding date make a quaint keepsake.
On the other hand, small crafted items can last longer and remind your guests of the event every time they use them. Think about making candles in mini tins, personalized keychains with your wedding colors, or little magnets featuring photos or quotes meaningful to you both. These projects don’t need to be complicated but should carry a hint of your personality. If you’re a bit of a novice, crafting simple items like painted wood slices or stamped clay keychains is quite achievable and won’t take forever.
What kind of favor feels most “you”? Something sweet and consumable, or a tiny treasure to keep? Both have their place, and sometimes mixing a few options works well too. Remember, your favors don’t have to be perfect or pricey—just thoughtful. Guests often mention these little details long after, so why not make them memorable in your own hands-on way?
Designing Your Wedding Guest Book
Making a DIY wedding guest book lets you capture memories in a way that feels genuinely yours. First, think about what style fits your day and personality. You could go with a simple traditional book, which is easy and familiar. Or maybe try a photo board where guests pin Polaroids alongside their messages. There’s also the option of a wooden puzzle or a globe—something guests sign that becomes a keepsake beyond the usual pages.
When you’re crafting the guest book, consider adding interactive elements. Spaces for photos are great, especially if you set up a small instant camera nearby. Guests can snap a quick picture, stick it in, and add a note. Or leave sections for “marriage advice” or “favorite memory,” encouraging people to share more than just a signature.
Personal touches matter. You might decorate the book cover with your wedding colors, add your engagement photos, or use quotes that mean something to you. Also, think about practical details—pens with different ink colors or a quirky table display can make signing feel less like a chore and more like a moment.
Making Bridal Accessories and Details
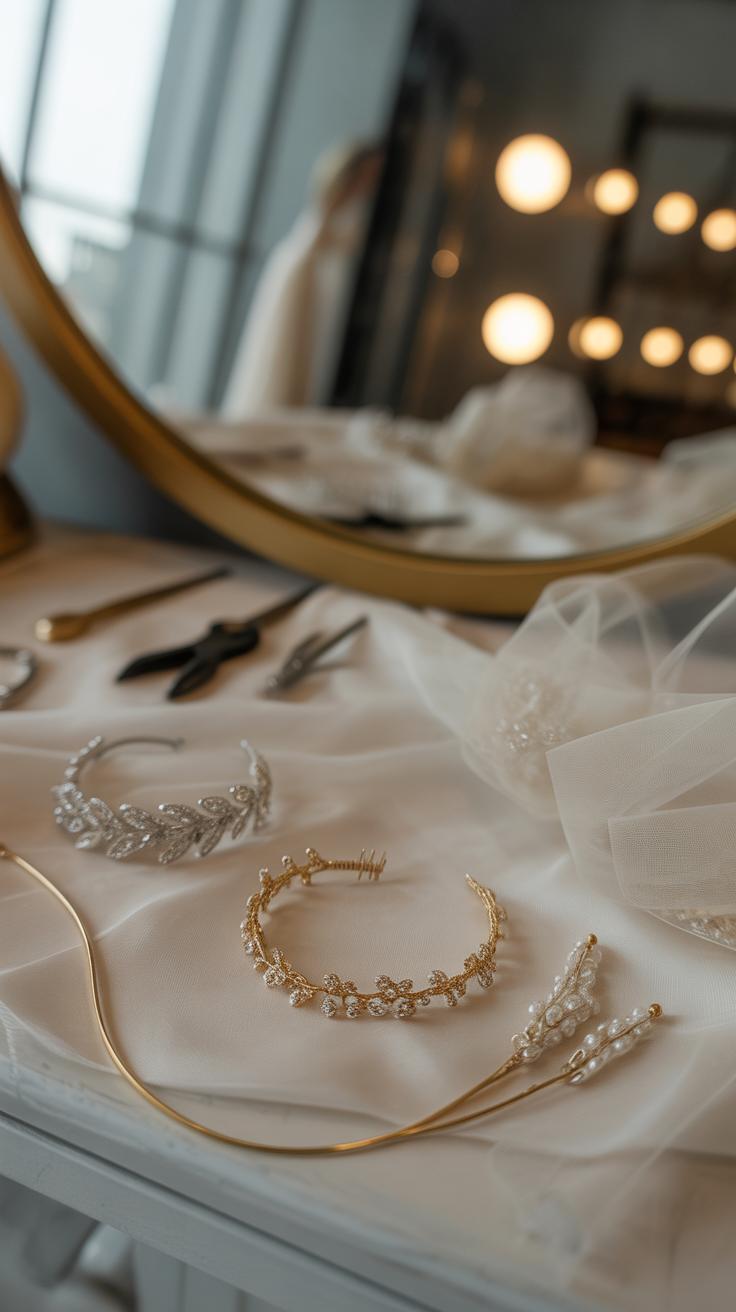
Creating Hair Accessories
Making your own bridal hairpieces can feel surprisingly simple once you gather a few basic materials. Think about what fits your style—fresh flowers, beads, or even fabric can all work.
Start with a base, like a plain metal or plastic hair comb or barrette. Attach small flowers with floral wire or a strong glue, spacing them where you want. If you prefer beads, string them on thin wire and twist into shapes that match your look. Fabric flowers can be made from scraps of lace or silk, cut into petal shapes and sewn or glued together. Pinning on these elements is easier than it looks, really.
Experiment a bit—sometimes adding a touch of greenery around flowers can add depth, or mixing pearl beads within petals makes it feel more delicate. You probably won’t get it perfect right away, but small adjustments on the wedding day are perfectly normal and maybe even part of the charm.
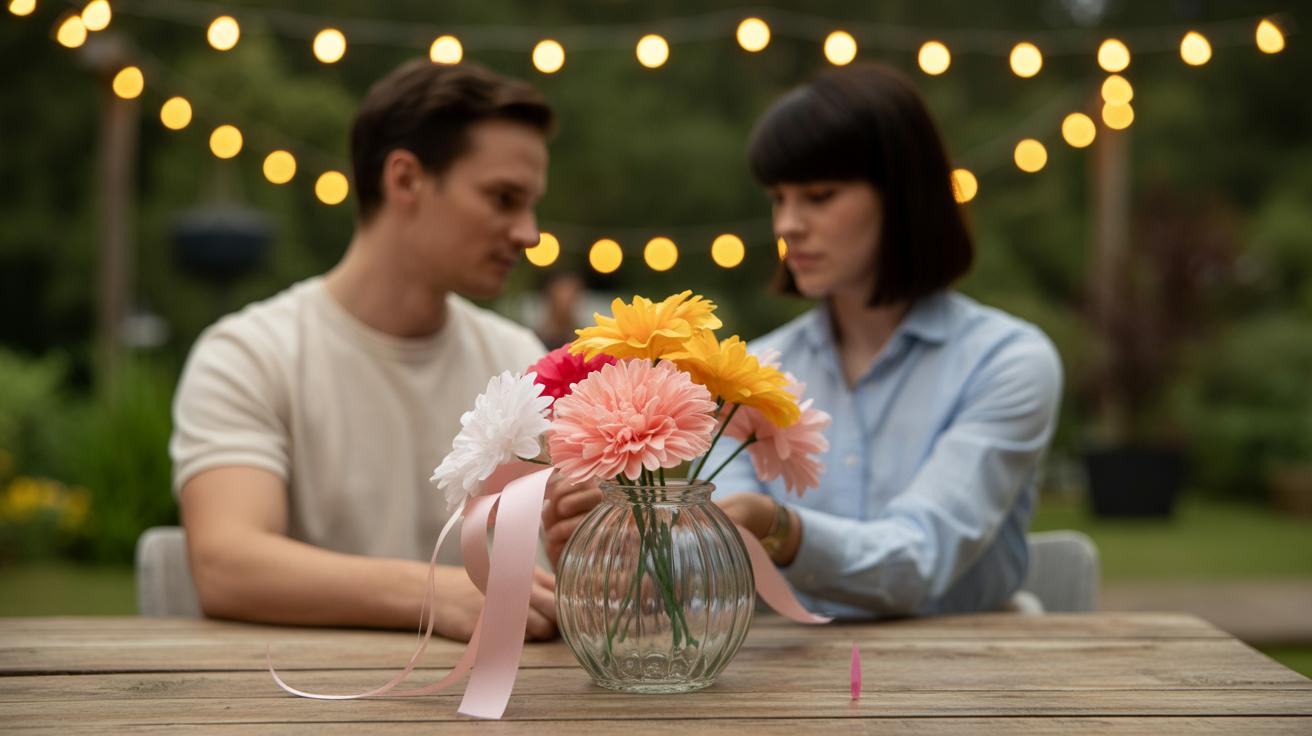
Crafting Bouquets and Boutonnières
Putting together bouquets and boutonnières is rewarding—and you don’t need fancy tools. Choose either fresh or artificial flowers based on durability and preference. Fresh blooms feel special but may wilt, while artificial ones hold their shape throughout the day.
For bouquets, trim flower stems to uniform length and arrange in layers, starting with larger blooms then filling in empty spaces with smaller buds or greenery. Wrap the stems tightly with floral tape, then cover with ribbon. Adding a pearl pin or charm winding through the ribbon can personalize it further.
Boutonnières are smaller but just as personal. A single bloom with a bit of greenery tied with twine or ribbon can look very simple yet elegant. You might try wiring the flower stem for extra sturdiness. Remember, they don’t have to match the bouquets exactly—just complement.
Do you want your bouquet to be lush or minimal? Bold or soft? Sometimes starting with what’s available locally is the best choice. Creating these details yourself lets you tweak according to what really feels right, or what’s actually on hand the week before the big day.
DIY Photo Booth and Wedding Memory Crafts
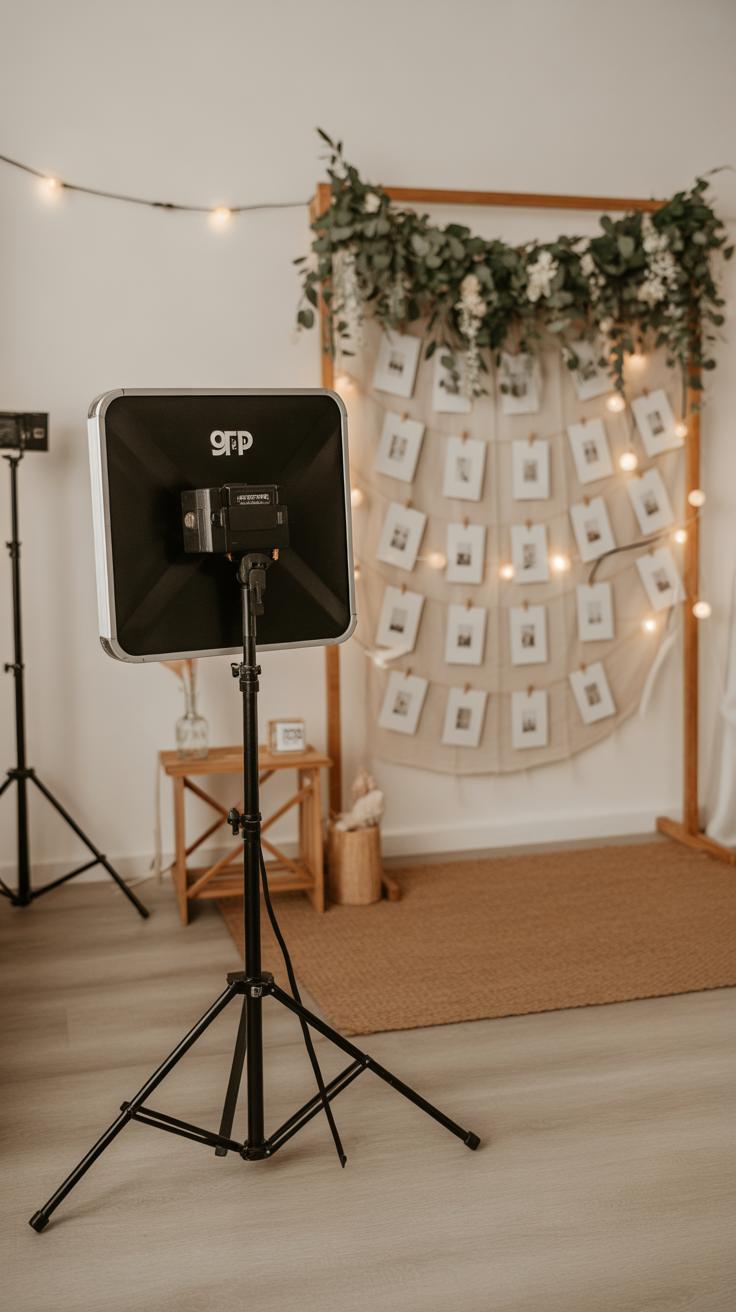
Setting Up a Fun Photo Booth
You don’t need fancy equipment to create a photo booth that guests will enjoy. Start with a simple backdrop—something like a fabric sheet, a curtain of fairy lights, or even a large piece of butcher paper you’ve decorated yourself. Think about colors that match your wedding theme or go for something playful that’ll pop in photos. Add some depth with hanging paper fans or balloons, maybe a handmade garland.
Props are where creativity really shines. Make props out of cardboard, wooden sticks, or even printable templates you can cut and decorate. Glasses, mustaches, hats, or little signs with cheeky phrases work well. You might want to prepare a small stand or box to keep them tidy—but don’t be too precise; part of the fun is seeing what guests mix and match.
The best part? It doesn’t have to be perfect. Sometimes a slightly crooked backdrop or a prop that’s a bit crooked adds to the charm. Guests often get more playful with a less polished setup, which means more candid and spontaneous photos.
Making Memory Keepsakes from Wedding Photos
After the celebration, the photos you’ve captured deserve a special place. Scrapbooks are a great way to bring your wedding story to life. You can print the pictures on quality paper, add handwritten notes or quotes from the day, and include little mementos like dried flowers or ticket stubs from your venue. Don’t fret if you’re not super artistic—a simple layout with your personal touch feels more authentic than something overly styled.
Framed photo collages also work nicely. Imagine grouping images by moments like “getting ready,” “the ceremony,” and “celebration.” You could arrange these in frames with different sizes or colors to add some texture. If you want to be extra interactive, leave space in the frame for new photos or notes that might come after the wedding—kind of like an evolving memory piece.
Have you ever thought about combining event snapshots with a guest book? Guests could paste instant photos as they take them and jot down quick messages. It’s both a craft and a memory holder, and, honestly, those little books often turn out to be favorites among couples even years later.
Tips for Successful Wedding Craft Projects

Managing Your Craft Time Well
Timing can make or break your DIY wedding plans. Starting early is usually the safest bet, but what I’ve found is that spreading out crafting sessions—even if unevenly—can ease stress. Maybe you tackle one project a week instead of trying everything at once.
Set small goals for each session. For example, decide to finish half the place cards before the weekend, then the rest next week. It feels less overwhelming, and you avoid that last-minute scramble we all dread.
Don’t forget to factor in “buffer time.” Mistakes happen; supplies might run short, or inspiration might dry up briefly. So, adding a few extra days just in case will give you a little breathing room. Trust me, it helps to have something handed off calmly rather than rushed.
Working With Helpers and Testing Projects
Involving friends or family can be a blessing and a bit of a challenge. When I’ve invited helpers, I realized early on that clear instructions save a lot of misunderstandings. Maybe you think it’s obvious to glue a ribbon one way, but your cousin’s method might differ. Show them exactly what you want or create a sample to follow.
Also, testing your crafts before D-day is crucial—even for simple things. For example, if you’re making custom signage, print a mock-up and see how it looks in the actual venue light. Sometimes colors look different, or weights don’t hold up. Catching these quirks ahead lets you fix them without panic.
Finally, don’t push through a project if it’s not working out as planned. It’s okay to rethink or ask for help. After all, the goal is to create something meaningful, not to perfect every stitch or paper fold perfectly on your own.
Conclusions
Trying out Unique Wedding Crafts Diy Projects is a great way to add your personality to your big day. They make your wedding feel more special and can save costs on décor. Each project you make carries meaning and shows your effort to create a celebration that is truly yours.
As you explore these wedding craft ideas, remember to choose projects you enjoy and that fit your timeline. Your creative work will enhance the atmosphere and leave memories for you and your guests. Start crafting today and see how DIY projects can transform your wedding experience.