Introduction
Handmade paper brings a personal, unique touch to your stationery. This craft has been around for centuries, creating sheets of paper by hand using fibers and simple tools. Every sheet is different and special, making handmade paper perfect for personal projects or special invitations.
This article explores the techniques of handmade paper making. You will learn about the materials, steps, and finishing touches. The goal is to help you create your own personalized stationery that shows off your style and creativity.
History and Basics of Handmade Paper
Origins of Handmade Paper
Handmade paper dates back nearly two thousand years, with origins in China around the 2nd century BCE. Cai Lun, a Chinese court official, is often credited with refining early papermaking techniques, though evidence suggests the craft began even earlier. Early paper was made from plant fibers such as hemp, mulberry bark, and rags. The fibers were soaked, beaten into a pulp, then spread thinly over a screen to dry in sheets.
This process spread slowly through Asia and eventually reached the Middle East and Europe centuries later. It’s interesting to note that each culture brought its own twist to materials and techniques, which influenced the paper’s strength and texture. Early methods were simple but required a lot of manual effort and patience, a far cry from the machines that dominate papermaking today.
What Makes Handmade Paper Unique
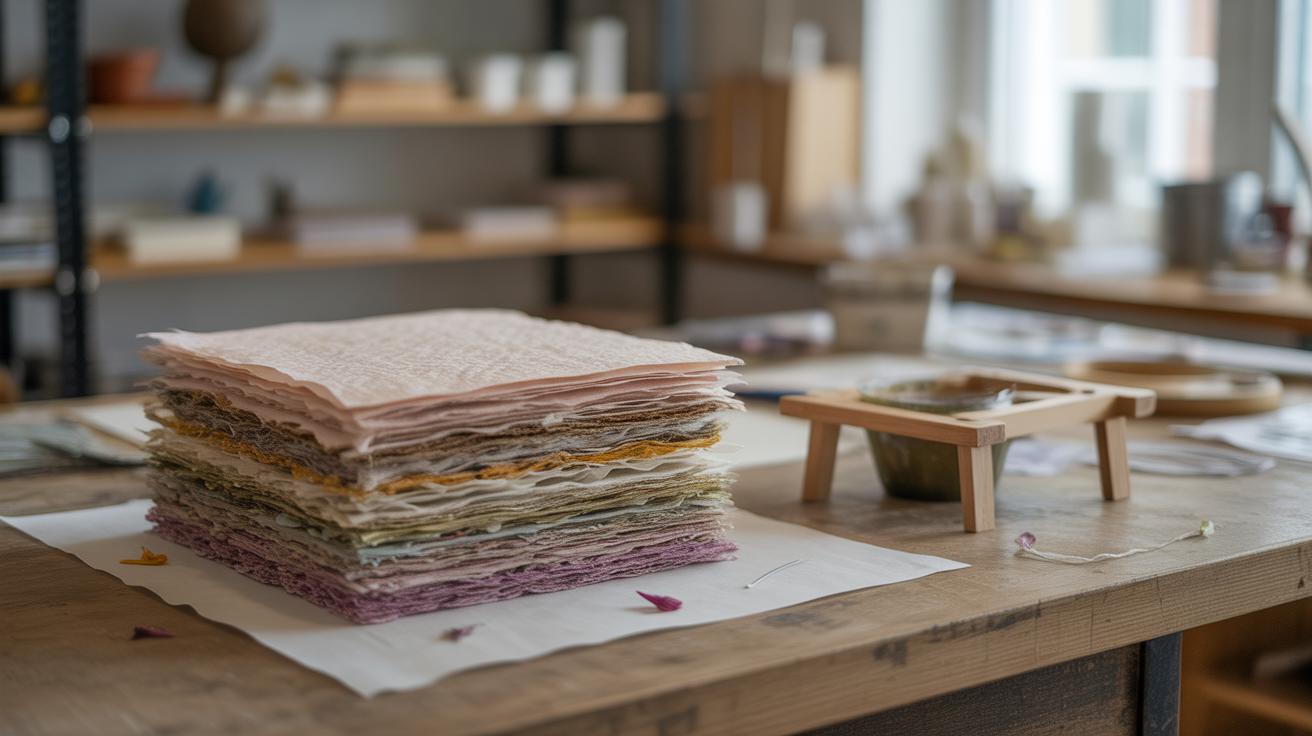
Handmade paper offers qualities that machine-made paper rarely matches. The texture tends to be uneven, sometimes rough, often showing delicate fibers and deckle edges — those irregular borders where the pulp naturally stops. These imperfections form part of its charm, representing the craftsman’s hand rather than a factory’s uniform stamp.
Beyond texture, every sheet feels different. You cannot truly replicate this uniqueness in mass production. The process demands care, skill, and time, which some might find frustrating but others enjoy as a meditative rhythm. Handmade paper often holds more character and warmth, maybe because you see the hands behind it. That’s a quality you might not fully appreciate until you’ve held a few sheets yourself and noticed how light, yet substantial, they feel compared to standard paper.
So, if you’re wondering why anyone still makes paper by hand, the answer might be in that subtle, one-of-a-kind quality. It not only carries the story of its making but invites you to add your own through your writing or art. Does that make it better? Maybe. It certainly makes it different.
Essential Materials for Handmade Paper
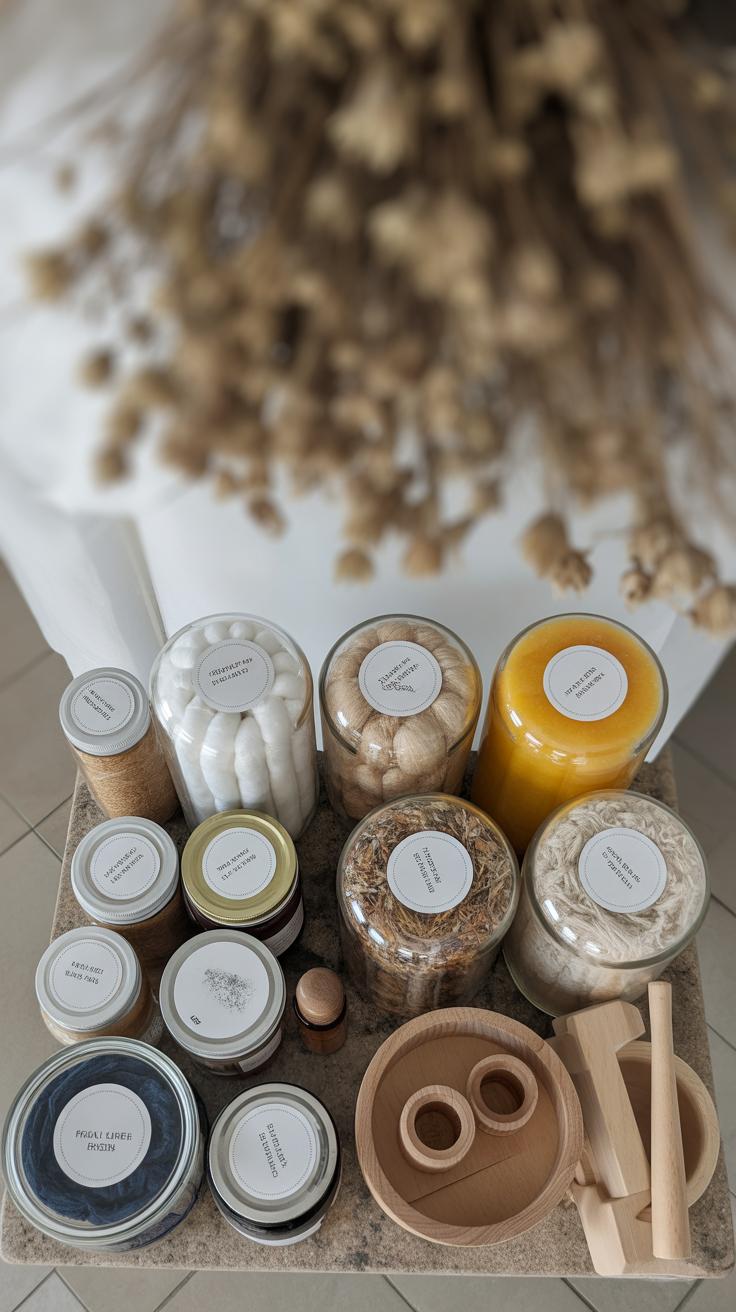
Making handmade paper starts with choosing the right materials. Your choice shapes the texture, strength, and look of the final sheet. Let’s take a closer look at what you’ll need.
Types of Fibers Used
Cotton fibers are popular because they produce soft, durable paper, often used for stationery. Cotton rags or fabric scraps work well. They break down smoothly but might take longer to pulp than other fibers. Hemp is another common fiber; it’s strong and gives the paper a slightly rougher texture with natural tones. I’ve noticed hemp paper feels more rustic—great if you want something earthy.
Recycled paper is a handy option, especially if you want to reduce waste. It’s easy to process but can produce a less consistent texture or color. I once made paper solely from recycled office scraps; the color came out uneven, which could be charming or frustrating, depending on your taste.
Additional Supplies Needed
A screen, mold, and deckle are essential tools. The screen holds the pulp as you lift it from the water, while the mold and deckle frame the paper’s size and edge. I find that using a well-fitted mold and deckle can make a noticeable difference in edge crispness. If they don’t fit well, the edges can be ragged or uneven.
Sponges help remove excess water from the wet sheet, speeding drying and minimizing warping. Water is, naturally, everywhere in this process, from soaking fibers to rinsing the paper. The quality of water—soft or hard—can subtly influence results, something you might not expect until it’s too late.

Each material brings something different to the table. Experimenting with combinations can yield surprising—and sometimes imperfect—results, which is part of the fun, don’t you think?
Preparing the Pulp for Paper Making
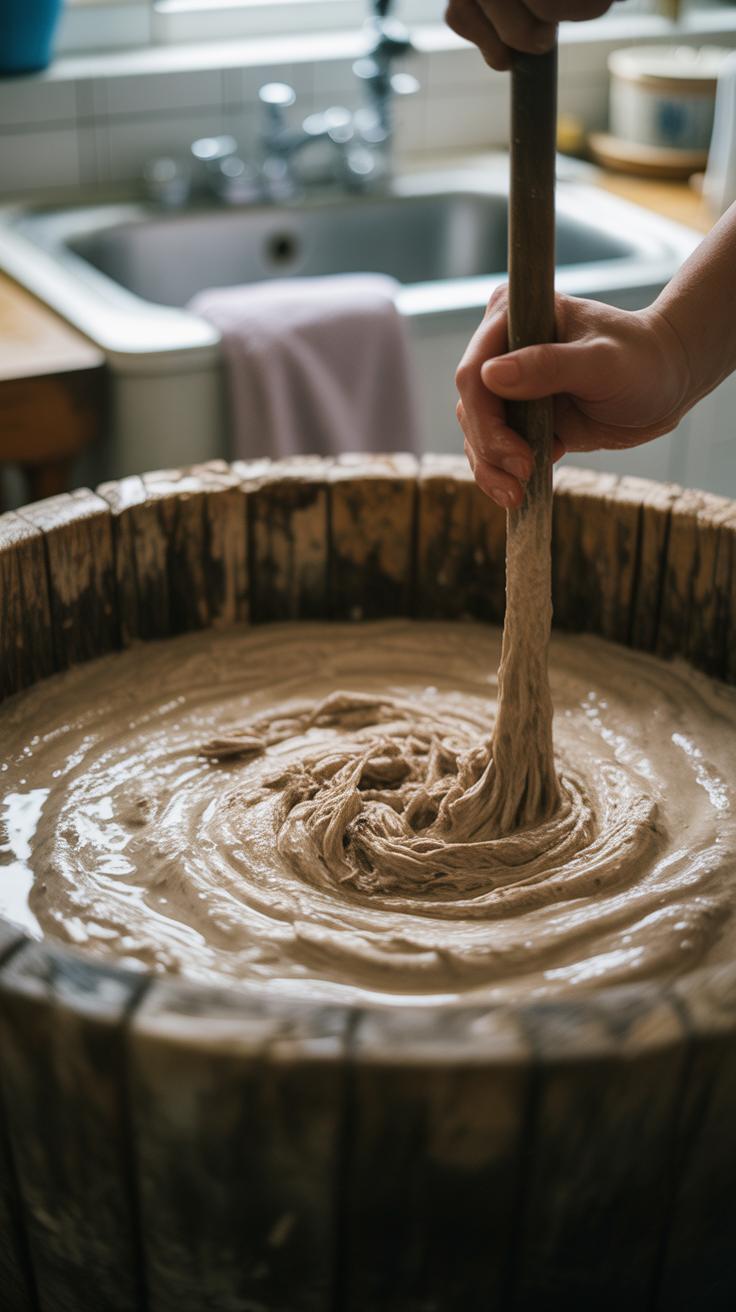
Soaking fibers is the first step that really sets the stage for good paper. When you soak your fibers, you’re softening them up, making them more flexible and easier to work with. This step seems simple but can’t be rushed. Depending on the type of fiber, soaking times might vary from hours to overnight. You’ll notice the fibers swell and separate; that’s a good sign. It’s a bit like letting dough rise—patience pays off here.
After soaking, the cooking phase changes the fibers on a deeper level. Cooked fibers behave differently than just soaked ones, breaking down some of the harder parts and making the fibers less brittle. You don’t want to overdo it—too much cooking can weaken your fibers, and that’s something I’ve learned the hard way. Usually, cooking involves simmering the fibers gently with water, sometimes adding a small amount of soda ash or calcium carbonate to help break down lignin. This chemical change improves how the fibers mesh together when forming paper.
Then comes beating the pulp, which is crucial but often overlooked. Beating basically means pounding the fibers until they’re all separated evenly in the water. This step controls the texture and strength of your paper. If you beat too little, you get lumps; too much, and the fibers get overly short, weakening the sheet. I usually use a wooden mallet or a simple blender for small batches, just to get that fine, almost creamy consistency. The goal is a smooth slurry where no fiber chunks float around separately.

Each part of this process—soaking, cooking, and beating—builds on the last. Skipping or rushing any step tends to show in the final paper’s surface, thickness, or durability. So, ask yourself: Have you really softened those fibers enough? Are they breaking down just right? And is your pulp smooth enough for an even sheet? Getting this right feels a bit like balancing, but once you do, your paper will carry that handmade quality you want.
Forming the Sheet of Handmade Paper
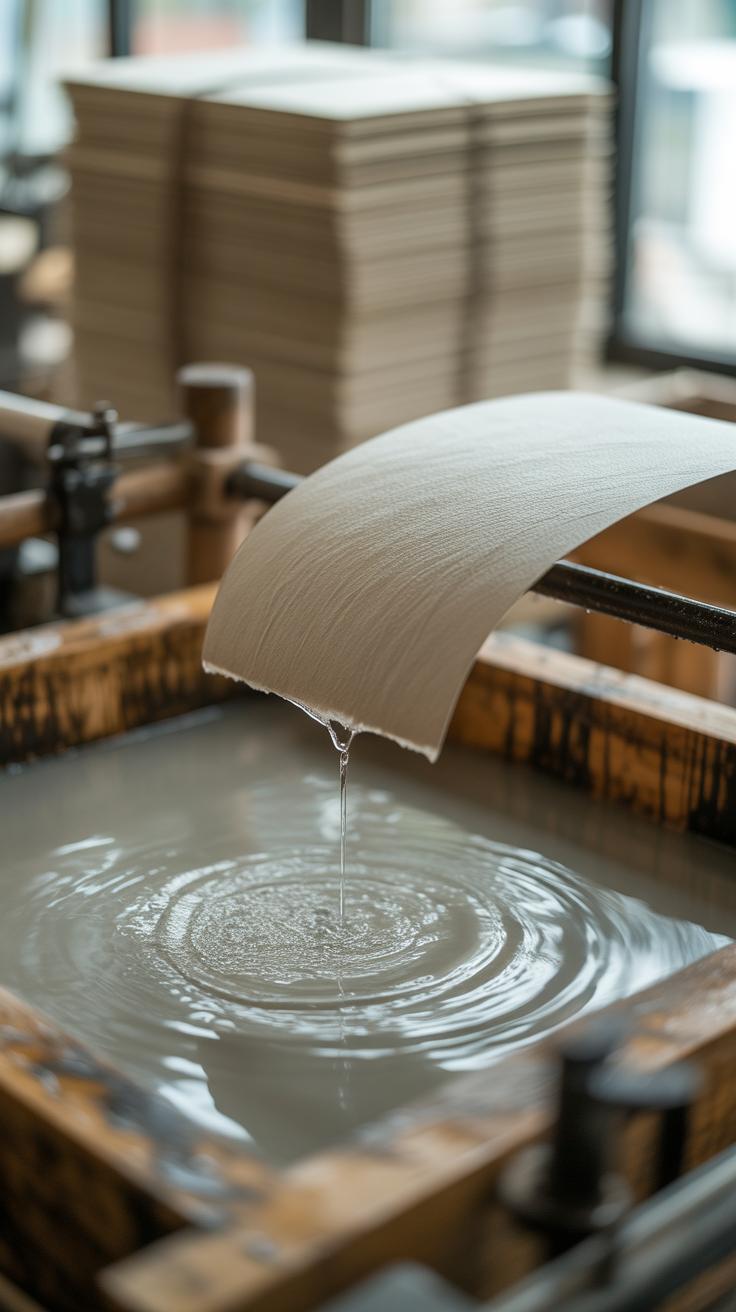
After preparing your pulp, the next step is to spread it evenly to create a sheet. You pour or scoop the pulp mixture onto a screen stretched across a mold—the foundation of your paper. This action isn’t as simple as it sounds. Too fast, and the pulp may clump; too slow, and it spreads too thin, melting unevenly. A gentle, rocking motion helps distribute the pulp just right, covering the entire area with a delicate layer.
The mold and deckle work hand in hand here. The mold is a frame with a fine mesh screen that holds the pulp, while the deckle is another frame you place on top to contain the pulp and shape the edges. Together, they prevent the pulp from running off and allow excess water to drain naturally.
Getting the right thickness depends on how much pulp you scoop and how you move the mold. For thicker paper, a heavier load and slower, steadier swirls help the fibers settle densely. If you want thinner sheets, use less pulp and move the mold quickly to spread it out. Texture is trickier. Pressing the pulp lightly or adding natural fibers like leaves before lifting the deckle can create subtle surface variations. Sometimes, I find that even slight changes in hand pressure or tilt adjust how the sheet feels—soft, coarse, or somewhere in between.
Have you ever wondered what makes some handmade papers feel so distinct? It often comes down to how the sheet is formed in this stage. Experiment with different motions and pulp amounts—they might surprise you.
Drying and Pressing Your Handmade Paper
Drying Techniques
Once you’ve formed your sheet, getting it dry without warping or tearing can be a bit tricky. Air drying is the simplest way—you just lay your paper flat on a clean, absorbent surface like felt, cotton cloth, or even a clean towel. The paper needs to stay flat while it dries to avoid curling, but that can take time—sometimes a full day or more depending on humidity. Waiting can feel slow, but rushing this step often leads to uneven texture or wrinkles.
Pressing your wet paper between absorbent materials helps remove excess water faster. You place the sheet between layers of blotting paper or fabric and apply gentle pressure to soak up moisture. This method prevents your paper from drying too fast on one side and stiffening unevenly. It’s a bit like sandwiching the sheet, and doing so carefully can improve flatness while drying.
Another approach is drying on a flat surface that doesn’t absorb water, such as glass or a smooth board. You can cover the paper lightly with a cloth to keep dust away. This lets your sheet dry evenly but you’ll want to monitor it closely to avoid sticking or damage. Each drying style offers some control, but none are foolproof.
Pressing for Strength
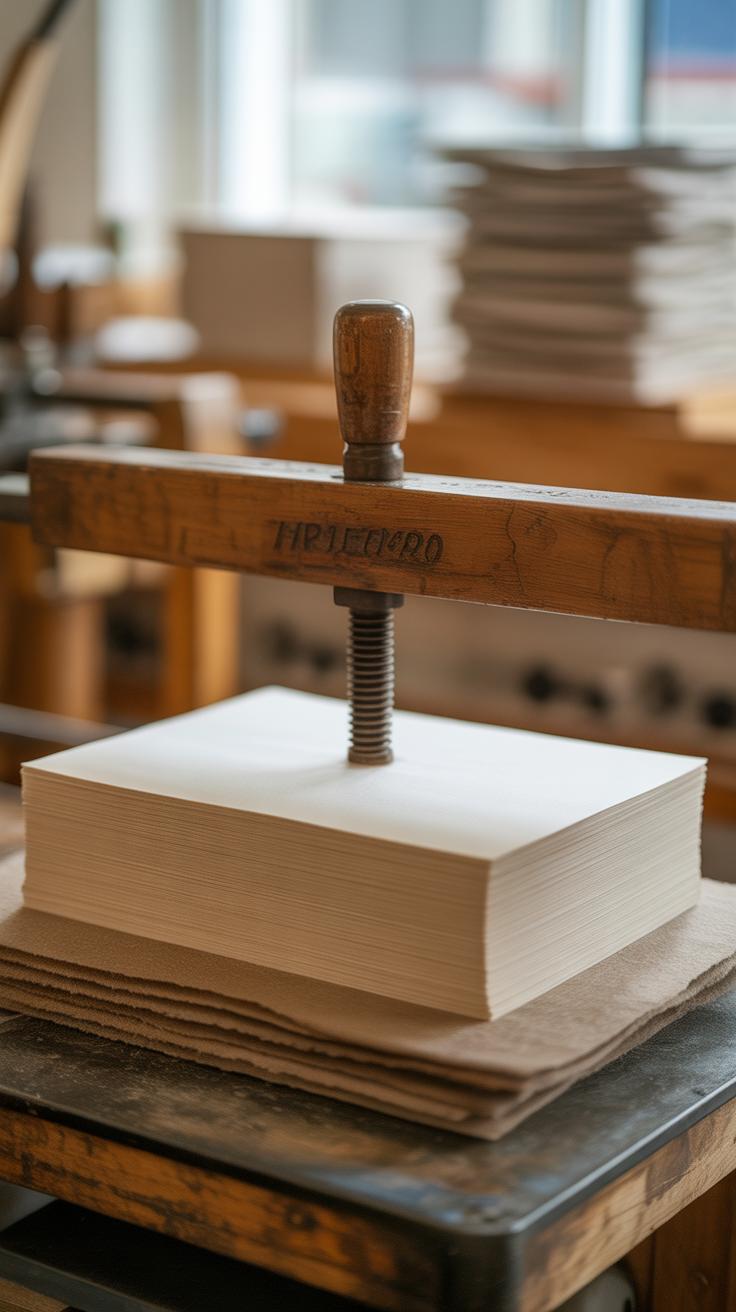
Once the sheet is damp but not wet, pressing removes more water and helps the fibers bond better. Using a press—either a dedicated book press or a homemade version with boards and weights—applies steady force. This squeezes out water and compresses the fibers into a denser, stronger paper.
You don’t always need fancy gear. A stack of heavy books can work in a pinch. But even then, you might find that weight distribution isn’t perfect, and edges can dry differently than the center. Sometimes switching press positions during pressing helps achieve a more uniform result. The goal is to get most moisture out and to smooth the sheet.
Pressing affects the paper’s final feel. A well-pressed sheet feels solid and flat, not fragile or ribbed. Without this step, your paper might end up too soft or prone to tears. I’ve noticed papers I’ve left unpressed tend to curl or wrinkle more easily, which isn’t ideal for stationery meant to last. So, don’t skip this part—your paper will thank you.
Adding Decorative Elements
Incorporating Natural Decorations
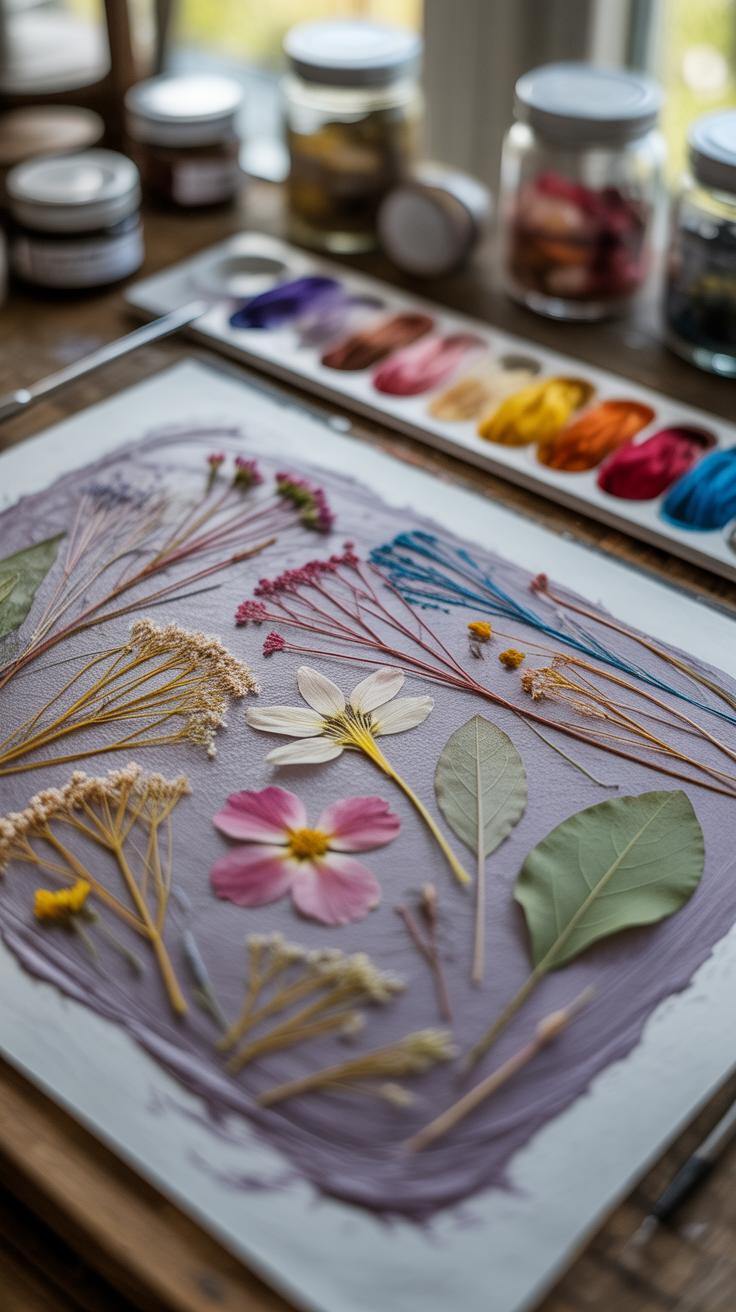
When you lay dried flowers or leaves onto your wet paper pulp, they become part of the sheet as it forms. It’s a bit like catching a moment in time, freezing the shapes and textures within the fibers. You might press a small fern or a delicate flower petal carefully onto the wet pulp, but the placement takes some patience—too heavy or thick, and the sheet can tear or dry unevenly.
Naturally, these embellishments add a tactile quality. You can feel the ridges, the veins of the leaves—it’s subtle but noticeable. The colors may fade just a little, depending on the drying method and the type of flower used. Sometimes, that fading gives a more vintage, haunting effect. Other times, the pigments hold their brightness longer than you’d expect.
It’s useful to experiment with layering thin petals versus whole leaves. The outcome shifts, changing both thickness and transparency in parts of your paper. You may not always want a perfectly clear outline or placement—that irregularity can be part of the charm, a sort of organic imperfection lending personality.
Using Colors and Patterns
Adding dyes or pigments directly to your pulp lets you customize color before the sheet takes shape. You can stir in powdered pigments or watercolors—just enough to tint without overwhelming the fiber structure. This way, you avoid blotches or uneven patches that look accidental rather than intentional.
Patterns also work well when you apply them before the sheet dries, using stencils or brushes. A light splash of color, some swirling motion, or even stamping shapes onto the wet surface can provide depth and interest. For example, creating a marbled effect by gently mixing different pigmented pulps can give surprising textures.
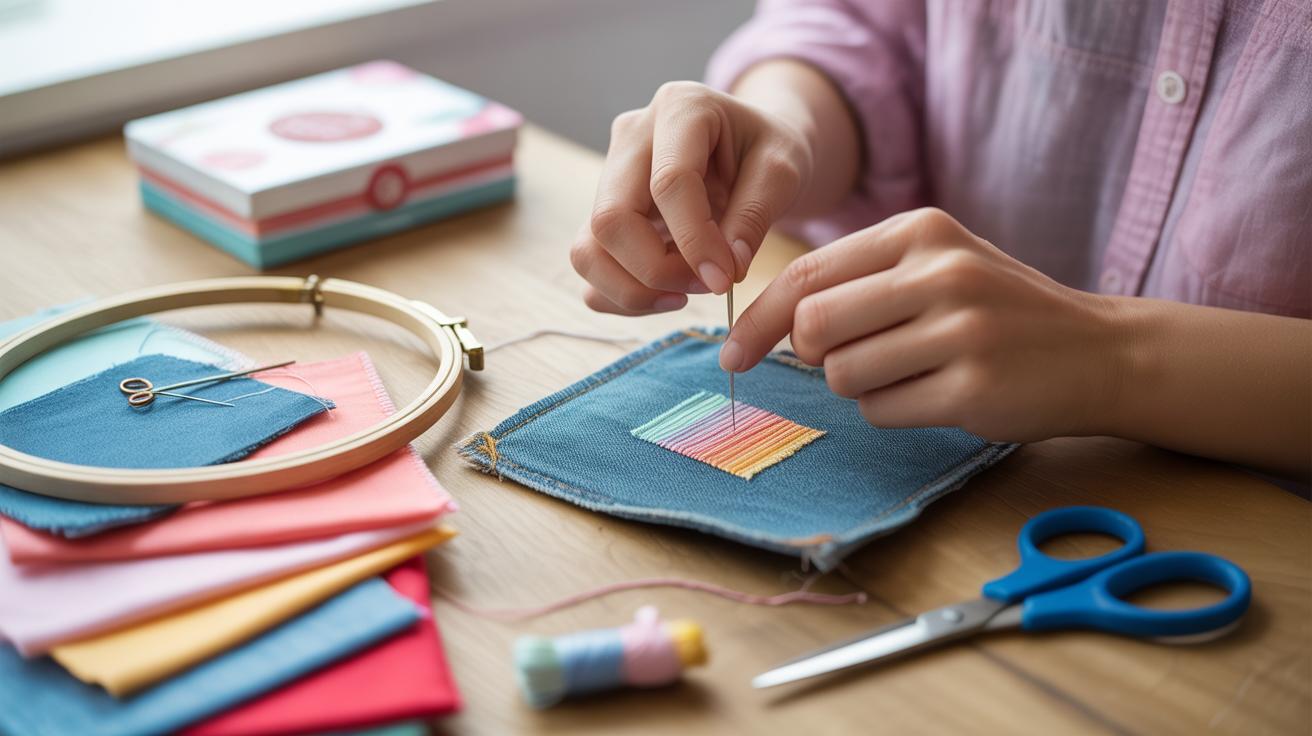
Threads embedded into the wet pulp add another layer of texture and visual appeal. You could insert thin strands for subtle lines crossing the paper or opt for thicker, fiber-like threads that stand out. Keep in mind that thread tends to alter drying times and paper strength, so testing small batches is wise.

Think about the purpose of your stationery as you decorate. Bold colors might suit invitations, while soft, natural elements better fit personal letters. Don’t hesitate to try combinations—sometimes, what appears mismatched at first glance turns into something unexpectedly delightful.
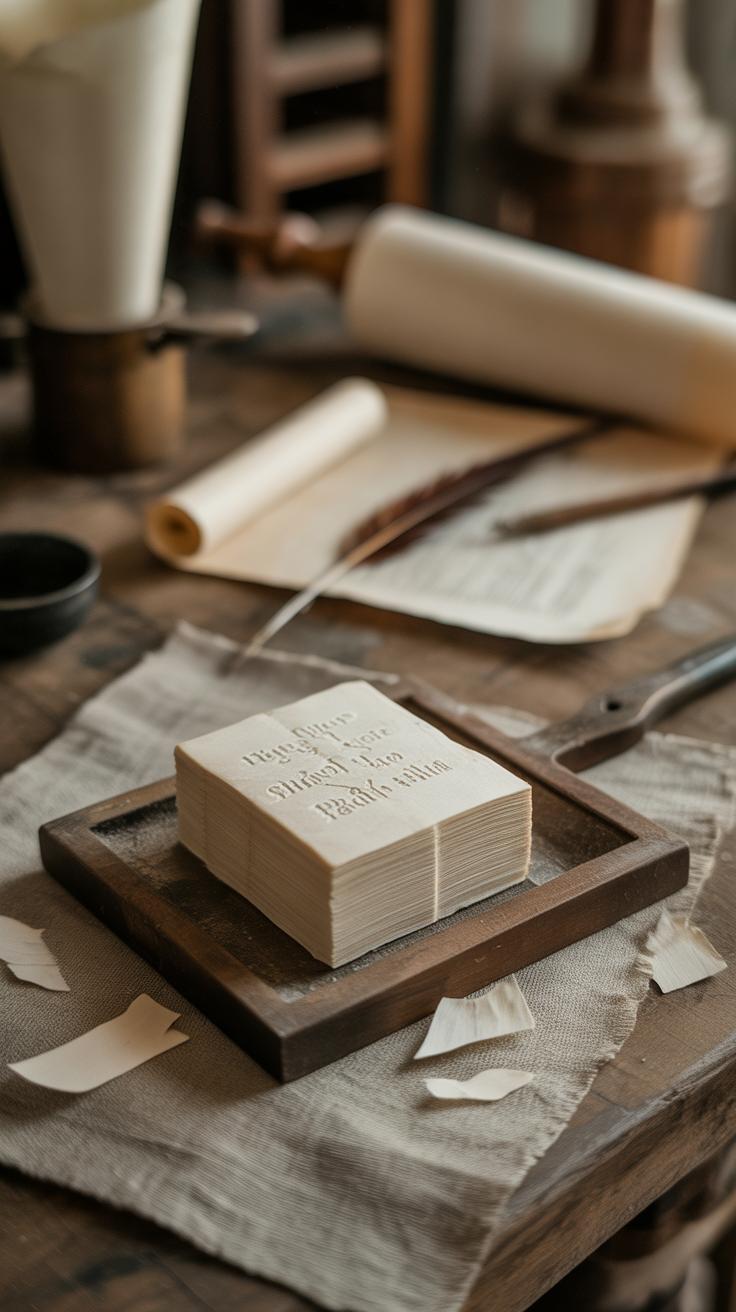
Cutting and Shaping for Personalized Stationery
Basic Cutting and Folding Techniques
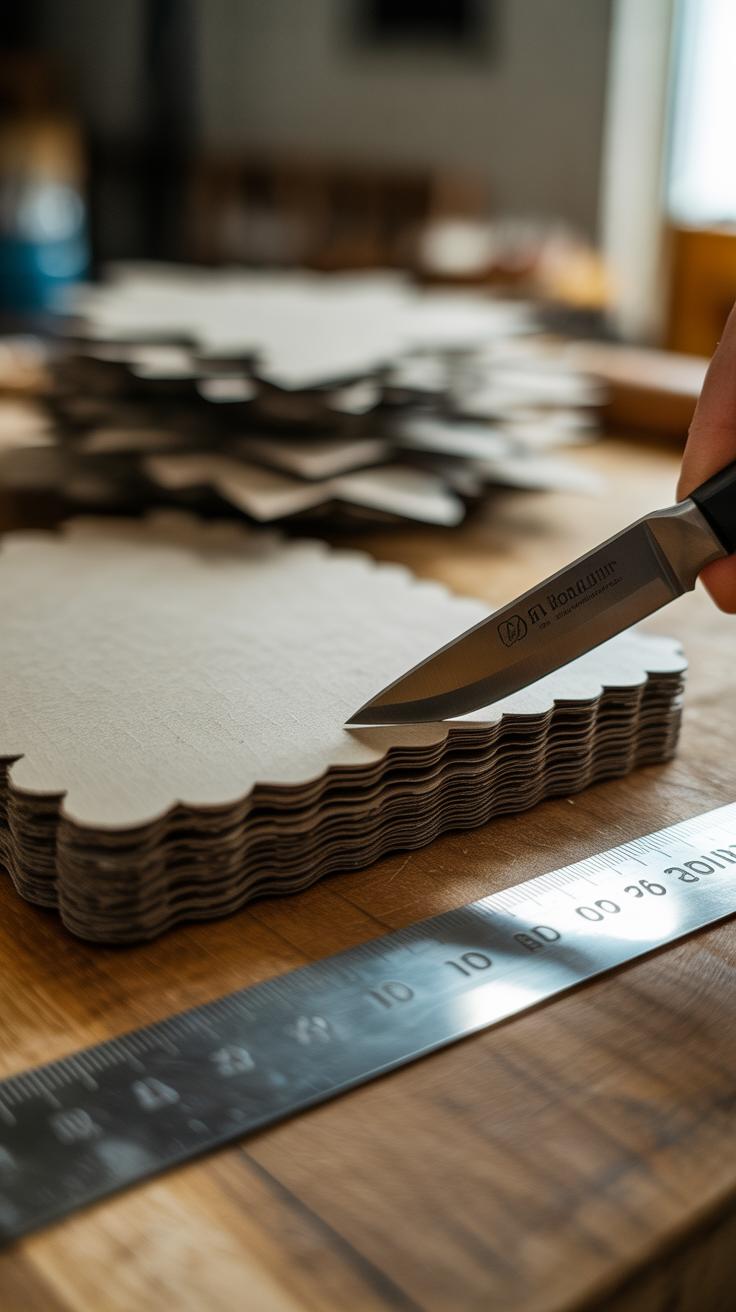
When working with handmade paper, cutting it neatly can feel a bit tricky at first. The texture isn’t as uniform as machine-made sheets, so scissors or blades can snag if you’re not careful. You might want to use a sharp craft knife with a cutting mat underneath to get clean edges instead of scissors, especially for thicker sheets. It’s surprisingly satisfying to see a clean cut on something so tactile.
Folding, on the other hand, demands patience. You’ll want to score the fold gently with a bone folder or the back of a knife to guide the paper and avoid cracking or uneven creases. If you skip scoring, the fold might look rough or even tear. It’s a small extra step, but much worth the effort—and it feels almost meditative.
Try folding slowly and pressing firmly but softly at the same time. And don’t rush—you’ll find the neatest folds come with a little practice. I think the texture actually influences how the fold behaves. Some papers hold firm creases, while others are more forgiving and bend softly.
Creating Custom Shapes
Cutting straight lines is just the start. Handmade paper invites you to experiment with shapes that stand out. For example, scalloped edges add a delicate touch to invitations, and jagged, torn edges can look intentionally rustic, giving your stationery extra character.
If you’re feeling ambitious, try creating folded elements like gatefold cards or envelopes. These allow you to use the paper’s weight and texture to your advantage. Remember, handmade paper is durable but still fragile in places, so take your time when shaping curves or intricate forms.
You could also punch shapes out or layer paper cutouts for dimension. Or fold sheets to make small notebooks by binding them along one edge with thread, which turns your paper into something both functional and personal. This hands-on aspect is what makes working with handmade paper so rewarding, despite the occasional imperfections.
Printing and Writing on Handmade Paper
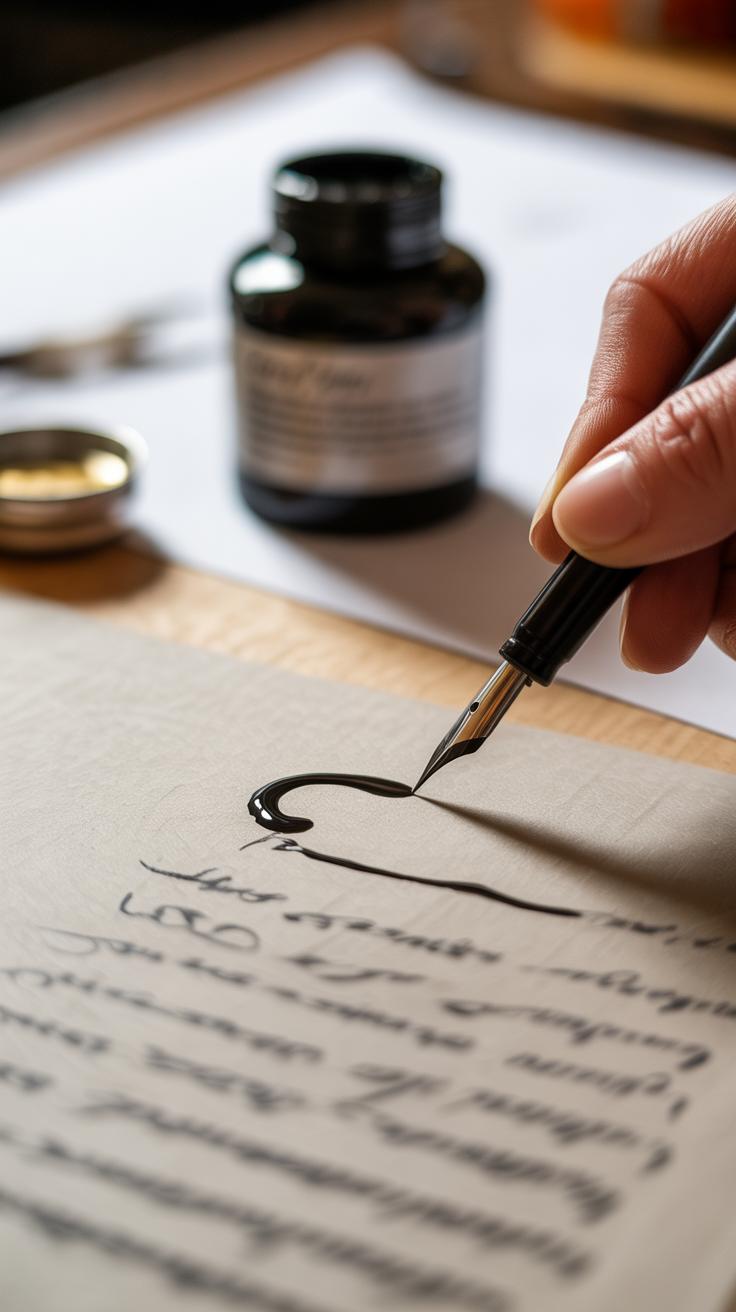
When it comes to printing or writing on your handmade paper, the texture can be both a blessing and a challenge. The surface is often uneven, which means ink can pool in crevices or skip across raised areas. To avoid smudges, it helps to let ink dry longer than usual—sometimes much longer than you’d expect. I’ve found that setting your sheets flat and undisturbed for a few minutes can make a surprising difference.
Choosing the right tools is key. Smooth gel pens or fine-tipped markers tend to work better than standard ballpoints, which can catch on the roughness and cause inconsistent lines. Pencils actually respond well here too, especially softer grades that allow for smooth strokes without digging into the fibers. Fountain pens, while elegant, often struggle unless you use fast-drying ink designed for porous papers.
For printing, block printing stands out because the pressure applied presses ink deeply into the fibers, giving a sharp image even on irregular surfaces. Using a brayer to apply ink evenly helps reduce blotches. If you want to print with a home printer, it’s best to try small sheets first. Handmade paper may be thicker or more fragile than printer specifications recommend, so feeding it carefully is crucial. Placing sheets between layers of standard paper can sometimes prevent jams.
Try testing a few strokes or prints on leftover scraps before committing. It’s frustrating when your perfect design gets ruined by a stray blot or smudge. Have you noticed how some inks soak in too much, dulling the text? Experimentation here isn’t just helpful—it’s almost necessary.
Caring for Handmade Paper Stationery
Storage Tips
Handmade paper is delicate, and how you store it can make a big difference in how long it lasts. Think about keeping your sheets flat, away from direct sunlight to prevent fading or brittleness. A cool, dry environment works best—excess humidity can cause warping or mold, but too dry, and the paper might become brittle. Oddly enough, finding the right balance feels like a bit of trial and error sometimes.
Using containers that breathe helps; plastic bags trap moisture which might backfire. Many crafters swear by acid-free envelopes or archival boxes, which create a safe haven without sealing in damaging conditions. I’ve found stacking sheets between heavier, smooth boards keeps them from curling or bending, which you might want to try if you handle large batches.
Handling and Usage
When you reach for your handmade stationery, gentle hands really matter. I tend to avoid touching the surfaces too much—oils from fingertips can dull the paper’s texture or smudge delicate designs. Maybe wear cotton gloves if you want to be extra careful, though that might feel a bit awkward depending on how you work.
Avoid bending or folding the pages unnecessarily. Even small creases can weaken the fibers over time. If you’re mailing your creations, use rigid envelopes or add cardboard inserts. It sounds like extra effort—but, honestly, the satisfaction of your stationery arriving intact usually justifies it. Also, consider how you write or draw on your paper—press too hard, and the texture may crinkle beneath your pen, which some might find adds character, but others may want to avoid.
Ultimately, patience and respect for the paper’s nature protect your work. It may take some practice to find what suits your style—and your paper—best.
Conclusions
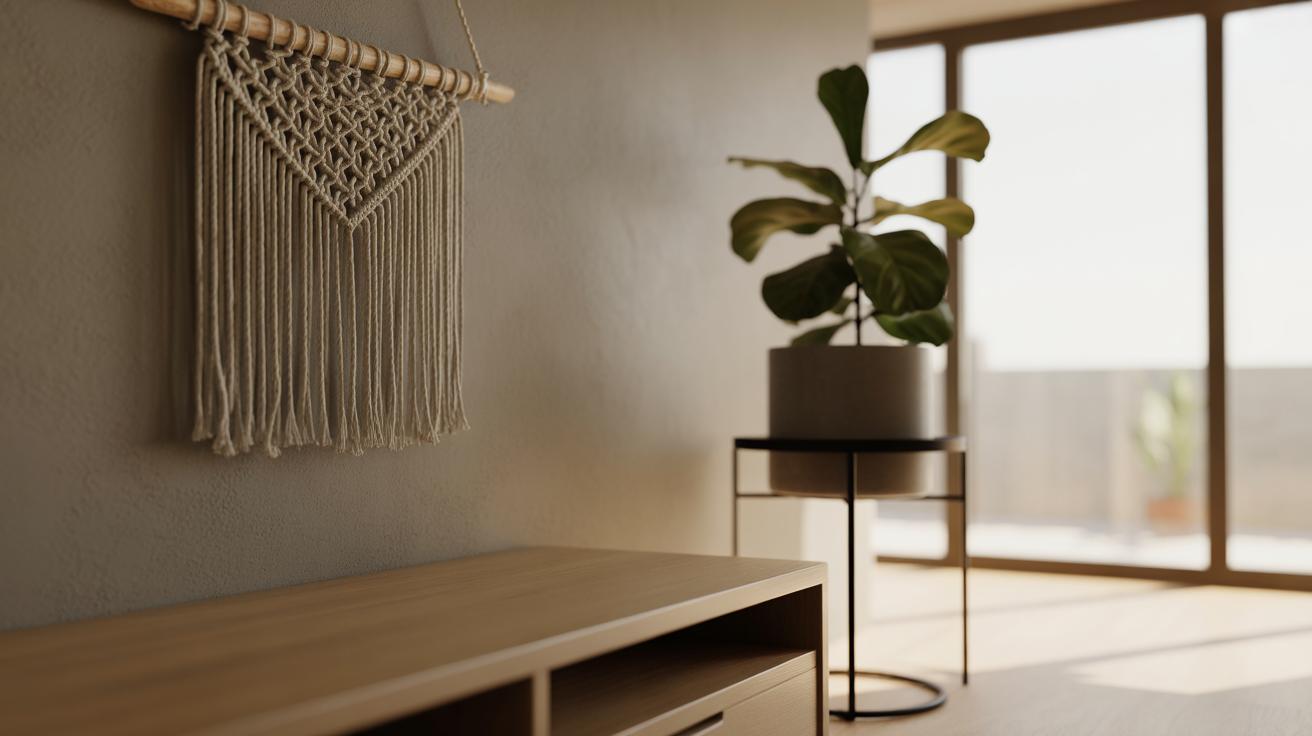
Making handmade paper for your personalized stationery lets you create something truly unique. You can control the look, texture, and feel of your paper. This craft lets you add your special touch to notes, cards, and invitations.
By trying out these techniques, you start a fun and rewarding project. You learn new skills while making items that friends and family will appreciate. Handmade paper adds beauty and meaning to your personal messages.


