Introduction
Planning an event means focusing on details that create the perfect atmosphere. One way to do this is with a flower wall backdrop. These beautiful displays add life and color to your space. They can suit weddings, birthdays, or any special occasion.
This article explores Gorgeous Flower Wall Backdrop Ideas For Your Event. You will find easy tips and examples to help you create a memorable scene. Whether you want something simple or grand, flower walls can lift your event’s style. Let’s look at how to design one that fits your theme and space.
Understanding Flower Wall Backdrops and Their Appeal
The Basics of Flower Walls
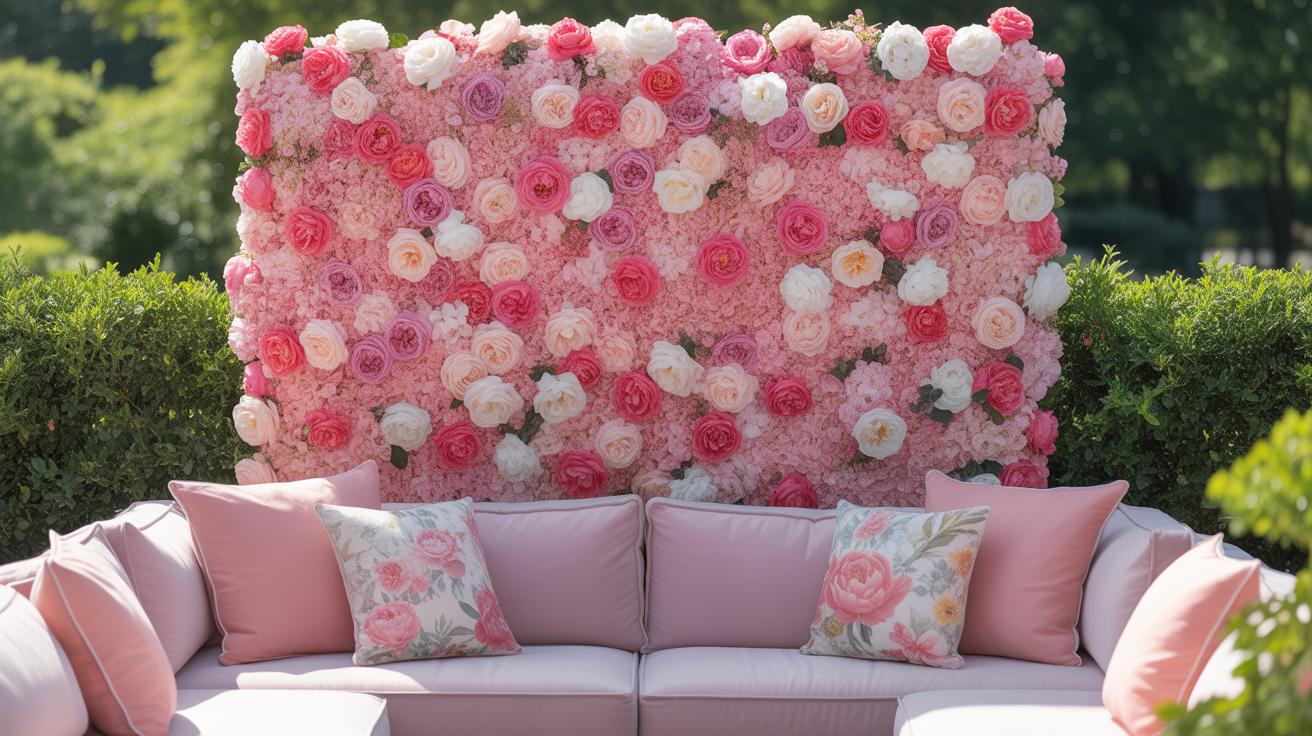
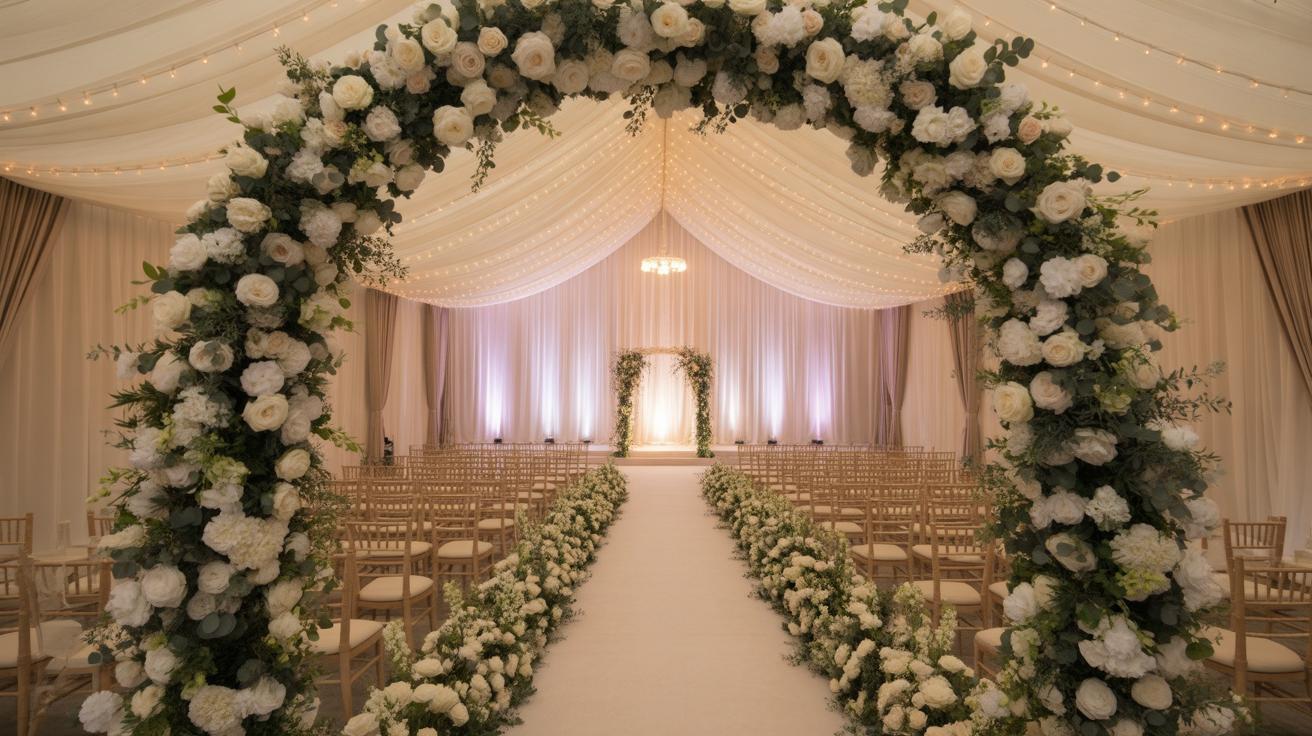
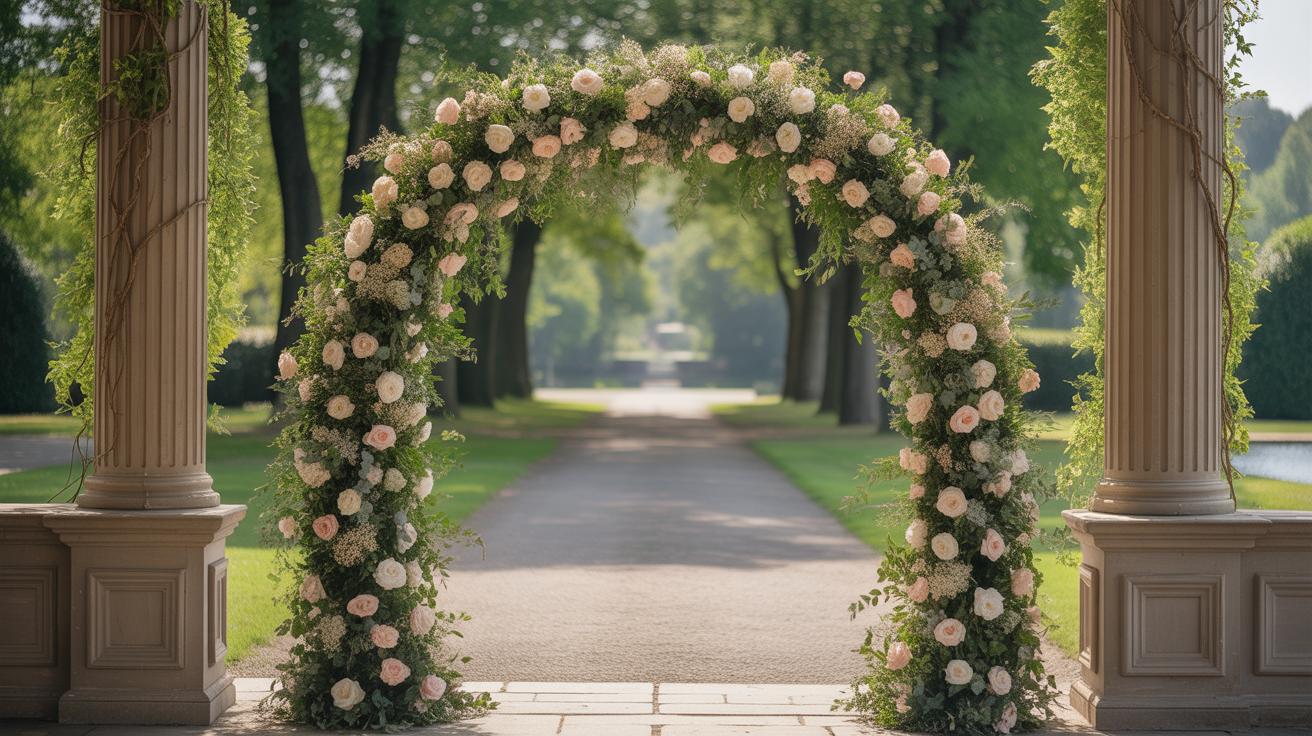
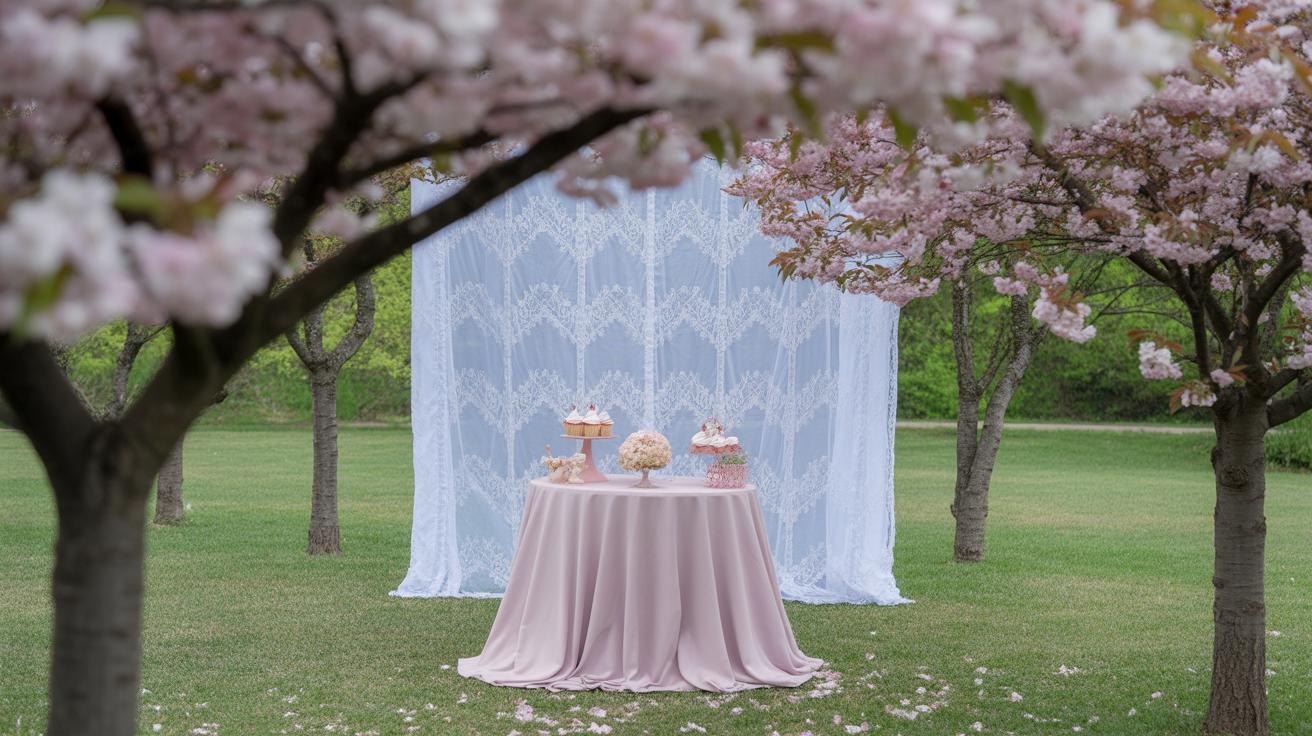
Flower wall backdrops are essentially large panels covered densely with flowers, either real or artificial, arranged tightly to create a lush, textured surface. They often serve as eye-catching backgrounds for events, bringing a touch of nature indoors or adding a splash of color outdoors. What you’ll commonly find in these walls are carefully selected blooms attached to a sturdy base—this base might be wooden frames, foam boards, or even metal grids. The flowers themselves range from roses and peonies to orchids and hydrangeas, depending on the look and feel desired. Sometimes greenery, like eucalyptus or ferns, is mixed in for contrast and depth. The combination creates this kind of immersive floral display that can look both elaborate and approachable at once.
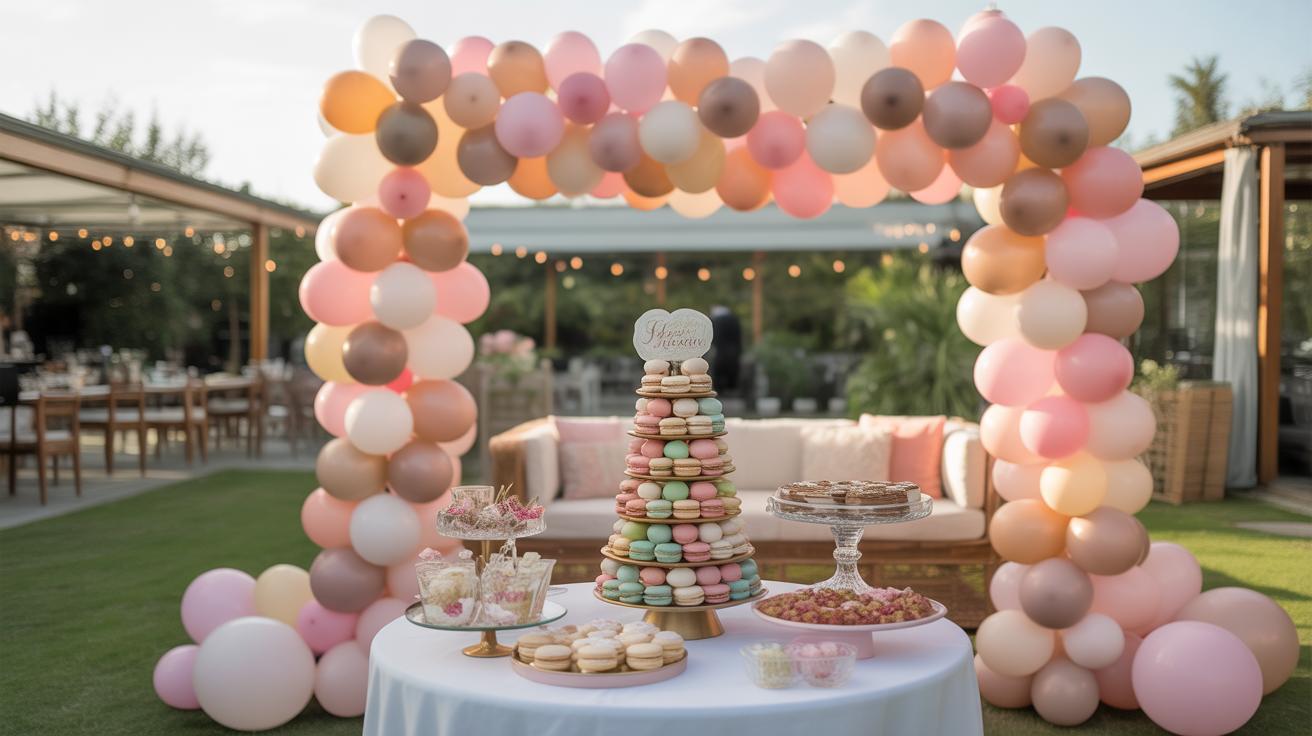
Why Choose a Flower Wall for Your Event
Why do so many people gravitate toward flower walls for their celebrations? For one, the visual presence is hard to beat. A flower wall can instantly elevate a plain room, turning any space into something memorable. Beyond just decoration, they create interactive moments—guests are drawn to them, often wanting to stand in front for pictures. Photos taken against a flower wall tend to have that natural charm that feels more genuine and lively compared to a traditional backdrop. It’s not just aesthetics; it’s about crafting an experience where your event feels more personal and engaging. I’ve seen events shift atmosphere simply because people found that flower wall perfect for capturing memories, sparking conversations, or sometimes just pausing to admire beauty for a quiet moment.
Selecting the Perfect Flowers For Your Backdrop
Choosing flowers for your backdrop goes beyond just picking what looks nice. You want the flowers to reflect your event’s mood and style, while also fitting comfortably into the space. For weddings, soft roses, peonies, and hydrangeas often work well—they bring a romantic, timeless vibe. For parties, you might lean toward brighter, playful blooms like sunflowers or gerbera daisies. Corporate events? Clean, minimal flowers such as orchids or calla lilies can create a sleek, polished atmosphere.
Colors play a huge role too. Think about the palette of your event—flowers that match or complement your decor will tie everything together. Sometimes contrast works better, though, like deep red flowers at a white-themed wedding to catch attention.
Seasonal flowers offer practical benefits beyond aesthetics. Using in-season flowers usually means better quality and prices that don’t skyrocket. In spring, consider tulips and daffodils, while summer opens up peonies and lavender. Fall invites warm tones with chrysanthemums and marigolds, and winter favorites include amaryllis and evergreen sprigs. Picking seasonally also keeps the vibe fresh and authentic, though if you’re set on a flower not in season, artificial options might be worth considering.
Planning Your Flower Wall Layout
Choosing the Shape and Size
Start by taking a good look at your venue space. Is it wide but not very tall? Or perhaps narrow with some height to play with? The shape of your flower wall should fit naturally into the area without feeling cramped or overwhelming. A long, low wall might suit a banquet setup, while a tall, rectangular backdrop works better for photo ops or ceremonies. Think about how guests will interact with it—will they be walking alongside it, or standing directly in front?
Size matters, but less is sometimes more. Oversized walls can dominate a room, making everything else fade into the background. On the flip side, too small a backdrop might look out of place or underwhelming. I’ve found that roughly covering a third of the main party area often strikes a good balance. It draws attention without demanding it completely—though, of course, every event is different.
Creating Visual Balance
Flowers don’t have to be evenly spaced to feel balanced. Actually, stuffing a wall with uniform clusters tends to look stiff. Instead, experiment with varying densities—denser flower groups in some spots, lighter in others. This patchiness invites the eye to wander, which can be surprisingly engaging. You might place larger blooms where the backdrop will be seen closest and use smaller flowers towards the edges to soften transitions.
Think about color flow as well. Spreading similar shades too evenly can flatten the effect. Grouping colors or alternating between complementary tones introduces rhythm. It helps avoid flatness, but beware—too much unpredictability may appear chaotic, so a little planning helps. Sometimes I’ll step back every so often just to see if the wall *feels* right because simple measurements don’t always tell the whole story.
How does your event’s mood influence this balance? A formal gathering might call for more controlled symmetry, while a casual get-together could allow for looser, more organic arrangements. Don’t shy away from trying a few layouts before settling. It’s worth the extra time to get something that flows naturally and welcomes guests visually.
Building Your Flower Wall Backdrop
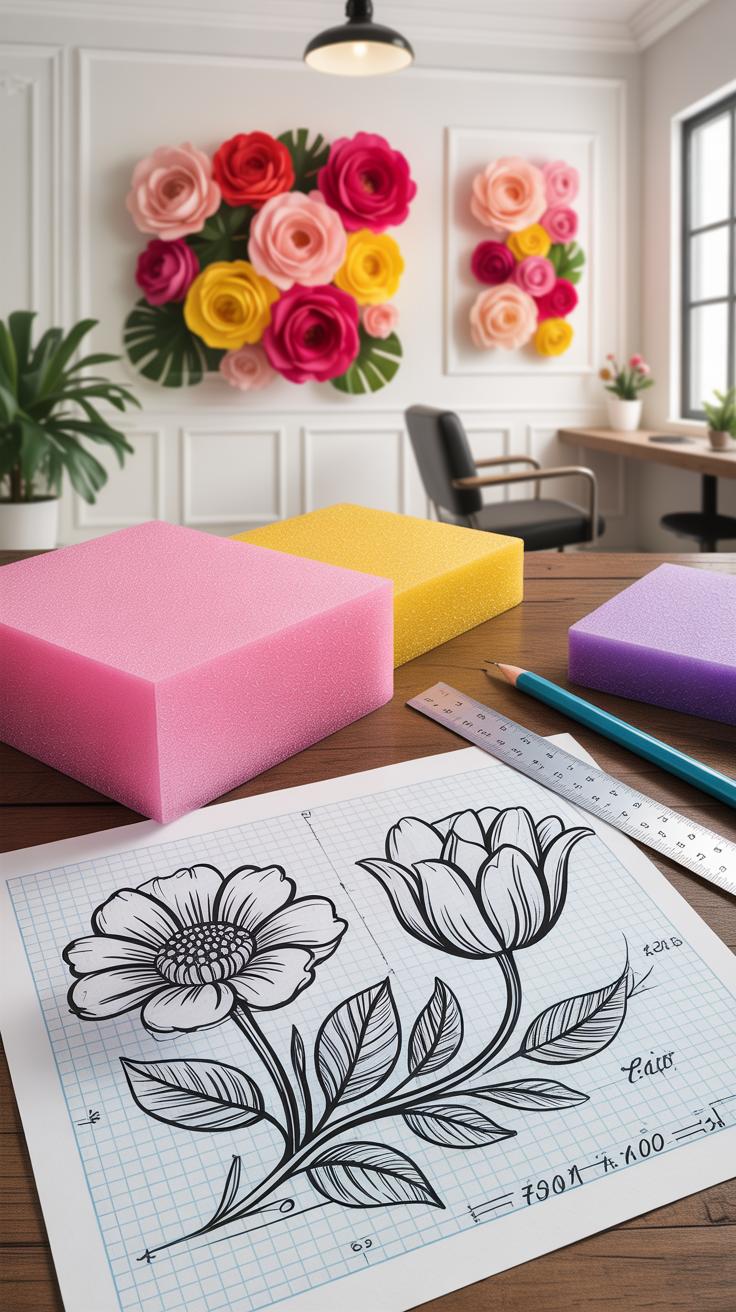
When it comes to assembling your flower wall, the materials and the way you put them together can really make or break the look. You’ll need a sturdy frame to support everything—often a wireframe or wooden lattice is used, depending on your space and budget. Floral foam is key for keeping your flowers in place and fresh, but it isn’t the only method you might consider.
Here’s a quick list of what you’ll need:
- A frame (wire or wood)
- Floral foam blocks or sheets
- Strong glue (hot glue works well)
- Floral wire or zip ties
- Fresh or artificial flowers
- Scissors and pruning shears
- Staple gun or hooks, if you’re mounting the wall
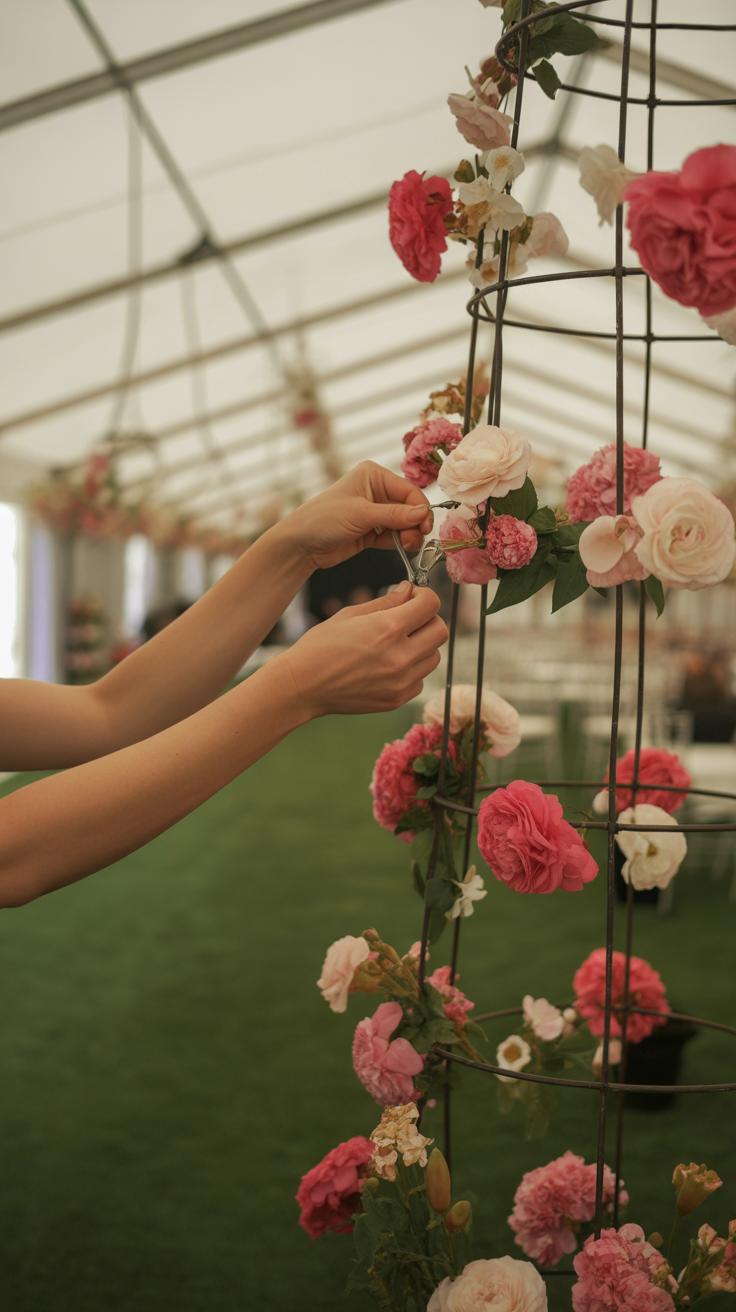
Start by attaching your foam securely to the frame—this sometimes requires zip ties or wire to keep it steady. Then, trim flower stems short but leaving enough length to push into the foam without falling out. If you’re worried about the arrangement looking too sparse or too tight, try layering flowers. Placing smaller blooms first and larger ones last helps balance the texture.
For safety, make sure the whole structure is stable before decorating—if it’s top-heavy, it might tip. You might find yourself adjusting as you go, which isn’t a bad thing; sometimes trial and error brings better results. Gluing is helpful for artificial blooms, but fresh flowers stay best anchored through foam. Be patient—it might take time to get that natural, full effect.
One thing I learned the hard way was to test your securing method on a small section first. It saves you from having to redo large parts. Would you want your guests to see a flimsy flower wall, though? Probably not, so take your time here.
Incorporating Color Schemes Into Your Design
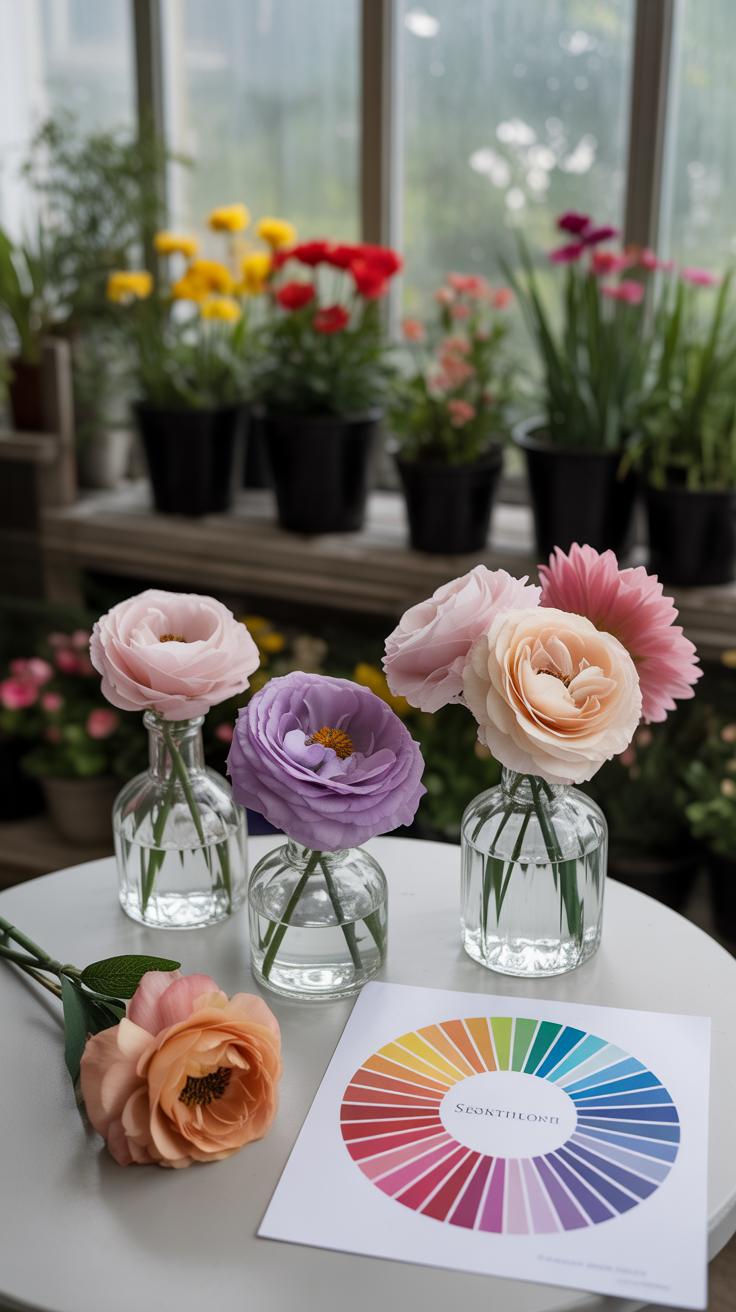
Picking flower colors for your wall feels like a quiet challenge. You want them to fit the event’s palette but also stand out just right. Color theory basics come handy here, even if you’re not a designer. Think about the color wheel—it helps you see which colors get along well, which ones clash, and which create balance. For example, choosing colors that naturally complement each other usually works well. Yet, sometimes a bit of contrast can surprise you in a good way.
When deciding on flower colors, you might want to ask yourself:
- What’s the main color scheme for the event?
- Do you want the flower wall to blend seamlessly or pop as a focal point?
- Are there any colors to avoid because they clash with the venue or other decor?
These questions guide the choices before you start pinning flowers to the frame.
Using Monochrome and Complementary Colors
Using one color throughout the flower wall—the monochrome approach—can feel safe but surprisingly effective. Imagine a wall full of soft blush roses or deep blue hydrangeas. It keeps things simple, sleek, and sometimes even elegant. But it can also risk feeling a little flat if the shades don’t vary enough.
Complementary colors, those opposite each other on the color wheel, offer another route. Red and green, blue and orange, yellow and purple—they create natural tension that looks vibrant without being overwhelming. The trick is: don’t overdo either side. Maybe focus on one color and sprinkle in just enough of the other to catch the eye. At one event I helped with, pairing soft yellow daisies with just a hint of lavender made the whole wall pop in a gentle way. It was subtle but memorable.
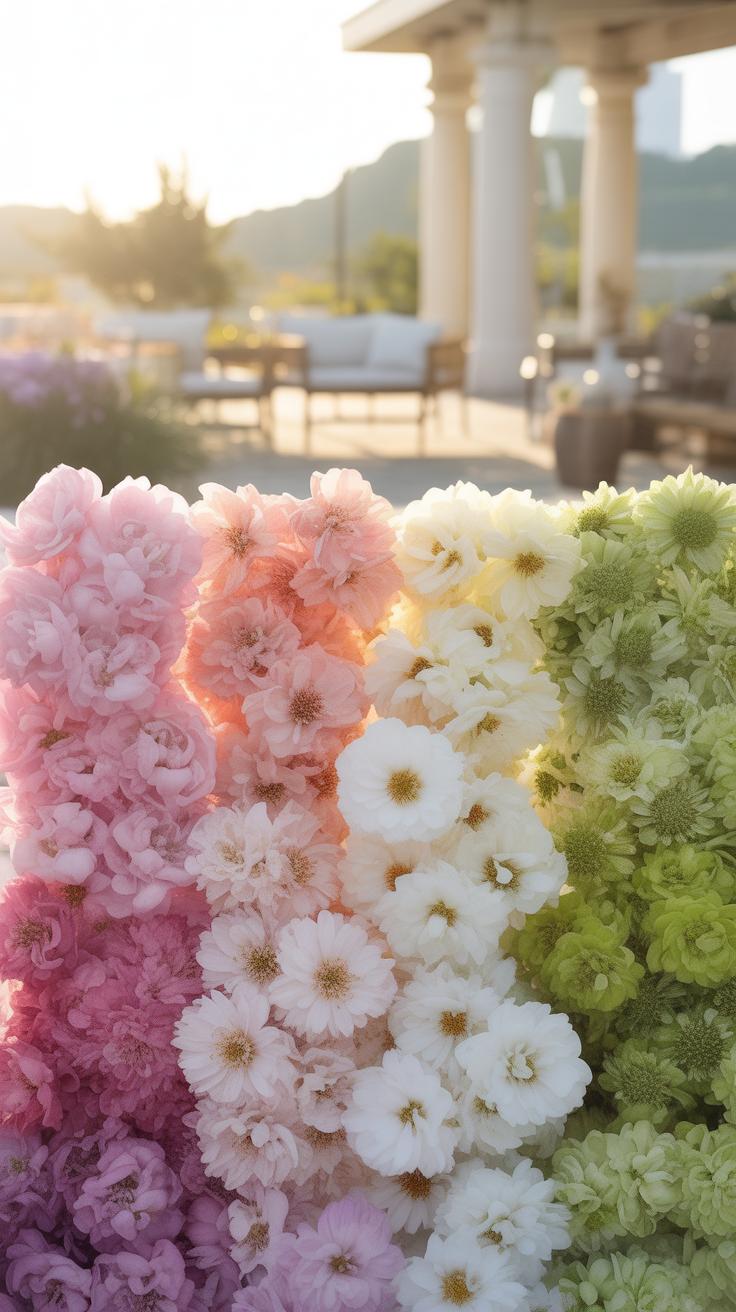
Mixing Colors for Depth and Interest
Blending multiple colors adds a sort of visual texture. You get layers, depth, and a livelier feel that can draw people in. Yet, mixing colors without a plan risks chaos. Here’s one way to keep it working:
- Pick two or three main colors that work well together—maybe from the same family or with a common undertone.
- Add a few neutral or muted shades to soften transitions and avoid sharp clashes.
- Vary flower sizes and types—this naturally creates movement and interest.
I remember seeing a flower wall that combined coral, soft pinks, creams, and touches of green. The colors weren’t screaming for attention but rather telling a calm, inviting story. That kind of layering, I think, can elevate a design from just pretty to genuinely captivating. It also leaves room for you to experiment—with flowers, shades, or textures—so the wall never feels dull or predictable.
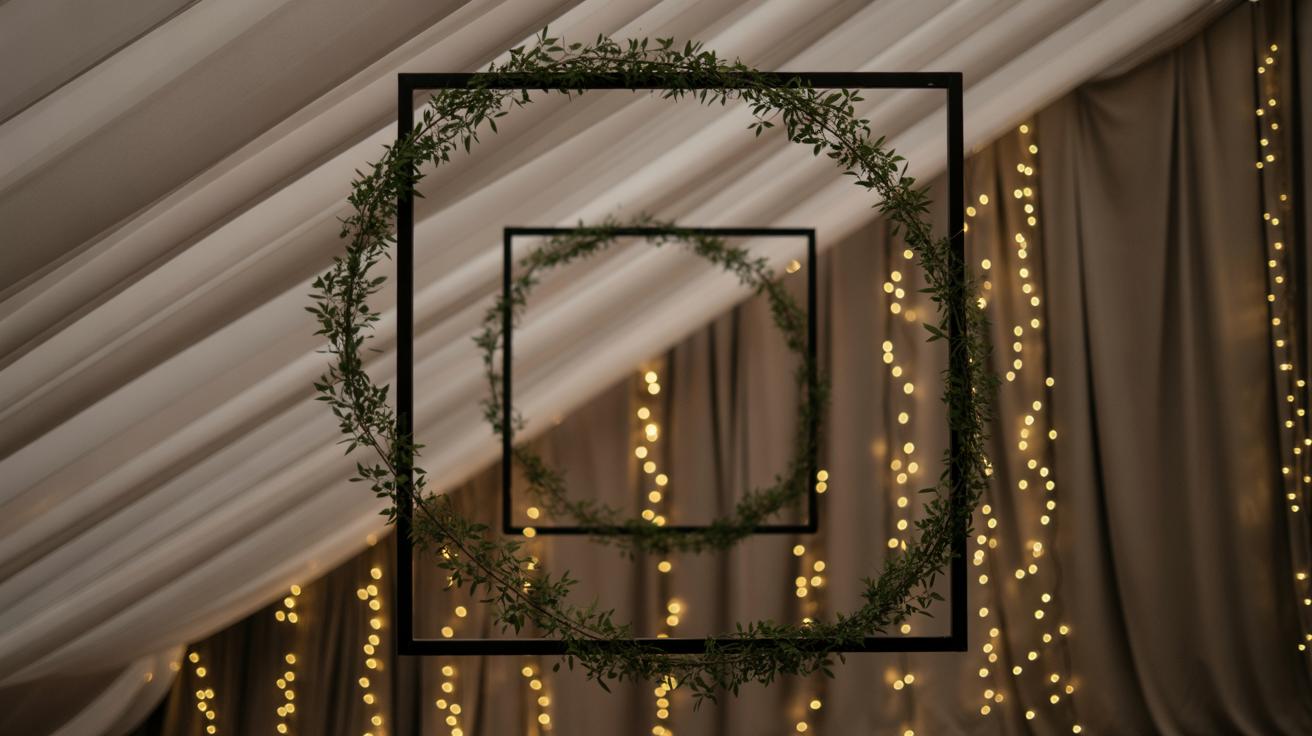
Adding Unique Elements to Your Flower Wall
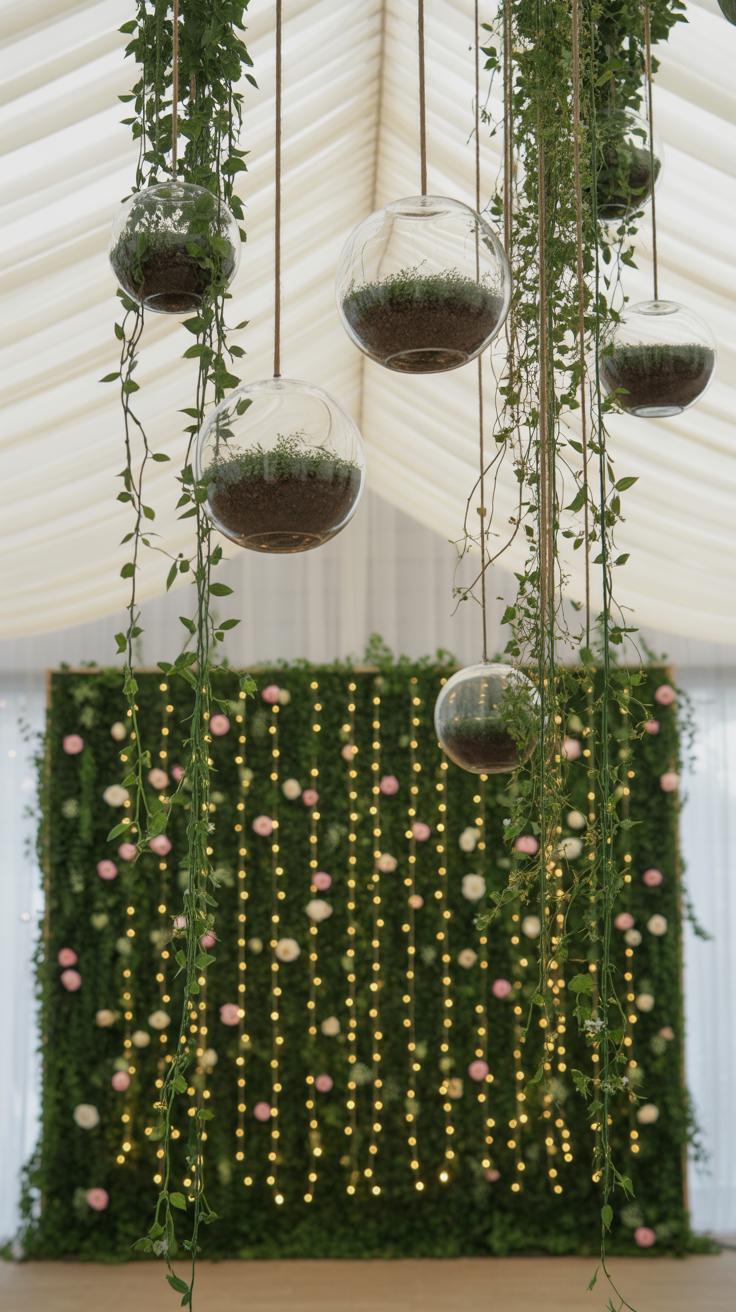
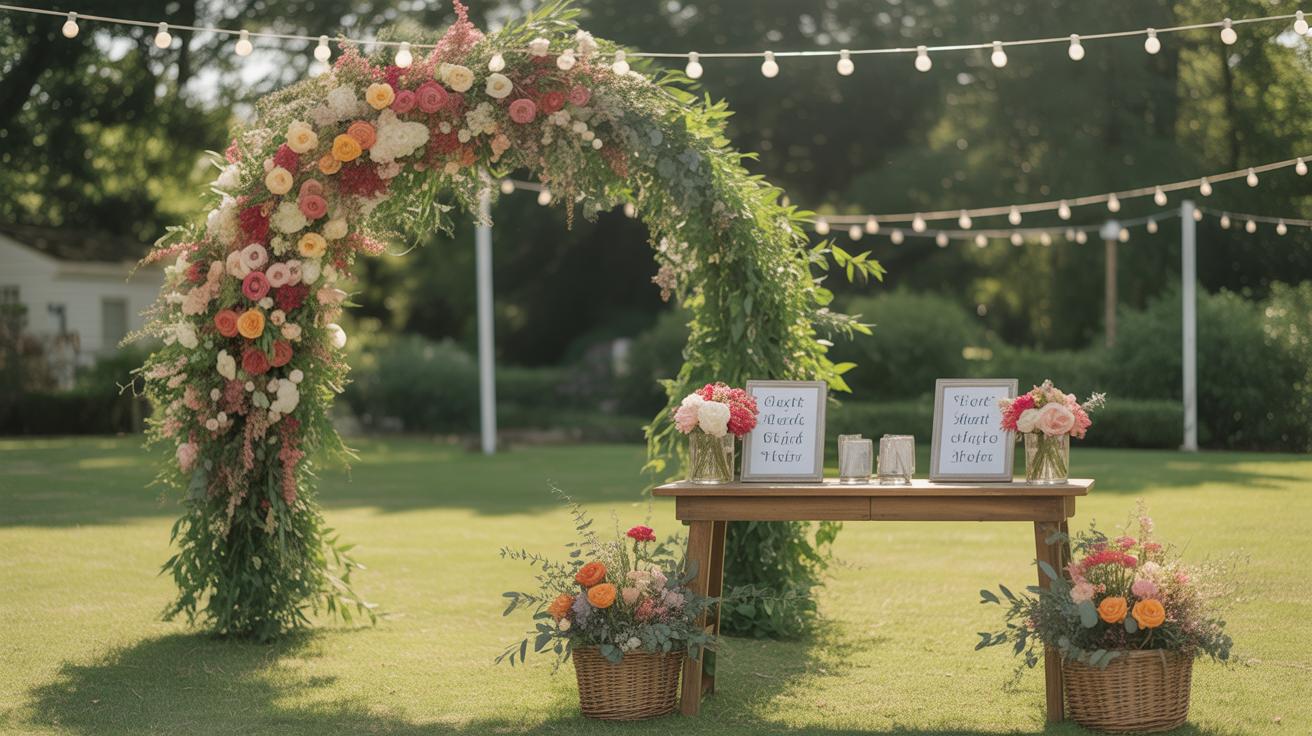
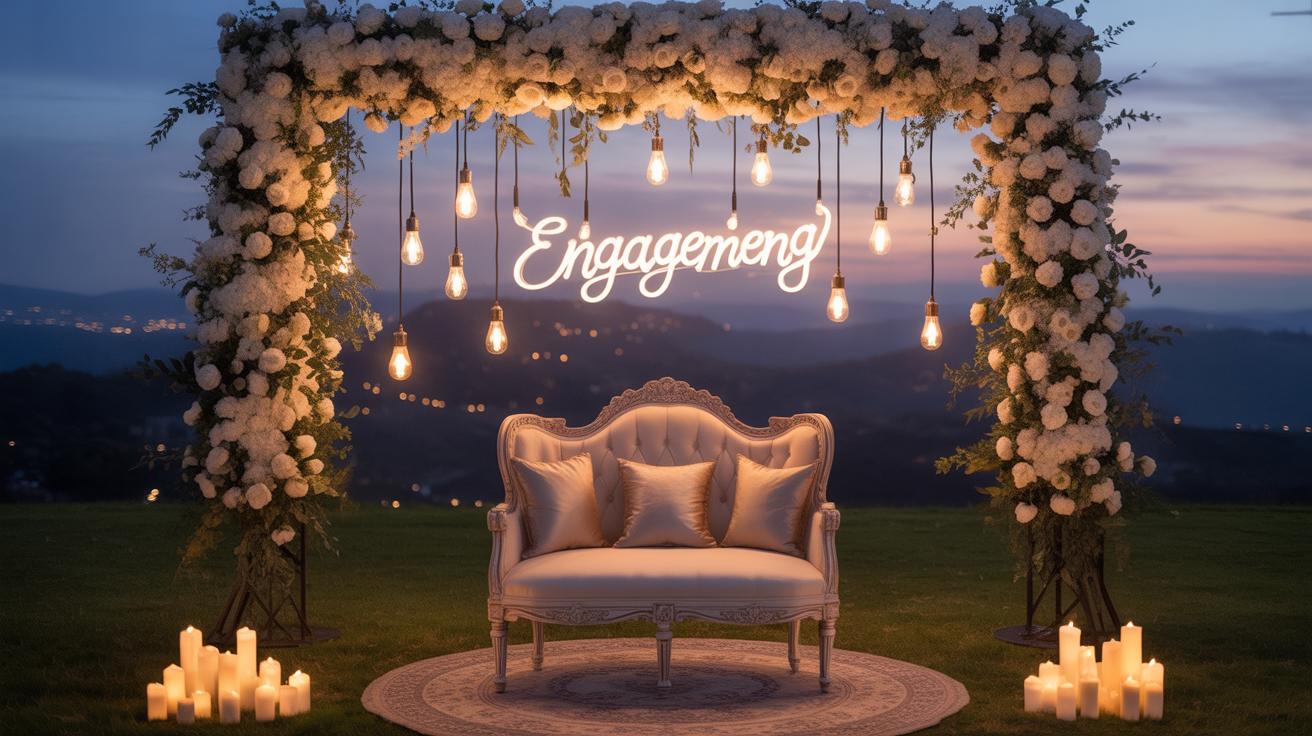
When you want your flower wall to really stand out, mixing in other decor elements can make a big difference. Lighting is a simple way to shift the mood—fairy lights woven gently through the flowers can add a soft glow, almost like the flowers themselves are breathing gently. Spotlights, on the other hand, can create dramatic shadows or highlight certain areas. You might want to experiment with warm tones versus cooler ones to see what vibes better with your event.
Personal touches can make the wall feel like it was made just for the moment. Think about adding names or important dates—maybe in the form of sleek acrylic signs or subtle wooden plaques nestled among the blooms. Theming the decor according to your event’s style, such as nautical anchors for a beach party or vintage frames for a retro wedding, can tie the whole look together. At times, it’s odd how small details like this create a sense of warmth, even if it’s just something simple that guests notice without really thinking about why.
Try mixing lights and signage—it doesn’t have to be over the top. Sometimes the soft twinkle of a few fairy lights paired with a single illuminated name can feel both intimate and festive. If you’re unsure, test out a few placements beforehand or even snap some photos to see what works best. Lighting and personalization can shift the flower wall from just “pretty” to genuinely memorable.
Positioning Your Flower Wall for Maximum
Entrance and Photo Spots
Where you set your flower wall matters a lot—don’t just stick it anywhere. Placing it near the entrance gives guests something striking to see right away, making a strong first impression. I remember attending a wedding where the floral backdrop was just off the main door; everyone naturally paused there to snap photos, chat, or just admire it.
Photo areas are another ideal spot. Guests love taking pictures during events, and a flower wall turns a simple snap into a memorable keepsake. Think about traffic flow; you want the backdrop where people will naturally gather, not tucked away where it’s easy to miss. Maybe near the bar or buffet? Anywhere people loop around often.
Considering Lighting and Background
Lighting changes everything for flower walls. Natural light can make the colors pop beautifully, but it can also cast shadows or fade petals if it’s too harsh. I’ve seen setups where afternoon sunlight hit flowers directly—some looked overexposed, others too dull depending on the angle.
Artificial lighting is tricky, too. Warm tones can give a cozy feel, but cool lights might wash out colors or create unwanted glare. Try testing your flower wall in different light conditions at the venue beforehand, if you can. Also, pay attention to what’s behind the wall. A plain or neutral background usually works best so the flowers don’t blend in or seem lost.
Placement isn’t just about look; it affects how people interact with your flower wall. Where will it draw the most interest and create moments worth remembering?
Maintaining Your Flower Wall Throughout the Event
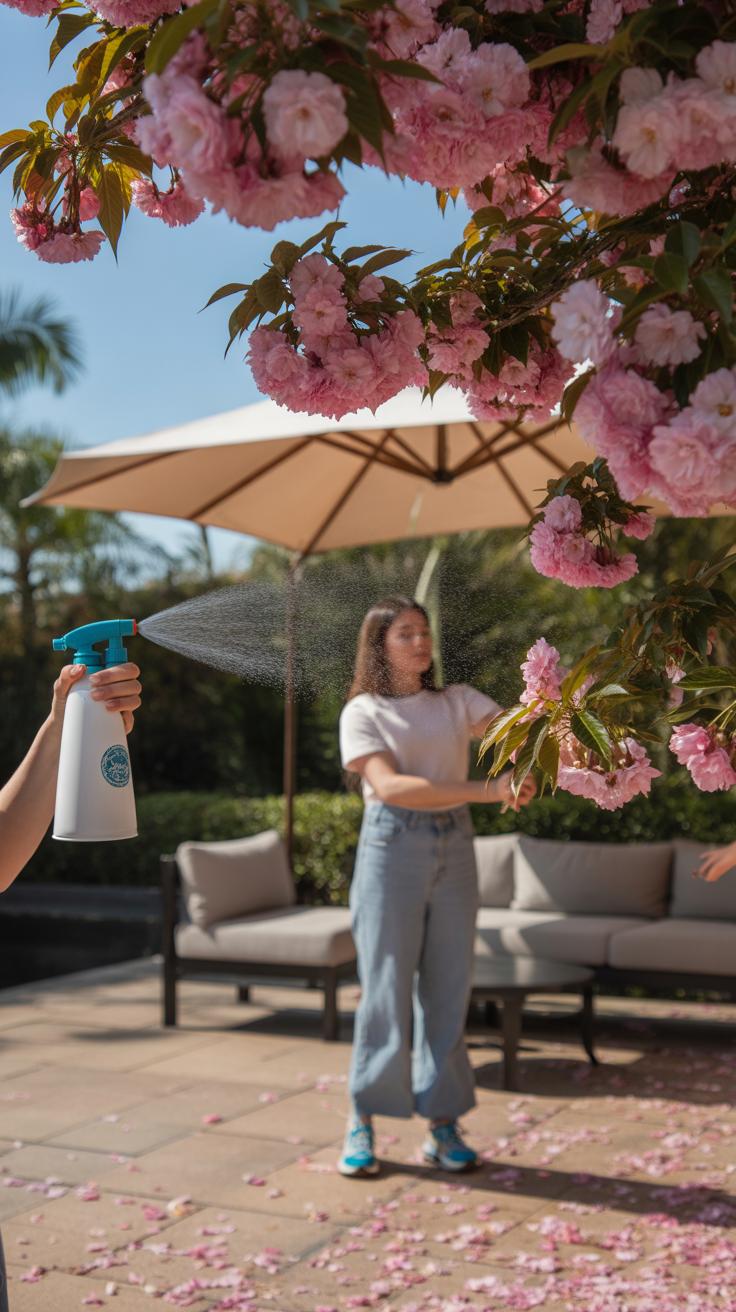
Keeping a flower wall looking fresh for hours can be trickier than it seems. If you’re using live flowers, hydration is key. But watering a vertical arrangement isn’t straightforward, right? One practical trick is to incorporate floral foam soaked in water behind the flowers. It acts like a reservoir, releasing moisture as needed. A small spray bottle with water can help, too—light misting every hour or so maintains freshness without drenching the wall.
Some flowers handle drying out better—think orchids or succulents—but others might need more care. If you spot drooping petals or wilting blooms, swapping in extras from a backup stash can save the look. I remember once fixing a few begonias that started to fade halfway through an event; a quick pinch and reposition made a noticeable difference.
Wear and tear isn’t just about the flowers fading; guests might accidentally brush against the wall or knock loose a few petals. Having supplies like floral tape, extra pins, or even a hot glue gun nearby helps you patch up issues fast. If a section starts to sag or shift, reinforcing it with zip ties or supports usually does the trick. It might feel a bit like emergency surgery, but hands-on fixes keep the setup intact without anyone noticing the difference.
So, what should you keep close during the event? Here’s a quick checklist:
- Small spray bottle for misting
- Spare flowers or greenery
- Floral tape or pins
- Zip ties or string
- Scissors and maybe a glue gun
With a little preparation, you can handle most hiccups quietly and quickly, keeping your flower wall picture-perfect while guests mingle. Are you ready to tackle those unexpected moments?
Exploring DIY Versus Professional Flower Walls

DIY Flower Wall Benefits and Challenges
When you decide to craft your own flower wall, you get a level of creative control that’s hard to match. You pick each flower, arrange every piece exactly how you want, and can really put your personal mark on the design. Plus, the cost savings can be significant. Purchasing flowers in bulk or opting for artificial blooms might keep your budget leaner than professional quotes.
That said, creating a flower wall yourself isn’t without its hurdles. It takes time—more than you might think—to plan, gather materials, and assemble the backdrop. Without experience, the final look can sometimes feel less polished, or flowers may not hold up as well during the event. Also, there’s the stress factor; managing this on top of other event details can be overwhelming. You may find yourself questioning if the DIY route is worth the trade-offs.
Why Hire Professionals
Hiring experts means you get their experience at once. They know how to build a flower wall quickly and securely—something that can really ease the setup stress on your event day. Professionals also bring quality assurance; they’re familiar with flower types that last longer and designs that fit your space and theme better.
Still, going professional might feel pricey at first glance, and you give up some control over the exact look. But usually, what’s lost in hands-on crafting is gained in peace of mind and reliability. Plus, they handle any unexpected challenges smoothly, which—believe me—is a relief when your event is ticking closer.
Planning Your Flower Wall Budget Wisely

When it comes to estimating costs for a flower wall backdrop, breaking things down can really save you stress later on. Think of key expenses like the flowers themselves, the supporting materials, labor if you’re hiring help, and any extras such as lighting or decorative accents. For example:
- Flowers: Fresh blooms can quickly add up, especially if you want rare or out-of-season varieties.
- Materials: Framework, foam, wire, and adhesives needed to hold everything together.
- Labor: If you choose to outsource, factor in setup time and expertise.
- Extras: Lighting, ribbons, or any additional touches that complement your design.
Sometimes, you can trim costs by mixing real and faux flowers. Faux options have become quite realistic lately and last longer too. Using them for less visible areas while reserving fresh blooms for focal points strikes a good balance both visually and financially. Another approach is choosing flowers that are in season or more common locally—they often carry a smaller price tag.
Could you use a DIY mindset here? Possibly. But even if you hire pros, asking for a quote that clearly breaks down each part helps you see where you might save or need more investment. Budgeting this way may feel a little tedious, but it prevents surprise costs from sneaking up when you least expect them.
Conclusions
Flower wall backdrops bring charm and freshness to events. They offer endless options in colors and styles. As you’ve learned, picking flowers, arranging them well, and placing the wall thoughtfully will enhance your celebration.
Use what you’ve discovered here to create your flower wall backdrop. Focus on your event’s feel and your taste to make a special scene. The right backdrop adds beauty and creates lasting memories for you and your guests.