Introduction
Beach Inspired Shell Crafts DIY For Wedding Decor bring a refreshing and natural touch to wedding celebrations. Using shells collected from the beach, you can craft beautiful and unique decorations that make your special day even more memorable. These crafts are easy to make and add a coastal charm that traditional decor items often lack.
This article explores a variety of shell craft ideas perfect for wedding decorations. We will cover the tools and materials needed, step-by-step guides for different types of crafts, and tips to personalize your decorations to fit your wedding theme. You will learn how to create practical and beautiful items that will wow your guests and capture the essence of the beach.
Understanding Shell Crafts and Their Appeal
What Are Shell Crafts
Shell crafts involve creating decorative or functional items using natural shells collected from beaches or purchased from craft suppliers. These crafts can be simple, like gluing shells onto picture frames or jars, or more intricate, such as weaving shell beads into jewelry or constructing larger art pieces. Basic techniques include drilling holes for stringing, arranging shells in patterns, and securing them with adhesives. Common shell craft items include candle holders, centerpieces, wind chimes, and even place card holders. Each piece carries the subtle texture and color unique to its shells, making everyday objects feel special. The hands-on process often invites creativity, letting you explore layout and design without much fuss.
Many people find working with shells relaxing, maybe because it connects them to nature in small, tactile ways. Personally, I’ve noticed how even a handful of simple shells can instantly change the vibe of a plain item, giving it a hint of seaside charm without seeming overdone.
Why Use Shell Crafts for Weddings
Shells bring a kind of quiet beauty to wedding decor. Their natural shapes and soft colors can complement themes such as beach, rustic, or garden weddings. The appeal lies not just in their look but in what they suggest—nature, simplicity, and the ocean’s calm presence. They feel approachable, not flashy, which suits many couples wanting an environment that feels sincere rather than staged.
Shell crafts offer versatility too. You might use them for table accents, bouquet wraps, or ceremony backdrops. This allows subtle personal touches that aren’t overwhelming but still meaningful. I think the freshness shells bring helps balance the usual wedding glamour, making the atmosphere feel a bit more grounded, a bit more human.
One thing that stands out is how shells can transform even a plain table or space. They add texture and interest without needing much else. In a way, they remind you that elegance doesn’t always involve complexity—sometimes it’s just knowing how to use simple, natural materials effectively.
Choosing the Right Shells for Your Wedding Projects
Picking the perfect shells for your wedding decor can feel a bit tricky, but it really shapes how your crafts turn out. Different shells suit different projects, so knowing the types, sizes, and colors helps a lot.
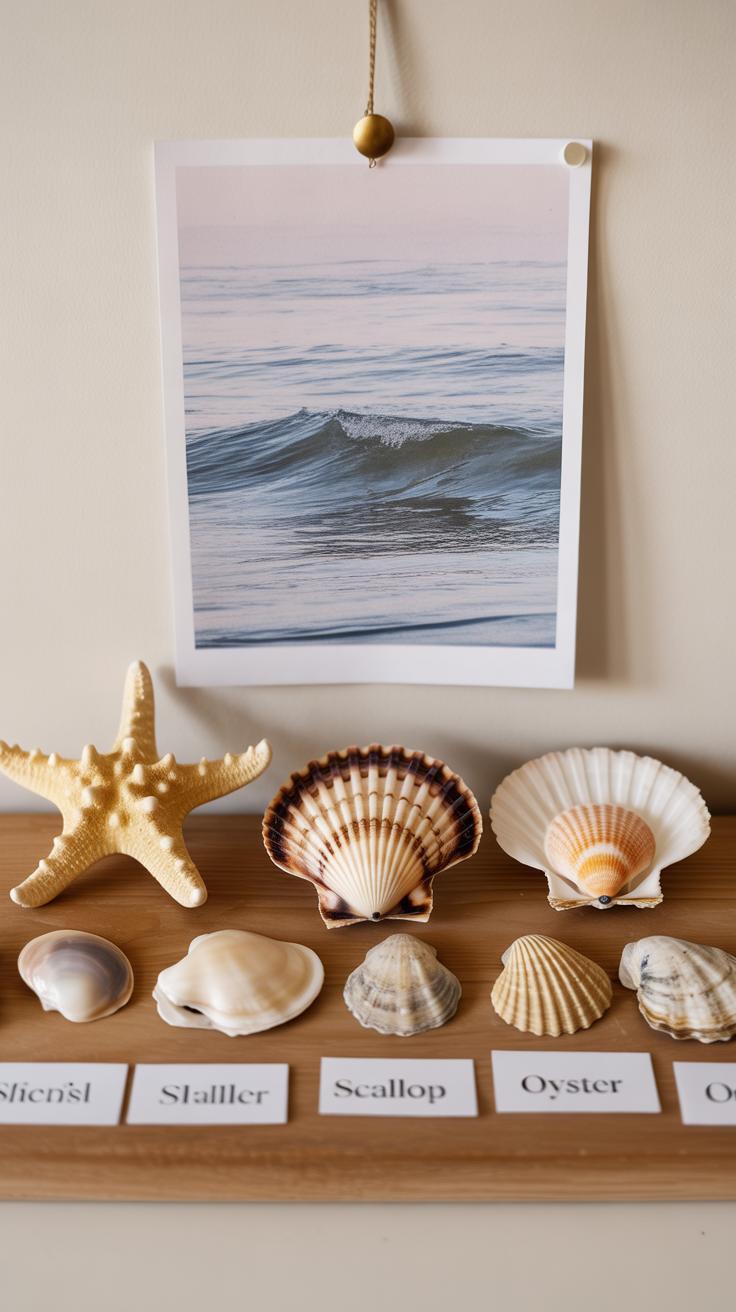
Types of Shells Suitable for Decoration
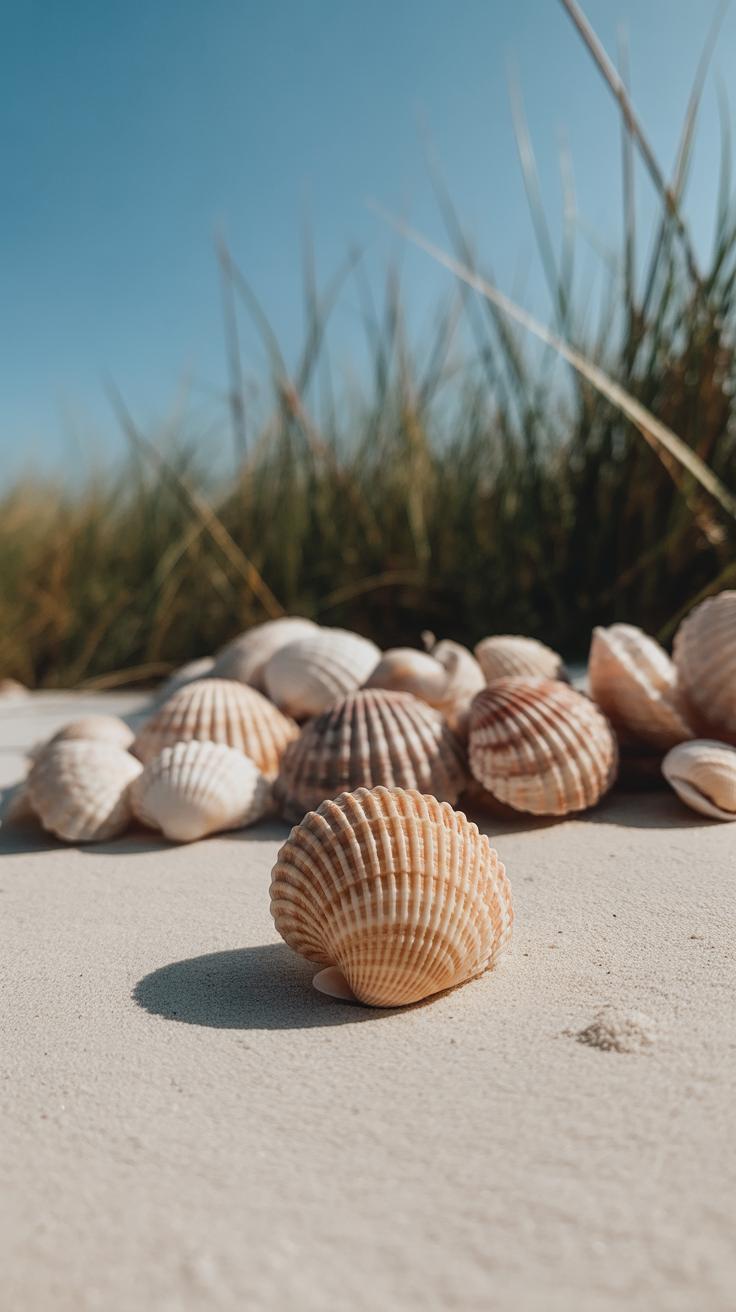
Some shells just work better for decoration than others. For example, scallop shells are popular because their fan shape makes lovely focal points on place cards or centerpieces. Cowrie shells, small and smooth, often appear in delicate garlands or jewelry-style crafts. Conches and whelks offer more texture and volume, great for larger statement pieces.
Think about what you want to do with them. Tiny clam shells can fill jars or scatter along tables, while olive shells, with their elongated form, suit hanging decor well. Color matters too—some shells have natural pearly sheens or subtle hues, which might save you from painting.
Preparing Shells for Crafting
Before you start gluing or painting, shells need some prep. Cleaning is key—rinse them in warm water and scrub gently to remove sand or leftover debris. If the shells smell or have dirt that won’t come off, soaking them in a mild bleach solution for a few minutes can help, but don’t overdo it—you do not want brittle shells.
Drying completely is another must; damp shells won’t hold paint or adhesives well. Leave them out in the sun or air-dry for at least a day. Sometimes, a light sanding smooths rough edges and creates better surfaces for glue.
Once prepped, you’ll find shells easier to handle and a bit more lasting, which is what you want when these pieces become part of your special day.
Gathering Tools and Materials for Shell Crafts
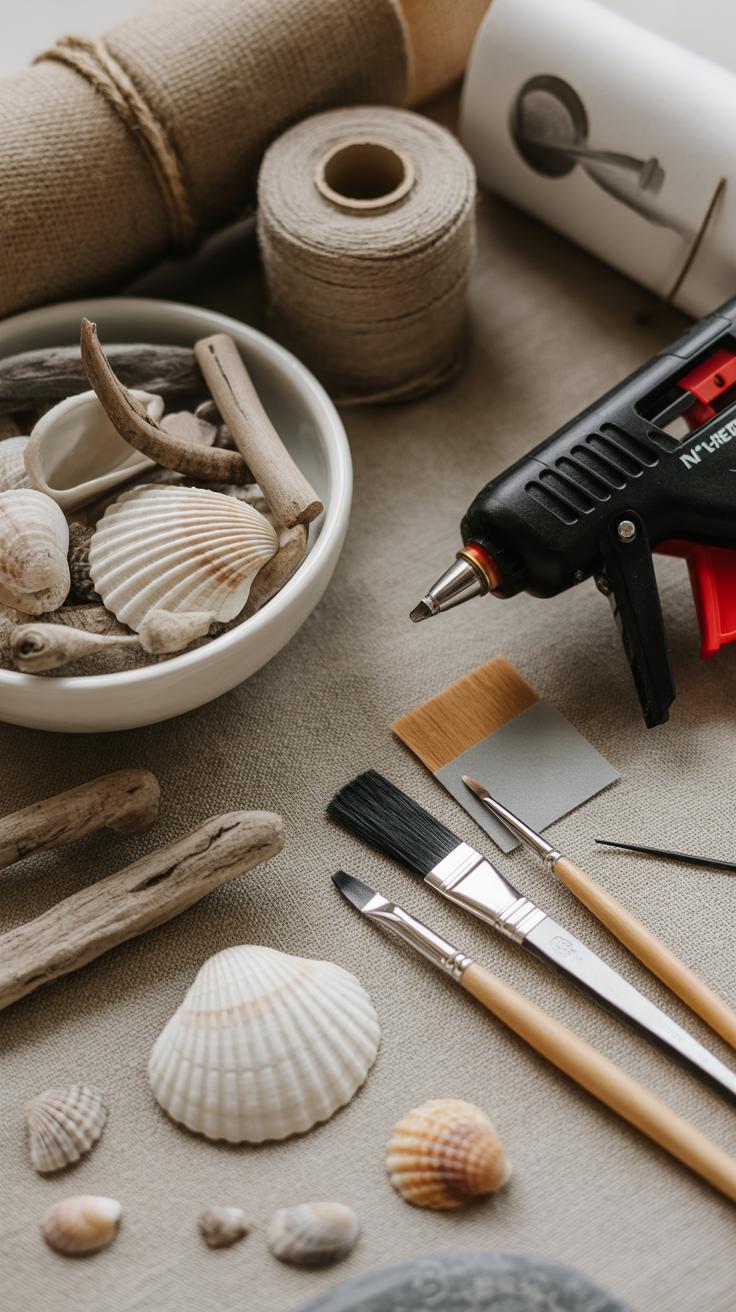
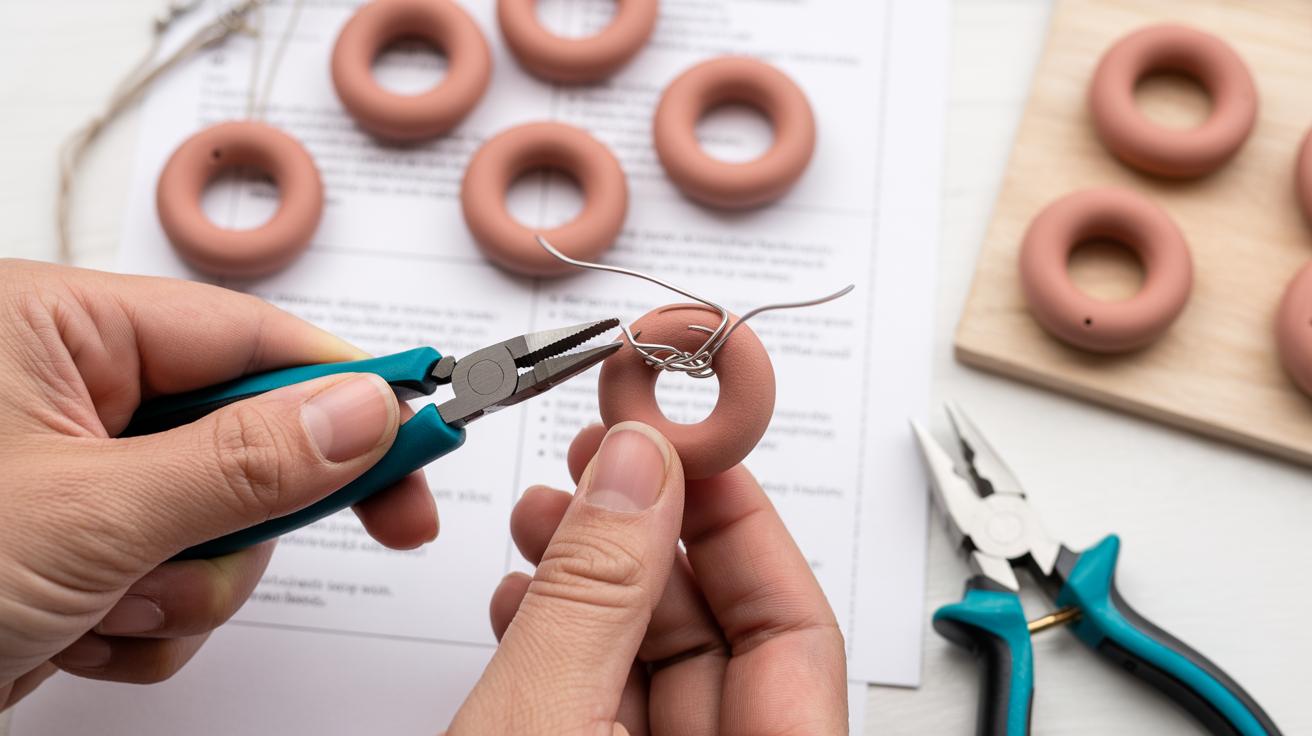
When you start diving into shell crafts, having the right tools and materials makes all the difference. You might think a simple glue stick will do, but for shells—especially those intended to last for wedding decor—you want something stronger. Clear-drying craft glue or even a hot glue gun works well; I’d lean toward craft glue for delicate shells to avoid the mess of hot glue strings. If you plan to paint, acrylic paints offer good coverage and durability, and a variety of brushes—thin ones for detail, flat for coverage—can help you get the effect you want. You really start appreciating the difference when your paint job can handle a few knocks without dulling.
Basic crafting tools you’ll find handy include craft scissors or small wire cutters, a fine-tipped permanent marker if you want to add little details, and even a small jeweler’s saw if you’re feeling ambitious about shaping shells. Wire, thin enough to bend but sturdy enough to hold shape, is a great addition if you want to make hangers or frames. I remember using floral wire on a seaside-themed wreath—not as easy as I thought initially, but it held firm.
To take things further, consider some optional extras: ribbons can add softness and color contrast, making your shell pieces feel a bit more delicate. Tiny LED lights are surprisingly effective to bring a subtle glow, turning simple shell crafts into something quite magical after dark. Small beads or sand can also add texture and dimension, which might be just what your wedding decor needs to stand out without overwhelming your overall design.
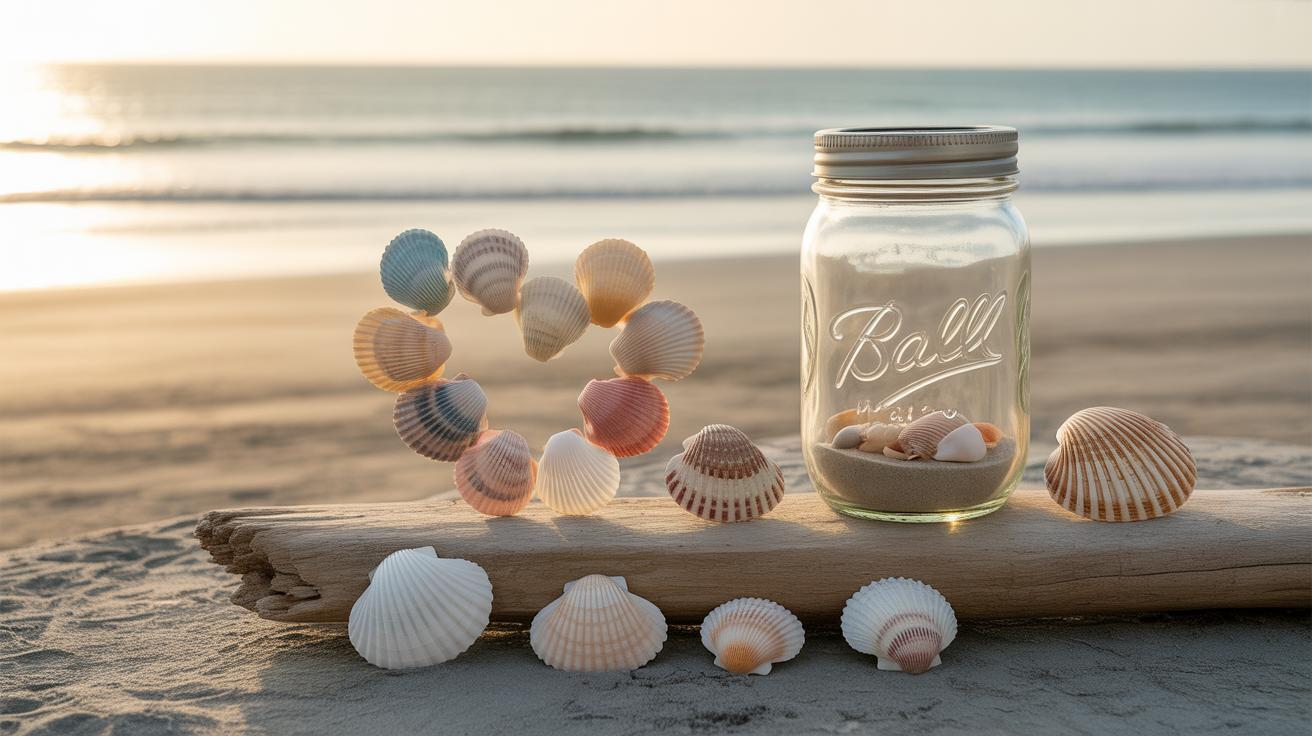
Creating Shell Centerpieces for Wedding Tables

Making shell centerpieces for wedding tables can be simpler than you might think. Start by selecting a base—this might be a glass bowl, a rustic jar, or even a shallow wooden tray. The choice really depends on your wedding theme and how formal or casual you want things.
Once you have your base, gather an assortment of shells—mix sizes and shapes for visual interest. You can sprinkle smaller shells around bigger focal ones or fill the bottom with sand before layering shells on top. If you want to add height, try stacking shells on wires or placing mounted shells on slender stands. It gives the centerpiece a unique touch.
For a beachy yet elegant vibe, include candles or fairy lights nestled among the shells. They bring warmth and a gentle sparkle when the lights dim. You might want to experiment with colors, too. Painting some shells or adding subtle metallic accents helps tie the centerpiece to your wedding palette.
And don’t forget—these pieces don’t need to be perfect or identical across tables. Small variations can add charm, making each table feel special. I found that leaving a few shells natural and unpainted keeps the arrangement grounded and real. Sometimes, less fuss creates more impact.
Design Ideas for Shell Centerpieces
Shell centerpieces don’t have to be one kind of thing. Here are some popular styles to consider:
- Shell Bowls: Use large, shallow bowls filled with mixed shells, sand, and small candles. This creates a coastal look that’s easy to replicate.
- Glass Jars: Tall or short jars layered with shells, sand, and perhaps sea glass. Add a ribbon or twine at the neck for a rustic feel.
- Mounted Shells: Attach shells to thin wire and arrange in a vase for a sort of shell “flower” bouquet. You can bend the wire stems to adjust height and shape.
- Driftwood Bases: Use small driftwood pieces as a base to glue shells onto. This works well for natural and earthy themes.
Each style can be customized with colors, textures, or additional seaside elements like starfish, coral pieces, or pearls. Consider, do you want a clean, minimalist look or something more layered and rich?
Instructions for Assembly
To build your centerpiece, follow these basic steps:
- Prepare your base—clean it and, if you want, add a thin layer of sand to stabilize the shells.
- Arrange your largest shells first, placing them in a way that feels natural but intentional.
- Add smaller shells and other decorative pieces around the bigger ones, filling gaps without overcrowding.
- Secure the shells with a strong adhesive if your centerpiece will be moved or need extra stability.
- Incorporate other items like candles or lights carefully, ensuring everything fits and stays balanced.
- Let glue dry completely before transport or display—it makes a noticeable difference.
Some people might skip gluing to keep it flexible, but I think a little bonding helps prevent accidents, especially during busy receptions. Try to build your centerpiece in stages—this lets you adjust as you go and find the best visual composition. Give yourself a bit of time for trial and error. It’s part of the process, really.
Crafting Shell Garlands and Hanging Decor
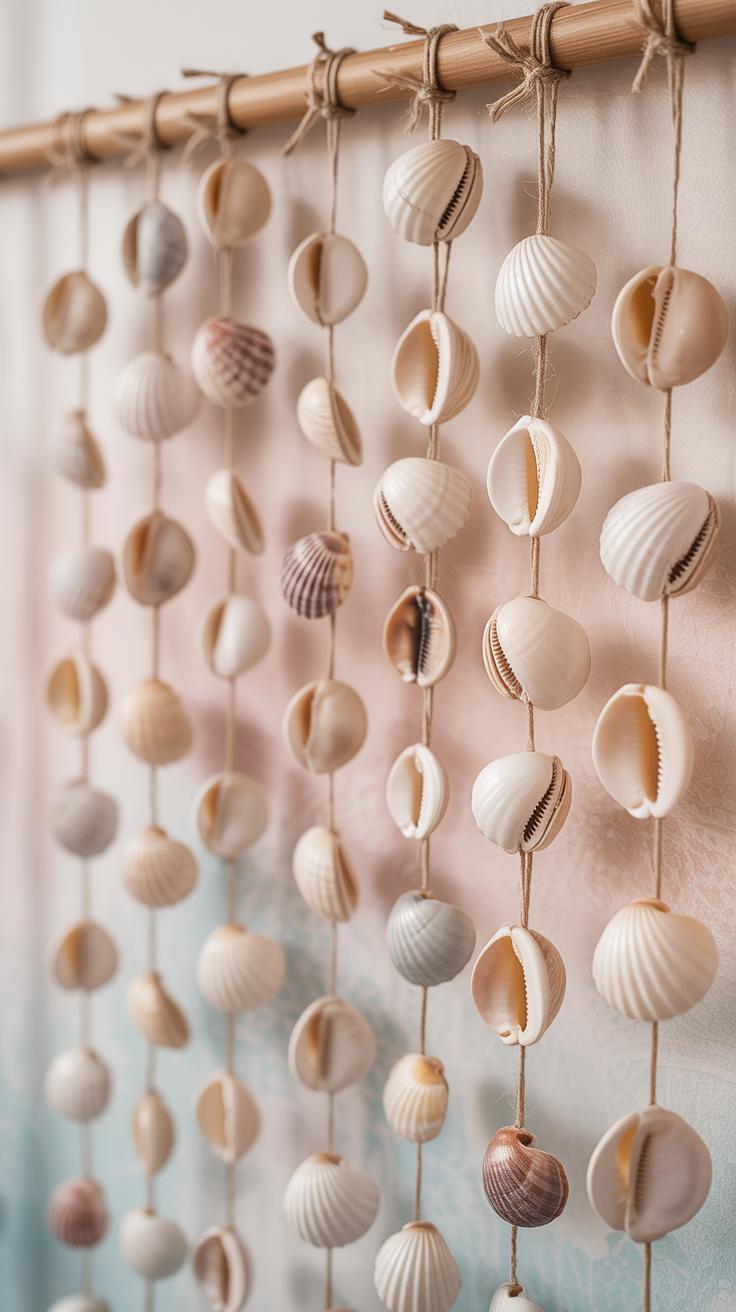
Choosing Designs for Garlands
When it comes to shell garlands, your design choices can shape the entire vibe of the wedding space. You might want to keep it simple with shells strung evenly on natural twine or thin cord—there’s something calming about the rhythm of shells spaced apart just right. On the other hand, mixing shells with beads, tiny driftwood pieces, or metal charms adds texture and interest. Maybe glass beads to catch light, or small charms that echo the couple’s story will fit. I once tried alternating small polished shells with pearl-like beads—it gave off a subtle shimmer, perfect for an evening beach wedding.
Deciding how many and what size of shells to use is also key. Larger shells create a bold statement but can weigh the string down. Smaller shells, arranged densely, form a delicate look but might need extra care to avoid tangling. So, think about the atmosphere you want—laid-back and rustic, or a bit more refined.
Step-by-Step Hanging Decor Creation
Start by gathering your materials: shells with holes (you can drill if needed), strong thread or twine, beads or charms if you want extras, and scissors. Threading can be fiddly at first—the holes may be tiny and uneven, so patience helps. Use a needle with a large eye if the thread is thin; it makes passing through quicker. I often arrange all pieces in order on a flat surface before threading, so I don’t forget my pattern mid-way.
Once threaded, knot at both ends securely to keep the shells from shifting. If some shells slide too freely, adding a small bead between them helps with spacing. When hanging, it’s best to use hooks or nails with care—garlands can get heavier than expected. Hanging them loosely lets them sway with a breeze, but not so loose that they droop awkwardly. You might want to test a small section first. Are the garlands catching too much wind? Or do they blend into the background too much?
These shell decorations aren’t just pretty extras. They add dimension and a feeling of the coast, almost like the sea is softly part of the space. Maybe that’s why I’m drawn to hanging shells—there’s an imperfect charm in their movement and sound that feels just right for a wedding.
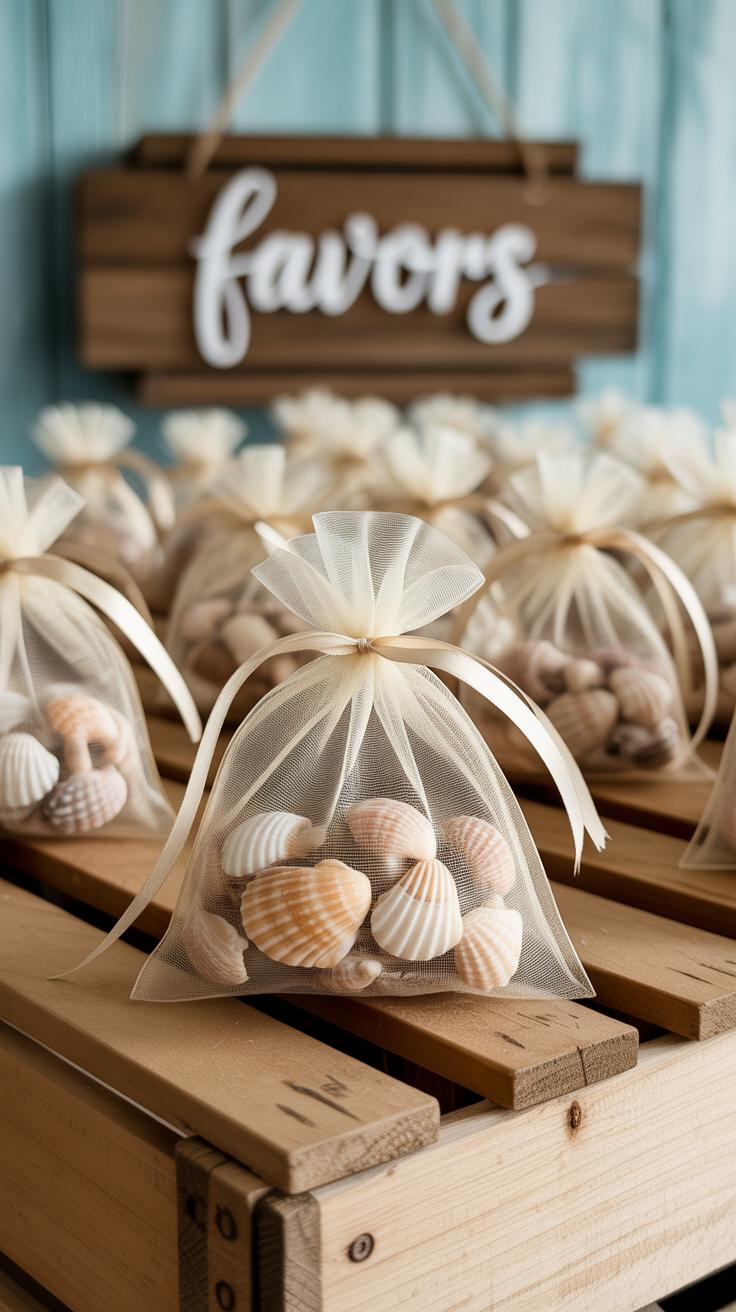
Making Shell Wedding Favors Guests Will Remember
When it comes to wedding favors, shell crafts bring a unique touch that guests won’t easily forget. You might want to think about simple projects that can be personalized without too much hassle, yet still look special—something that feels like a keepsake rather than just a token.
Popular shell favor ideas often include things like shell keychains, which are handy and easy to carry. Magnets featuring small shells pressed into resin also make for neat little reminders of your day. Framed shells work well if you want guests to have a bit of wall decor that echoes your beachy theme. You can find yourself mixing these options or trying something a bit off the beaten path.
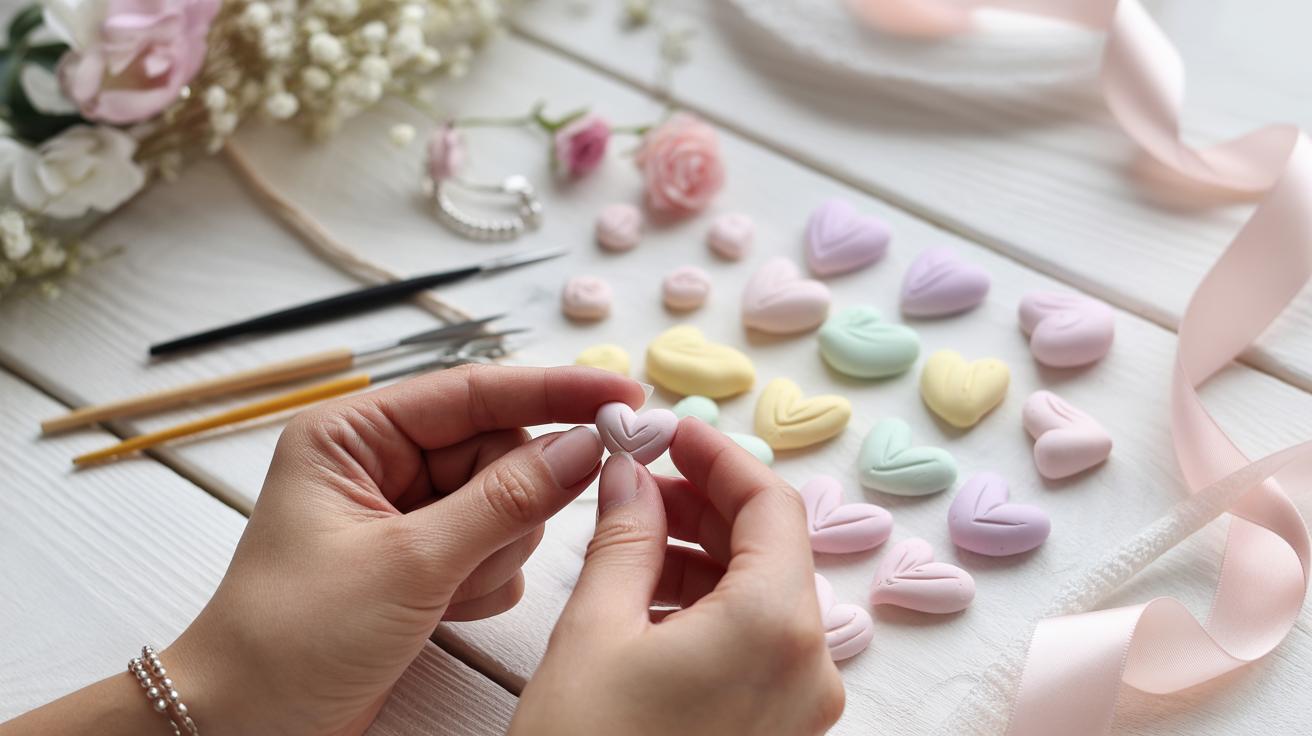
Personalizing these favors is where it gets interesting. If you’re comfortable with a steady hand, painting names or wedding dates directly onto shells using fine-tipped acrylic paint pens works well. For a more refined look, you could use small tags tied with twine or ribbon that carry your message or initials. Sometimes engraving or laser etching comes to mind, but that might not be achievable unless you have the right tools or a local craft shop that can help. Do you want to keep these favors simple, or are you tempted to make everything match exactly?
Packaging also plays a role in how your favors are received. Think about small burlap sacks, tiny glass jars filled with shells and sand, or even hemp cords securing little bundles of shells. These add a tactile feel—something guests can appreciate when unwrapping. Sometimes the packaging says more than the favor itself.
In the end, shell favors can blend practicality and sentiment, making for memorable gifts. What matters is—do these little treasures reflect your style and perhaps spark a small smile every time guests see them later?
Designing ShellInspired Wedding Invitations and Stationery
Using shell motifs in your wedding invitations can set a lovely tone right from the start. Printed shell patterns—like scallop edges, starfish silhouettes, or subtle sand textures—can bring a coastal vibe without overwhelming the design. Think about soft pastels or sandy neutrals paired with clean fonts to keep it elegant yet simple.
But what about going beyond print? Adding actual small shells to your invitations or RSVP cards can create a tactile, memorable piece that guests will likely hold onto. It’s tricky, though, because shells come in different sizes and shapes, so picking the right ones matters. Tiny, flat shells work best—they don’t bulk up the envelope too much or make mailing a nightmare.
When attaching shells, use a strong adhesive like a tacky glue, and apply just a small dab to avoid warping the paper. Press gently and let it dry fully before stacking the invites. You might want to test this with one before making a full batch—sometimes shells can crack or discolor the paper if the glue bleeds through. And, of course, don’t cover up any important text!
What if you want a middle ground? Try printing shell designs on translucent vellum overlays or stripes on the edges of the cards, then attach a single shell as a focal point. It’s a bit like telling a story through layers and texture.
Do you think guests will appreciate this blend of print and genuine texture? From my experience, this little mix often sparks conversation and adds a personal touch—especially if the shells come from a place meaningful to you.
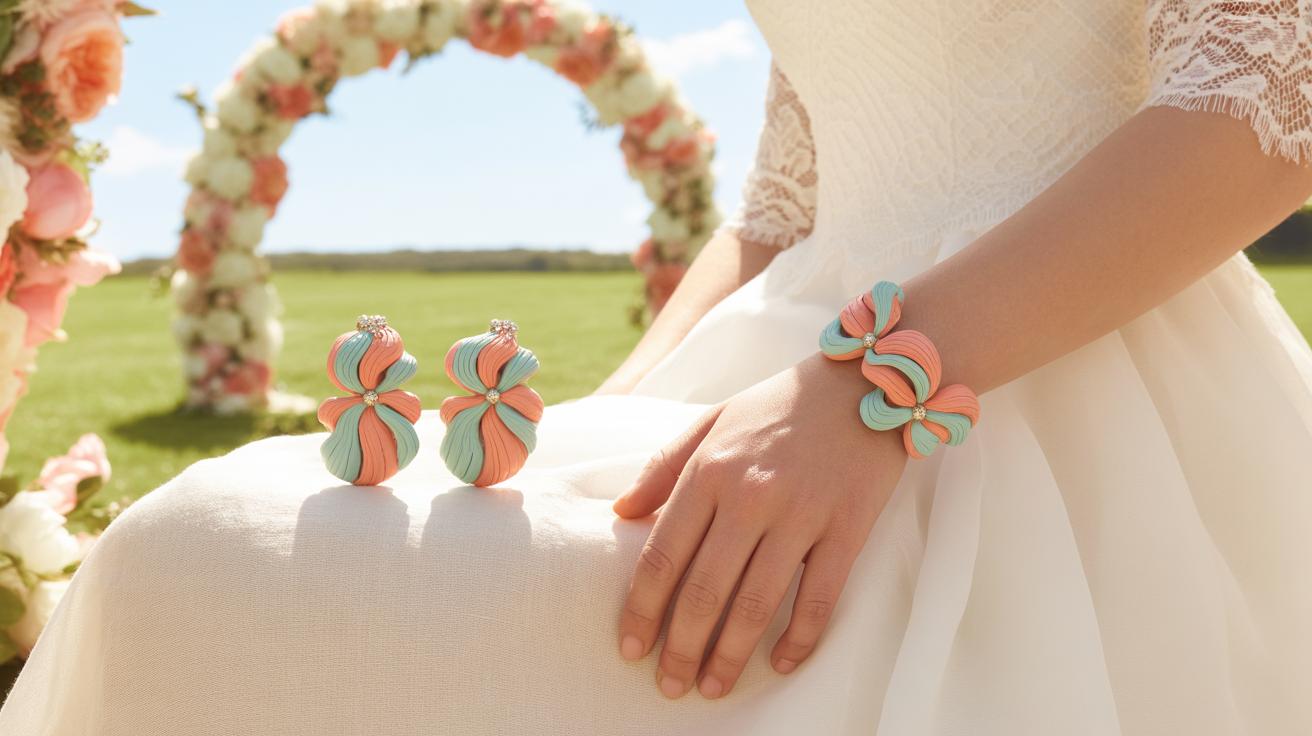
Incorporating Shell Crafts into Wedding Apparel and Accessories
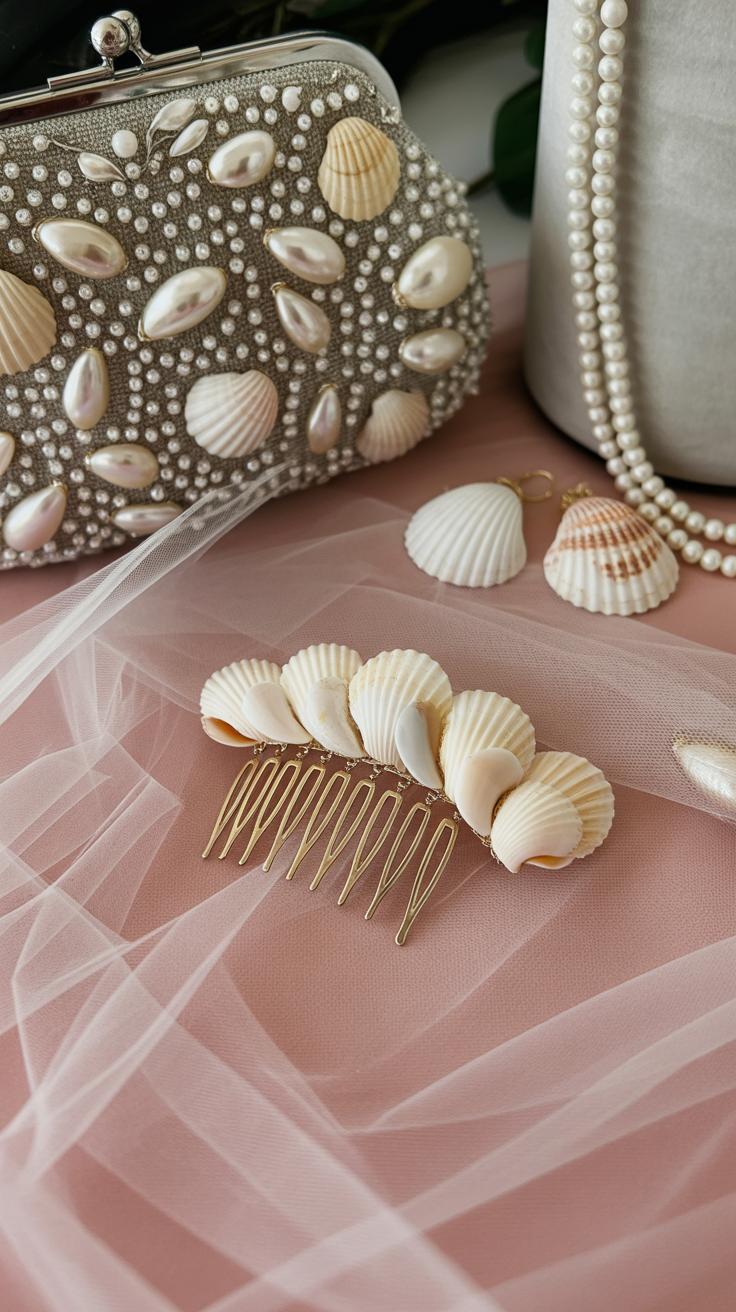
Using shells to enhance wedding attire adds a subtle beach vibe without feeling overdone. You might start small—think about shell hairpins that can tuck into a loose braid or a low bun. Simple clips with tiny shell clusters can look delicate and natural. I once saw a bride wear pearl-like shells woven into her veil, which seemed to catch the light just right, though it wasn’t flashy.
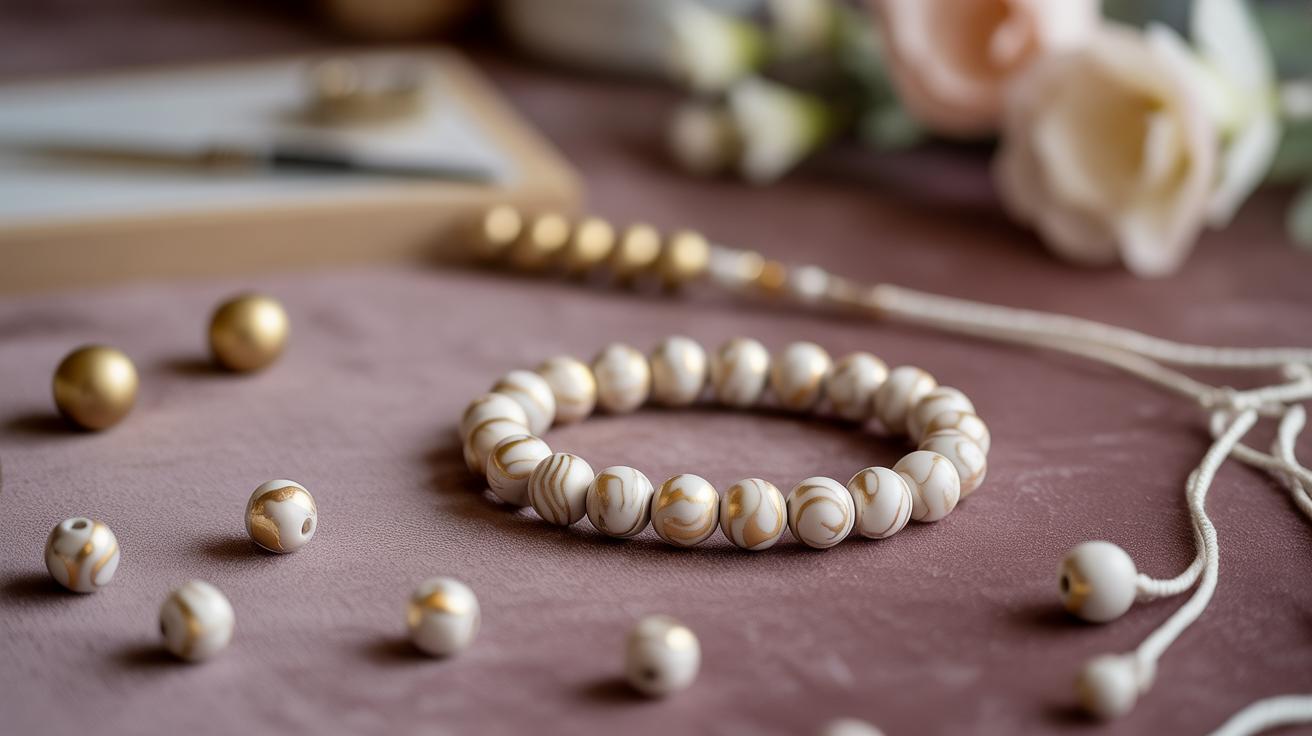
Jewelry is another easy way to bring in shells. Earrings with single shells dangling on thin wires, or necklaces featuring a small shell pendant on a leather cord, work well. Bracelets made from tiny shell beads paired with natural twine are both casual and elegant. These pieces don’t have to be uniform—mixing different shell shapes gives a bit of personality.
Shoes can feel a bit trickier. Still, attaching shells to wedding shoes creates a unique touch if done carefully. You can glue small shells along the edges of a heel or scatter a handful around the toe area. Use a strong adhesive that won’t damage the fabric or cause discomfort. It’s best to test on an inconspicuous spot first; I experimented with a hot glue gun once, but some shells fell off after a bit of walking.
Overall, these projects don’t require special tools or skills. A little patience and an eye for balance go a long way. Why not try making a few pieces yourself and see how they feel on your special day?
Setting Up a DIY Shell Craft Station at Your Wedding
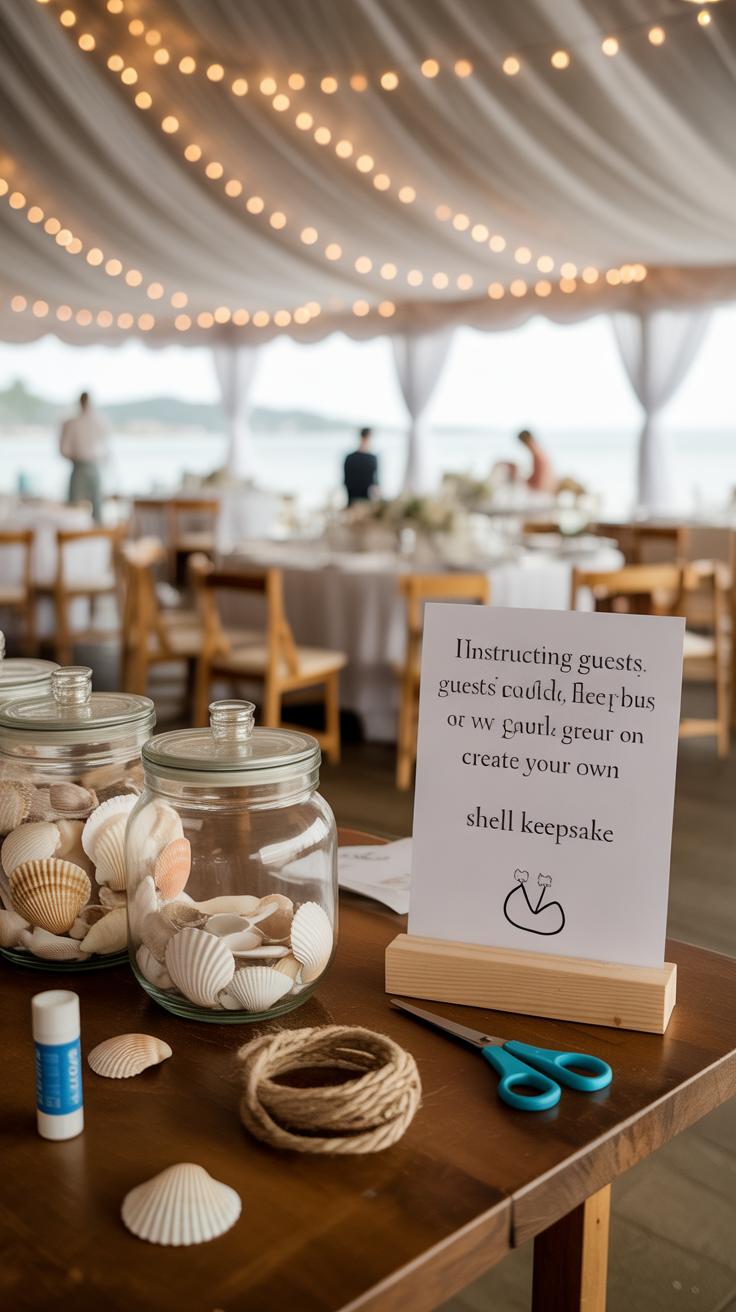
Creating a shell craft station for your wedding guests is a fun way to bring everyone together. Plus, it offers a chance for folks to unwind, chat, and leave with a personalized memento from the day. Setting it up doesn’t have to be complicated, though it might take a little prep to get the right vibe. Think of an inviting space with good lighting and enough room for guests to sit or stand comfortably while crafting.
Essential Supplies for the Station
Start with a variety of shells, ideally different shapes and sizes, because choice keeps things interesting. You’ll want craft glue strong enough for shells, but dry enough not to cause delays. Include durable string or thin twine for making bracelets or hanging decorations. Keep simple tools handy—scissors, tweezers, and maybe a few small brushes for applying glue. Don’t forget some paper towels and perhaps shallow trays to contain glue spills or tiny shell bits.
Ideas for Guest Projects
Offer easy crafts that don’t require much instruction, so guests feel confident jumping in. Stringing shells into bracelets or necklaces is a classic option, appealing to nearly all ages. Small framed collages made from glued shells on cardstock or mini canvases make charming keepsakes, too. You might even provide blank tags for guests to write a note, then attach a shell as a unique favor tag. The key is to keep projects simple but meaningful, giving your guests something personal to remember the day by.
Maintaining and Storing Your Shell Wedding Decor
Shell crafts add a delicate charm to wedding decor, but they do need some care to stay looking good. While they might seem sturdy, shells can chip or dull if not handled properly. When moving or arranging them, try to hold each piece gently—avoid sudden knocks or drops, which can cause cracks or breakage. I remember once accidentally dropping a shell centerpiece; the crack was tiny but still noticeable.
Cleaning shell decor isn’t complicated, but a quick, light dusting with a soft brush or cloth goes a long way. If you notice any salt residue or smudges from outdoor setups, wiping shells with a damp cloth works well. Avoid soaking them or using harsh cleaners since this might wear down their natural texture or color.
After the big day, storing your shell crafts properly makes a real difference if you want to keep them as keepsakes. It’s best to wrap pieces individually in tissue or cloth, then place them in a sturdy box with padding like bubble wrap or foam peanuts to absorb shocks. Avoid places with high humidity or drastic temperature changes to prevent weakening or mold. Some couples tell me they store their shells in memory boxes mixed with other wedding mementos, which feels personal but also can be risky if not cushioned well enough.
Conclusions
Shell crafts offer a fun and rewarding way to add a personal touch to your wedding decor. Whether you make shell centerpieces, garlands, or favors, these projects bring in natural beauty and a calming beach vibe. With the right materials and some creativity, you can craft decorations that reflect your style and the spirit of your wedding day.
By following the simple instructions and ideas shared in this article, you can create stunning decor pieces without spending much. Your guests will appreciate the thoughtfulness and uniqueness of your handmade shell crafts. Embrace the beach theme and enjoy the process of crafting for your wedding celebration.